
By Jennifer Poindexter
Step 1
We built two 4×20-foot framed garden beds to start this project. We didn’t buy any wood — we keep all of our wood from other projects in order to repurpose it and save money. With a two-foot walkway running lengthwise between the beds, the overall size of our greenhouse is 10×20 feet.
Step 2
We screwed PVC pipes to the outside of one of the garden beds. We used 1″x10′ slip joint electric conduit PVC pipes. We did this because they are UV-resistant and will last longer in the sunlight. Then we bent the PVC pipes into a dome shape and screwed them to the outside of the other garden bed.
Step 3
Next, we ran PVC pipes horizontally on both sides of the dome to serve as a brace for the greenhouse.
Step 4
With the frame of the greenhouse in place, it was time to frame up the door and windows with the least expensive wood we could find (if you have it, scrap wood works well for this).
The door: We built the door frame first. We used 2x3s because that was the least expensive wood we could find at our local lumber yard. We attached the door frame to the greenhouse by screwing it to the raised garden beds. Then we built the door with the remaining 2x3s and wrapped it in plastic. We attached the door to the door frame with inexpensive hinges. (a homemade latch works, too).
The windows: We used recycled windows that we found through the internet — search sites like Craigslist or local yard sale pages. You do not need anything new or fancy, just windows that will open and close.
We used the door frame as one side of the support to hold our front windows up. First, we measured the width of the window. Then we measured from the door over to see where to place the other stud to support the other side of the window. Once the stud was in place, we screwed the bottom of the stud into the top of the raised garden bed and the top of the stud into the PVC hoop.
For the window we put on the back side of the greenhouse, we had to place two studs to hold the window, since there is no door frame.
Step 5
The most expensive part of the greenhouse was wrapping it in plastic.We purchased our plastic at Lowe’s. There are two types of plastic to choose from: 4-mil and reinforced.
Reinforced is the sturdier option, but it is more expensive than 4-mil. For this project, 4-mil will work; just be advised that there is a greater possibility of it ripping if you have high winds.
After wrapping our greenhouse in plastic, we stapled it to the wood framing of the doors, windows, and bottom of the outside of the garden beds. When in doubt, we continued stapling the plastic; it needed to be tight-fitting and secure.
To get the tightest fit for the plastic after stapling it, we created clamps to secure the plastic more tightly to the PVC pipe. We had an old water hose we weren’t using, so we cut it into four-inch pieces and slit it open on one side. We then placed the hose clamps all over our greenhouse and screwed them into the PVC pipes. It helped secure the plastic that much more.
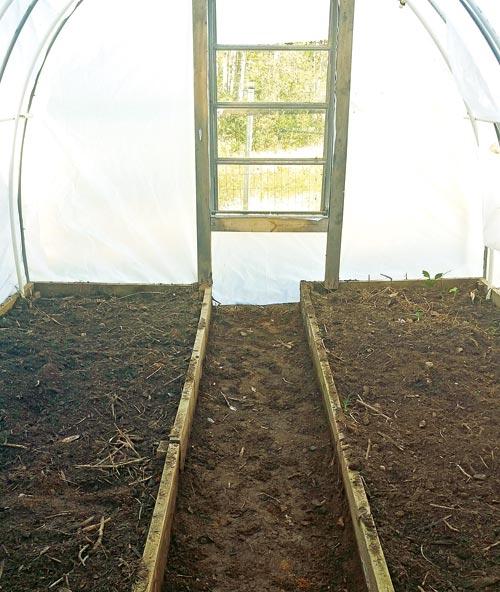
Step 6
We dug up good dirt on our property to fill the garden beds. We wanted healthy dirt for our plants to grow in.
Final thoughts
We use our greenhouse to start seeds and grow a lot of vegetables. I have had great success growing tomatoes, onions, and corn in the greenhouse earlier than I can grow them in our garden. If I need it to stay really warm in the greenhouse, I close up all the doors and windows. If I need the temperature to drop, I simply crack a window or open the door.
With this greenhouse, I can grow root vegetables and other hearty vegetables throughout the winter without the need for electricity (although it depends on location). Our greenhouse has been a great asset to our homestead … and it only cost $100!


