
By Brianna Stone
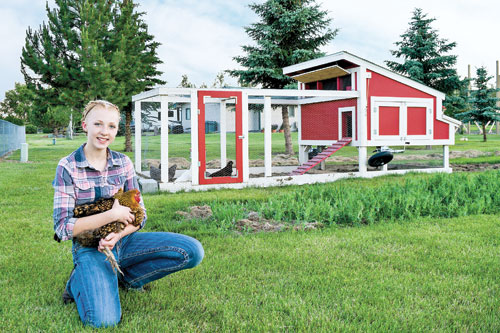
This spring, my parents let me enlarge my garlic business and till up three 600-square-foot beds for planting garlic in a three-year rotation. My plan is to plant one of the beds with garlic this fall, but right now I am working on preparing the beds. After I initially tilled up the beds, I realized that the clumps of sod still needed to be broken up more and the fertility of the soil was less than satisfactory. As I researched solutions, I came across an idea that would require me to add some business partners — five, to be exact. They work exceptionally hard and they never complain. What type of fantastic partners did I end up with? Chickens.
I decided to use a chicken tractor (a mobile chicken coop with a fenced-in run) to house my chickens while they break up my soil and increase its fertility. Chickens till the ground when they scratch, fertilize it with their manure, and supply us with the added bonus of fresh eggs every day.
Building the chicken tractor
As I looked into buying a chicken tractor, I realized that the size I needed would cost me about $1800, but it would only cost $800 to build one from scratch. The plans were drawn up by my handyman (Dad), and we worked together to build it. We built my coop to house up to 10 chickens comfortably.
Materials:
2x4s for the frame
1x6s cut in half for around the vents and doors
¼-inch plywood for the siding
OSB for the flooring and roof
linoleum for flooring
asphalt rolled roofing
½-inch hardware cloth for under the coop and in the vents
1-inch chicken wire for the main run (top and sides)
2 trailer jacks that have been modified to fit wheelbarrow wheels (For the axle we had to use a hardened ?-inch bolt because of how heavy the coop is.)
a cord and pulley system for the door and a homemade track with metal threshold trim
The coop contains four nesting boxes, one dry feeder, one waterer, two small feeders for nutrient supplements and granite chips for their gizzards, two long vents to keep the coop cool, and one roost.
The nesting boxes are built on the back of the coop with a hinged lid on the outside for easy access to the eggs.
The two small feeders are metal ones I purchased at my local farm store and the big feeder for their main feed is one we built into the coop.
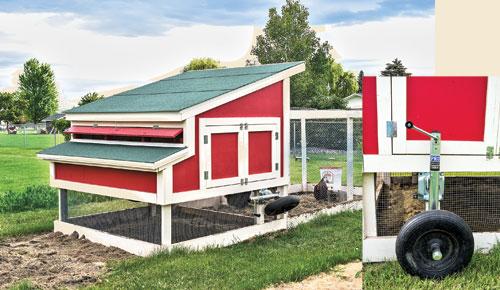
To ensure the chicken coop stays cool during the hot summer days, we placed two closeable long vents on the ends of the coop. Every time we move the tractor, we position the coop so that our usual wind patterns flow right through it.
Because I have four different neighbors that can see the coop, we took the time to make it look pleasant. I decided I wanted the coop to look like a barn, so we painted it red with white trim and gave it a green roof.
To make the coop easy to clean out, we built double doors on both sides so I can use a shovel to scrape out the shavings and manure.
When we looked into flooring, we wanted something waterproof and not too pricey. My dad found a scrap piece of linoleum at a local flooring store — the perfect solution.
I chose to use a flat 2×4 for the roost. We placed the roost in front of one of the long vents for a couple reasons. The first reason is to prevent the chickens from molting early when the days get shorter. Many chickens molt (lose their feathers and stop laying) early when they are not let out at sunrise and have no light in the coop. Placing the roost in front of the vent gives the chickens light so we don’t have to let them out at sunrise. The second reason I placed the roost in front of the vent is so that the chickens stay cool in the summer.
A sliding door on the front of the coop gives the hens access to the run and keeps the predators out and chickens in at night. We lift and shut the door with a rope and pulley system, which enables me to open the door from the outside of the coop.
We built the coop to be elevated two feet above the run so the chickens could have shade and shelter from the elements while being outside. The area under the coop is eight feet long and six feet wide (the dimensions of the coop). The run is an additional 10 feet long, six feet wide, and four feet tall. The area under the coop is fenced by hardware cloth but the run area is fenced by 1-inch chicken wire that my mom found on our local Facebook yard sale page.
To make the coop easy to move, we placed two wheels on the balance points that raise and lower it. The wheels are made of two trailer jacks with wheelbarrow wheels attached to them. We salvaged the wheels from two old wheelbarrows and we purchased the trailer jacks on
Amazon. It takes two or three people to push and pull the coop to a different location.
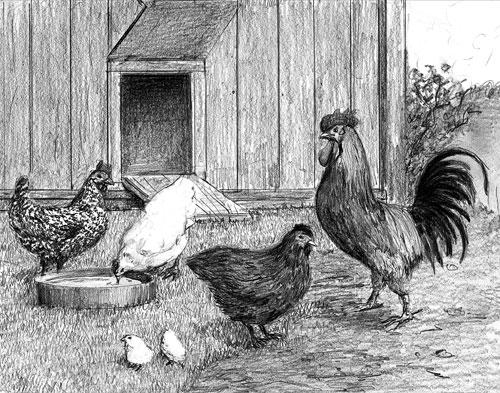
After we started building the coop, I began looking for chickens. I didn’t have to look far because a kind neighbor, after learning about our plans for a chicken tractor, decided to give me five of her chickens. I went to her house in the late evening, after the chickens had gone to their roost. She helped me catch, handle, transport the chickens, and taught me how to tell if a chicken is laying. After a few days, the chickens settled in and now I consistently get three eggs a day.

Tips and tricks
My process is far from perfect, but here are some tips and tricks that I’ve learned so far:
• In the coop, I use wood shavings from a local beehive manufacturer, but in the nesting boxes I use straw because I find that I get no broken eggs when I use it for padding.
• To encourage the chickens to scratch and till more, I scatter about one cup of grain out on the ground every morning when I let them out.
• To supplement their normal diet of grain and feed, I give them overgrown greens from my mom’s garden and other food scraps that otherwise would be wasted.
• I wait to change the shavings until they are filled with chicken manure, and then I scatter the soiled shavings on the other (unplanted) beds for extra fertilizer.
• Because normal water feeders can get shavings and dirt in them, I got little bucket inserts called chicken nipples that let the chickens drink without spilling everywhere and getting gunk in their water.
Conclusion
Overall, my chicken tractor has been a great success. Between the chickens working the ground and spreading their manure, they have taken away a lot of work and expense of preparing the soil for planting, while doing everything in a more healthy and natural way. Chicken tractors are a great solution to many agricultural needs without the use of chemicals or environmentally-detrimental solutions. I hope all of you will be able to use this concept in your own gardens to promote a more earth-friendly way of gardening.
Brianna is a home-schooled student who enjoys photography and living the life of a young entrepreneur. You can contact her at info@heritageacrefarm.com
My garlic business
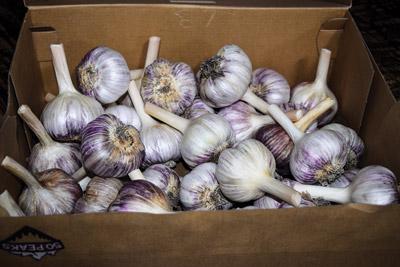
Why garlic? Garlic is typically low maintenance, easy to harvest, and grows great where I live.
I got started with my garlic business two years ago. My mom had extra Spanish Roja garlic cloves that she let me buy to use for seed. The first year, I planted about 100 cloves. Then the second year I planted 250 cloves. I plant my garlic in the fall so that the cloves can start growing as soon as it gets warm and then I harvest the bulbs at the end of July. This results in larger cloves. When I harvest, I pull them all up, shake off the extra dirt, and hang them up to dry. After the garlic’s dried, I cut off the tops, take off one layer of the dried skin, and then sort the garlic into piles of small, medium, and large. I sell my garlic to people in my community through social media. I don’t sell large quantities or to any of the gourmet markets; I just sell it by the bulb — large bulbs for $1 and the smaller ones for 50-75¢. I don’t sell all the garlic I grow because I have to keep some of the best bulbs to use for seed the next year.
But this year I am making a few changes to my garlic business. I will still be planting in the fall; however, I will be planting a few other garlic varieties as well as Spanish Roja. Because I am using a three-year rotation, only one of the three beds will be planted in garlic each year. The bed that will be planted with garlic this fall was planted with a green manure crop that has been tilled and is now being worked by the chickens. I am spreading grass clippings and chicken litter on the other two beds.
I am working on finding a new way of packaging my garlic because I want to be in the gourmet garlic market instead of the bulk market. Another change in my business is that I have chosen to sell my garlic under the name Heritage Acre Farm.
I want to take this business as far as I can. I’m only 14 years old, so I have time to steadily grow the business. One of my goals is to help educate people on the fact that all garlic is not the same. There are many different types of garlic with different tastes and textures.


You sound like a wonderful young lady. Good luck!
Do you have more info on the jack/wheels? Really neat set up!