
By Robert Van Putten
Issue #164 • March/April, 2017
Remember that old rag rug Great-grandma made? Chances are, most country homes have one or two of these things lying around. Back in the days before wall-to-wall carpeting, floors were bare and the odd rug was a welcome addition. Besides, what else does one do with clothing and blankets so worn they can’t possibly be used in a scrap quilt? Wool was traditionally the preferred material for these rugs because it wears well, is fairly fireproof, resists dirt and odors, and tends to spring back up after being walked on better than many other fabrics. These days, folks don’t wear much wool, so scrap wool is harder to come by. Luckily, perfectly good rugs and mats can be made from a wide variety of materials that you probably have on hand right now by the same old braiding and coiling method. They may not last 100 years like Great-grandma’s old wool rug, but most anything you can braid and coil will work, and will last a decade or two.
Baling twine
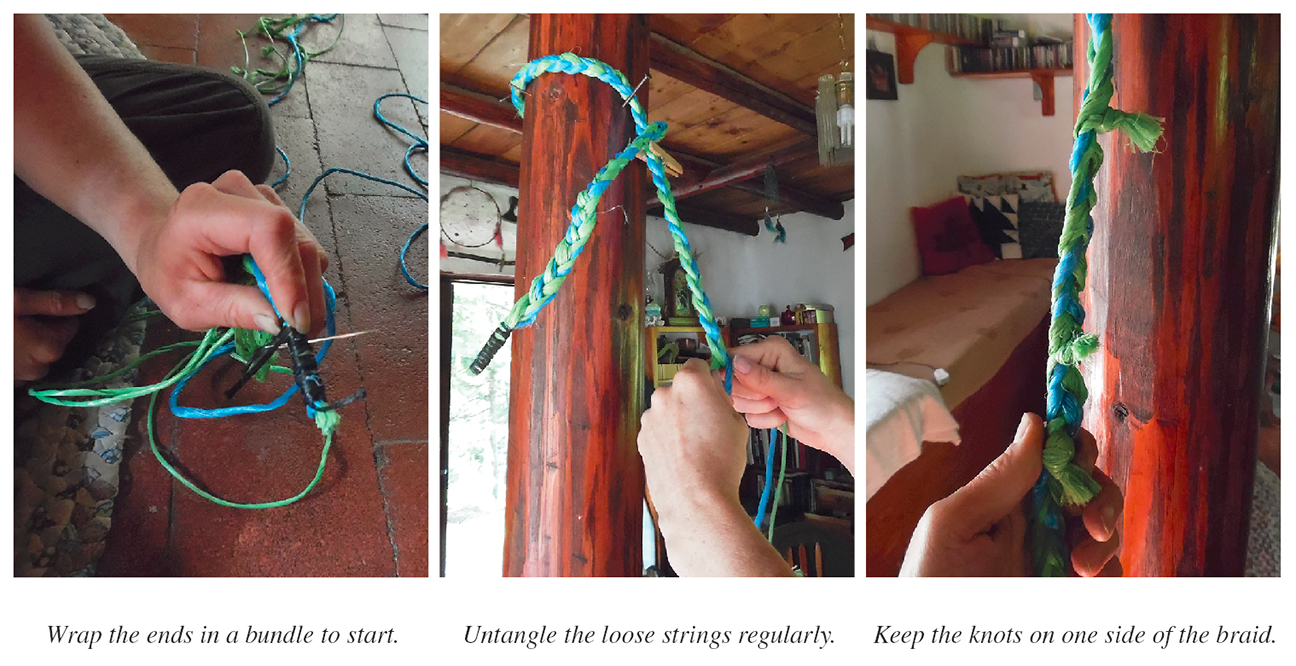
One of the easiest materials to get started with is baling twine. Every homestead with livestock has piles of this stuff kicking around. If using “average” baling twine from two string bales, begin by taking nine strings and wrapping the ends together with strong thread, then securing by sewing with a stout needle. We will be braiding three cords together, but because most baling twine is thin, use three strings per “cord.” Some very fine baling twine will need five strings per “cord.” Be sure to trim each individual string to a different length, maybe six inches apart. This way when new strings are added they won’t all make a big knot in the same place.
Now start braiding. Everyone knows how to braid, right? It’s easy to do but hard to describe. If we number the left hand cord 1, the middle 2 and the right hand 3, begin by folding 3 over 2, then 1 over 3, then 2 over 1, then 3 over 2, and so forth. You’ll need some way to hold the end of the braid so you can use both hands to work. You can sit down, take off your shoes, and use your toes like Tom Hanks in Castaway, hammer a nail into the wall and hang the braid over that, force a sibling to hold on to it, or whatever else your imagination can come up with. My wife is a fan of the nail method.
Braid six inches or so, being sure to keep it nice and tight. Then, hold the braid tight in one hand and untangle the free end of your strings with the other — as you braid, these loose ends will get tangled. Continue to braid another six inches or so before untangling again. The nice thing about using twine from two string bales is that the strings are never very long, unlike the 20-foot-long snakes of fabric some folk use when making a traditional rag rug. When you get to the end of a string, tie a new one on. The braid you are making should be sort of flat, and it is best to keep all the knots on one side of the braid, so they will all be on the bottom of the finished mat.
Use a big, blunt tapestry needle and the stoutest thread or thin cord you can find. My wife prefers to use synthetic mason twine. Over the years she has repaired several heirloom wool rugs and they all come apart when the thread used to bind the coils breaks. This thread is the weak link in the rug, so use the stoutest you can find. Don’t use yarn or cotton; use heavy artificial sinew, waxed linen, or mason twine. Synthetic mason twine is cheap and stout, but doesn’t hold knots well, so be sure to burn the ends of the cord to keep it from fraying and singe the knots. My wife keeps a lit candle nearby for this.
Now it’s time to start coiling the braid. Starting at the bend, pass the needle through the braid and tie the cord off. Then sew between the braids, pulling the bend tight as you go. As you go along, remember that the knots in the braid should be down, on the underside. If you goofed and tied a knot on the wrong side of the braid, you’ll just have to live with it — you can’t twist the braid to fix it at this point.
When you run low on braid, simply stop coiling and start braiding again. It’s a continuous process.
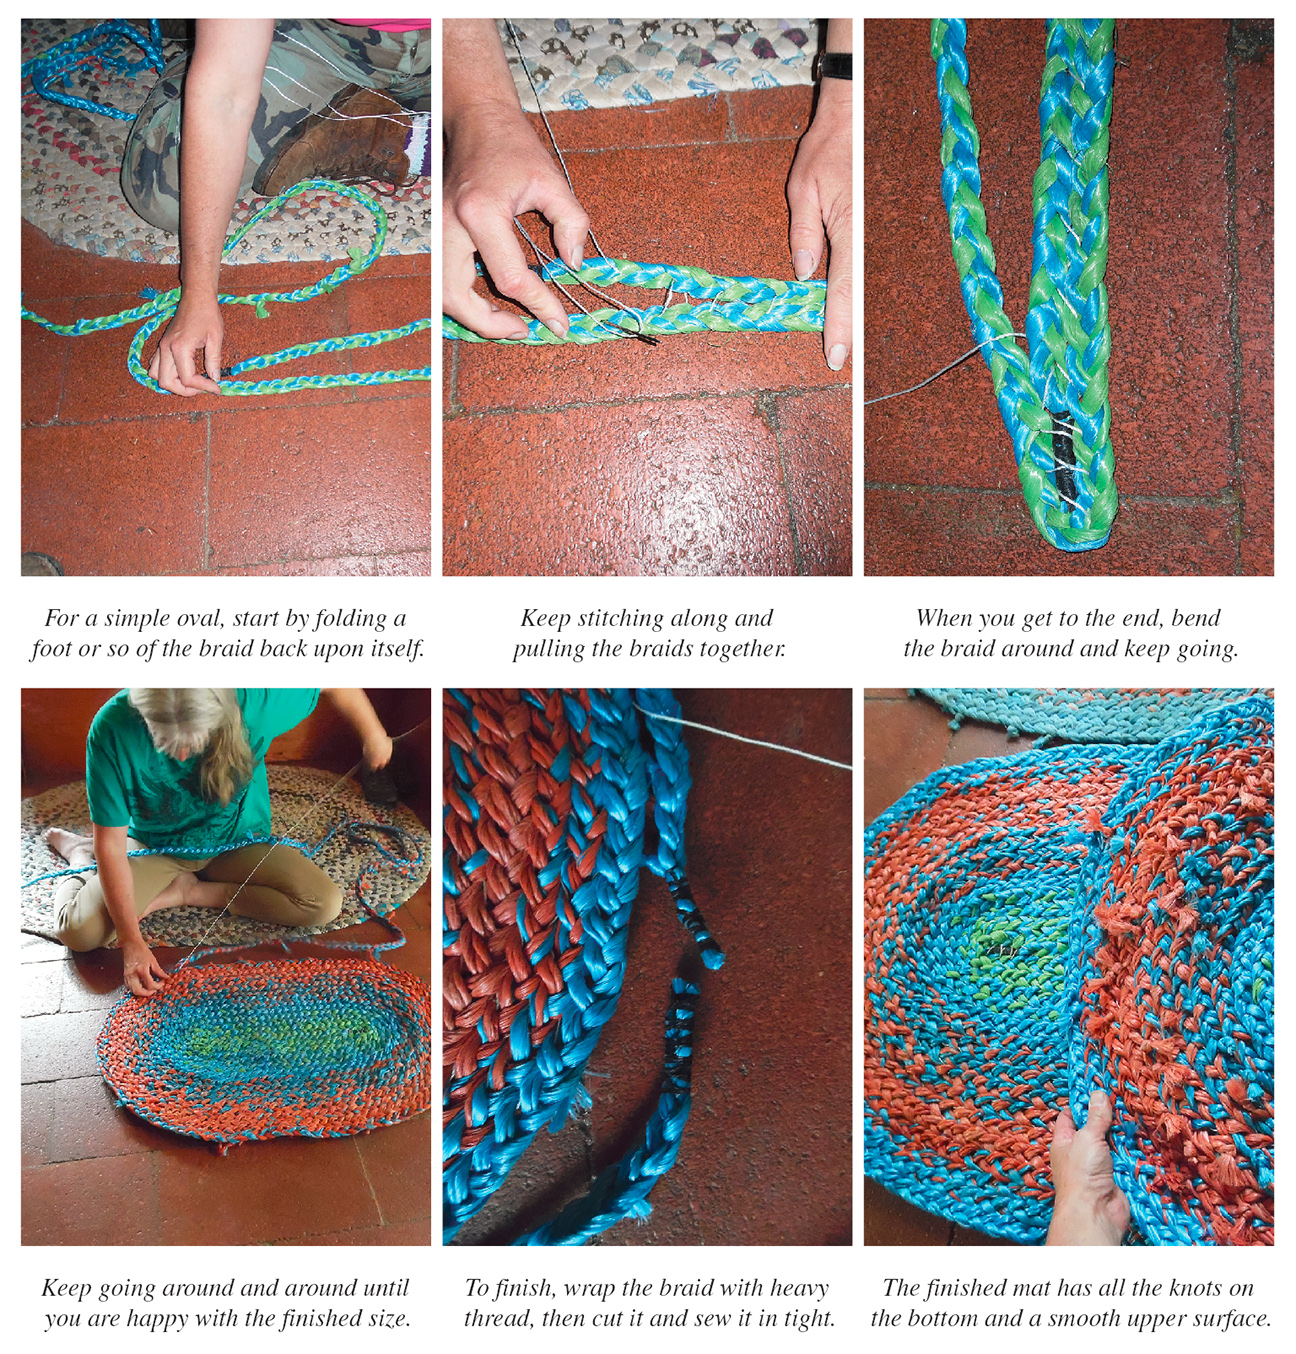
To finish, simply wrap the braid nice and tight with heavy thread, just the way you did to start. Cut the braid and sew it in tight.
These make the best door mats I have ever seen. Unlike most plastics, baling twine doesn’t seem to be affected by sunlight and it is indifferent to water, so these mats can be used indoors and out, and they last a very long time. If you start making these, you will begin paying attention to all the wonderful colors baling twine comes in. Every time a friend buys hay, you’ll be asking, “What color did you get this year?” Making rugs from baling twine is a perfect way to recycle a “waste” product.
Grocery bags
Another kind of “scrap” material that makes a good mat is the ordinary plastic grocery bag. These bags make a thick, warm, soft mat that is indifferent to water (but not sunlight). These are made like the twine mats except they use just one bunched-up bag per “cord.” Any plastic grocery bag or merchandise bag with handles will do. Cut really big bags in half lengthwise so each half has a handle. Bunch up the handles of three bags (preferably bags of different length, or shorten a bag or two so the knots will be in different spots), wrap with thread just as we did to start the twine mats, and begin braiding. When you run short of bag to braid, add another bag by poking two holes in the creases in the sides of the bottom of a bag, pass the handles of the new bag through these holes, then put the body of the bag through the handles and pull tight.
When you have enough bag braid, coil and stitch the rug exactly as with the twine mats. These are surprisingly warm rugs for bedside and bathroom.
Fabric scraps
For a fabric rug, start by cutting strips of cloth and sewing them end to end. My wife makes strips as narrow as two inches wide if using heavy fabric such as old denim jeans, and as wide as six inches if using thin stuff like old bedsheets. The wider strips are easy to work with and produce a nice thick rug.
Make three cloth strips about six to eight feet long, and try to stagger the sewn seams in the three strips so they don’t all bunch up in one spot in the braid. Gather the ends of the three strips together, and wrap and tie with strong thread just as with the other mats. Hang the mess up on a nail or hook and start braiding. The hard part of braiding cloth strips is that the edges of the fabric strips should be folded inside as you braid, so the raw fabric edges are not exposed. My wife does this a few feet at a time by rolling in the fabric from both edges until the rolls meet in the middle, and pinning them together.
Our sewing loft upstairs has a seven-foot-high ceiling, which is just the right height to screw a big hook into the ceiling to hang the strips from for braiding. Some folks make really long strips of cloth and roll them all into balls, then try to make a braid with these balls hanging off the end. That’s too much tangle and trouble for us. We just work in easily-handled increments of six or eight feet. When we run short, we unhook the braid from the nail and take it to the sewing machine to add more to the strips.
When the braid gets close to 20 feet long, start coiling the rug just as described above, and keep right on coiling, braiding, and sewing more strips on in a continuous process until the rug is as big as you like. It is especially important to use the stoutest thread or thin cord you can get your hands on when making a cloth rug, because these things get rather heavy, and shaking out a rug or putting it in a washing machine puts a lot of stress on that cord.
To finish a cloth rug, taper the cloth strips so the braid gets thinner, and try to end the braid at a corner of the rug so it is less noticeable. Wrap the end of the braid good and tight with heavy thread and sew it in tight.
So there you go, three ways to use “waste” material to make charming, unique, and practical rugs. Your feet will thank you and so will the landfill!


Great instructions!