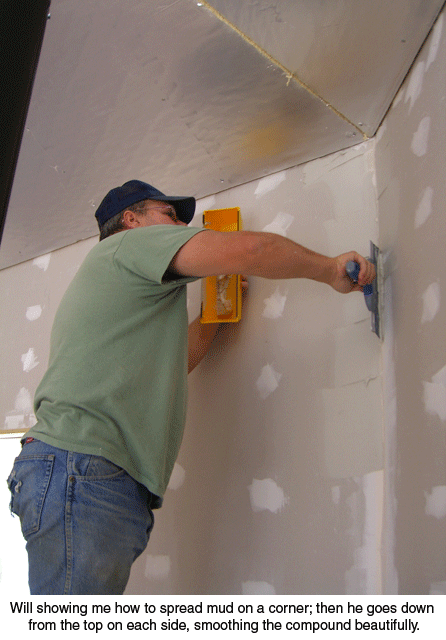
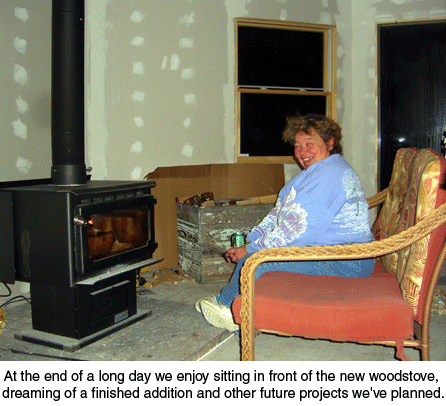
Well, yes, actually. We’re still drywalling and mudding. But the good news is that we also have our new woodstove hooked up and heating! And it does a good job, too. We even took the door out between the new addition and the living room. Now we’re looking forward to removing part of the wall between the two so we will be using the rooms like we plan to. Will’s been giving me lots of mudding tips (he taught it in carpentry school). The biggest help was to use a series of different knives, starting out with a 6″ blade to spread the mud and tape, then on the second trip over the joint, use a 10″ blade, finishing up with a 12″ inch one. Less mud, more area covered = less sanding! Hooray! I’m getting it, but he’s still a whole lot better and faster, too!

I should be painting the primer on the walls and ceiling of the new laundry room tomorrow. I’m really looking forward to that. It’ll take my mind off the other 30 feet of room that needs more mudding and sanding. Whew!

I’m getting out my pepper and celery seed to decide what I’m going to plant this year. But this year, Will gets to “play” in the seeds too, so it’ll be a joint decision. That’ll be so much fun. We’re both seed-aholics. And that’s a good thing. I think.
Readers’ Questions:
Soup from dehydrated vegetables
I am a new subscriber, but have been doing all these things for years. I am trying to use my dehydrator more and like the results. Do you have or know a source for making homemade vegetable soups and such. I have tried the store bought dried soups where you just add a few fresh ingredients and they have been very tasty but would like to make the whole business from scratch myself, using my own dried vegetables and herbs. My kids say I rely too much on recipes, but they also say no one cooks a meal better.
Deborah Pasco
Sioux Falls, South Dakota
I don’t have a source for recipes for dehydrated soups. I’m pretty much a no-recipe cook; I experiment and experiment until I love what I’m making. I start my soups with a basic base. For instance, chicken stock, beef stock, etc. Then I add whatever dehydrated vegetables and spices I decide would taste good that day, let ’em cook and it usually turns out pretty darned good. You can also throw in rice, pasta or wild rice for additional body. Keep at it and I know you’ll develop your own favorite recipes! — Jackie
Pickled green tomatoes
I have a question about pickled green tomatoes. We visited my wife’s uncle and aunt in Alberta, Canada, a few years ago. At the end of their growing season they picked all the small green tomatoes off the plants and dill pickled them. They were the most delicious pickles I’ve ever eaten, aside from dilly beans (green beans), of course. The pickled tomatoes were crisp, and full of yummy garlic and dill-flavored juice. Since then, I have tried twice to copy their pickled tomatoes, without success. They didn’t give me a recipe–I just thought I’d try it using my dilly bean recipe, which includes water bathing the veggies for a short while to seal them up. Both attempts the past two summers have resulted in mushy tomatoes, not crispy ones. The flavors are about the same as the ones in Alberta, but they’re mushy to the point we can’t eat them. Have you ever pickled little green tomatoes? Is there a way to pickle them without cooking them, say just adding hot water and letting them seal on their own? Will they seal that way? I’m certain my aunt-in-law didn’t cook hers at all, as they were so crisp and firm, yet they absorbed the vinegar and flavorings so well.
Incidentally, our whole family loves pickles, especially pickled green beans, as noted above. Whenever we find green beans on sale for 69 cents a pound or so in the winter, we buy ten pounds and pickle them up with garlic, dill and a pinch of cayenne pepper. They are so delicious and crunchy.
Dallen Timothy
Gilbert, Arizona
Here’s a recipe that you might like to try:
Dill Tomatoes
5 qts. small, hard green tomatoes
3 small green peppers, seeded and cut in strips
5 large heads of dill
1 qt. water
1 qt. vinegar
1 cup pickling salt
5 cloves garlic
Pack tomatoes into sterilized quart jars, dividing pepper strips among the jars. Add heads of dill or put them in first. Add sliced cloves of garlic. Bring water, vinegar and salt to a boil and boil for 5 minutes. Pour boiling brine over tomatoes, leaving 1/2″ of headspace. Wipe rim of jar clean, place hot, previously simmered lid on jar and screw down ring firmly tight. Process for 10 minutes in a boiling water bath.
I hope these will taste like the ones you remember! — Jackie
Canning lemon juice
I have a lemon tree and have a lot of lemons and was wondering how do you can lemon juice? I freeze the zest for cooking and baking and would like to save all the lemon juice I can. I prefer to can over freezing.
Deanna (Dee Dee) Miles
Palatka, Florida
Rinse heavy, solid, ripe lemons and drain. Juice. Strain juice through several layers of dampened cheesecloth, into large pot. Add sugar to taste. Heat only to 165 degrees. Fill hot jars with hot juice, leaving ¼” of headspace. Wipe rim of jar clean, place hot, previously simmered lid on and screw down ring firmly tight. Process pints or quarts for 15 minutes in a boiling water bath canner.
Your home canned juice will be so much better than store juice, and have no additives! Enjoy. — Jackie
Growing potatoes in barrels
I tried growing potatoes in barrels last summer, but was very disappointed when I dumped them only to find pea sized potatoes. I need “barrel potatoes for dummies” instructions for doing this. I put an old air conditioner filter on the bottom, then 4 inches of sawdust, then the potatoes and soil. As the potato vines grew about 4 inches above the soil, I added more ‘eyes’ and more soil repeating this to the top of the barrel. What did I do wrong? How much water do they need? I really want to can some next year! Thanks for any help you can offer, I gain so much from your site and eagerly pass it on to my Cheapskate Club. I will be giving classes on canning to those young moms this year and you will be a big part!
Jo Riddle
Vienna, West Virginia
Here’s the way I do it: I put two large tires on the ground, over several thicknesses of newspaper to retard weeds. I add good soil, mixed with rotted compost in the tires, packing the dirt into the tires as well as in the centers. Don’t pack down the center soil. Place your seed potatoes about a foot apart, planted 4″ deep in the soil. When the plants are about a foot above the soil, add another tire and soil to cover all but 1/3 of the plant. Keep repeating this until your tier is about 3′ high. Potatoes in this “container” need more moisture than regularly planted ones because the sun evaporates moisture from all sides and the tires are black, attracting heat. Some people add more sets as they raise the tires, but I don’t. I think it only gives you smaller potatoes and doesn’t let the “old” ones mature and make big spuds. Better luck this year. — Jackie
Canning black walnuts
I am trying to can black walnuts. The 1st batch had very small moisture droplets inside the jars. I opened and re-canned them. Same problem. Am I not getting the nuts HOT enough? I heat nuts on cookie sheets in 300 degree oven with the jars on the 2nd oven rack. How long should I heat the nuts? I finally froze the nuts after 2nd canning. How much re-heating can these nuts take without changing the flavor? I REALLY need help here. Sorry I’m not as canning savvy as I should be. Also, I canned some butter. LOVE it! My second batch had a “bubble like” effect along the inside top of the jars. Is that normal?
Jan Eylar
Savannah, Missouri
You need to reduce the heat on your walnuts, but keep them in the oven longer. Nuts usually need about 30 minutes in a slow oven, stirring them a few times to maintain even drying/toasting. Once they are toasted, there will be no more moisture. Then you proceed to can them. The heating only improves the flavor.
The bubbles on the butter are normal; it depends on how much it was heated during the melting process and how much moisture was “cooked” out of it. I try to get as much out as possible. — Jackie


It’s looking GREAT, Jackie! Only one thing – when Will is done at your place, can I borrow him? I’ve got a BUNCH of “honey-do”s that I can’t seem to get d/h or sons to tackle! Okay, then can I rent him by the week?
Congratulations on your newest additions, and I agree – I HATE “mudding”….
You are making great progress on the addition, and Jackie, you look so happy sitting there warm by the new wood stove. Will look forward to video when you’re done!
Thanks Jackie for all the info! I’ll try with tires this year and let you know how it works. For watering, I took a long PVC pipe and drilled holes around it all the way down and figured the water would slowly seep out into the dirt all the way to the bottom of the barrel. Thanks again, and your house is looking fantastic! So worth the work when finished!
Comments are closed.