By Lorinda McKinnon
In hard times, comforts are important for morale. Some might stash a jug of whiskey or a case of cheese puffs, but for me, comfort is a steaming cup of coffee.
When I think about preparing for a serious emergency, I’m more concerned about running out of coffee than I am toilet paper. If I’m going to have to fight off wild animals and marauding looters, I will definitely need my caffeine.
If you’re just looking for a hot cup of caffeine, instant coffee is the most practical option for storage; it lasts for decades. But if you love a rich cup of coffee and are concerned about the possibility of being without electricity, buy a small manual coffee grinder, an inexpensive pour-over coffee maker, and a selection of green coffee beans.
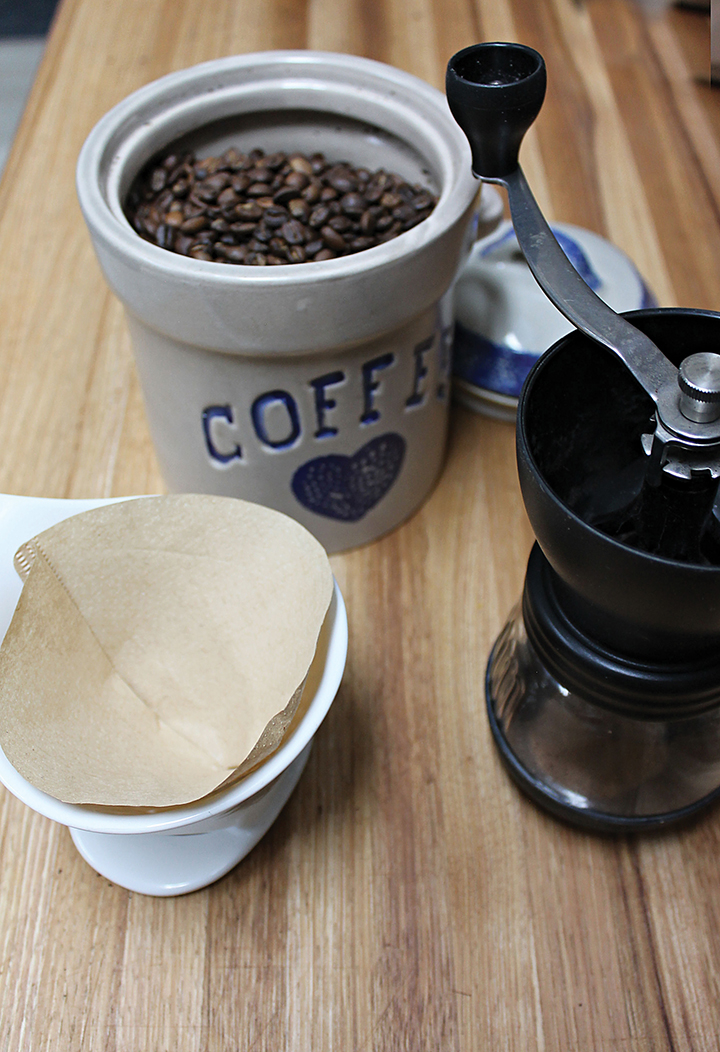
Why green coffee beans? They can be purchased online for about half the price of roasted designer coffee beans. They store for at least a year, and if they’re kept cool and dry they can last three years or more.
Even if there is no electricity, the beans can be roasted on a wood stove. All you need is a cast-iron skillet, a heat-resistant utensil for stirring, a hot wood stove, and a little patience. Be prepared for some smoke. It helps to have a heat-powered stove fan or an open window while roasting.
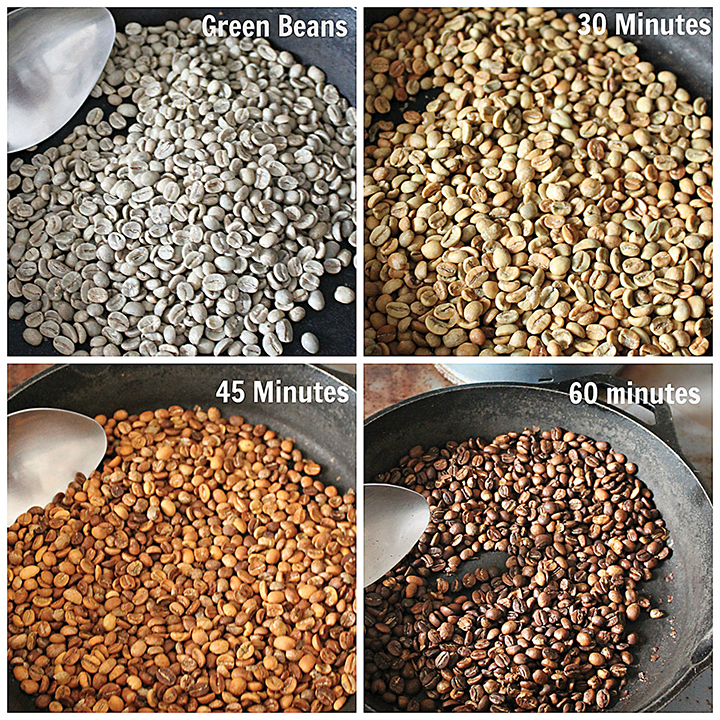
Depending on the type of wood stove and fuel you’re using, roasting coffee can take anywhere from 20 minutes to an hour. If you have an infrared thermometer, shoot for a surface temperature of 400-500° F. Otherwise, get the stove going nice and hot; you can judge the progress of the beans by color and sound. The surface of my stove was approximately 400° F and it took a full hour to roast. More wood in the stove would have made things go faster, but I was in no hurry … and it was already pretty hot standing by that stove.
Select a cast-iron skillet with high sides. Place the pan on the stove and let it heat for several minutes. Add only enough coffee beans to make a single layer (about one cup for a 10-inch skillet). Stir with a heat-resistant utensil. It’s not critical to stir constantly at this point; every minute or two is fine. The beans will turn from green to khaki, then to a light golden brown. At this point, stir frequently; keep those beans moving!
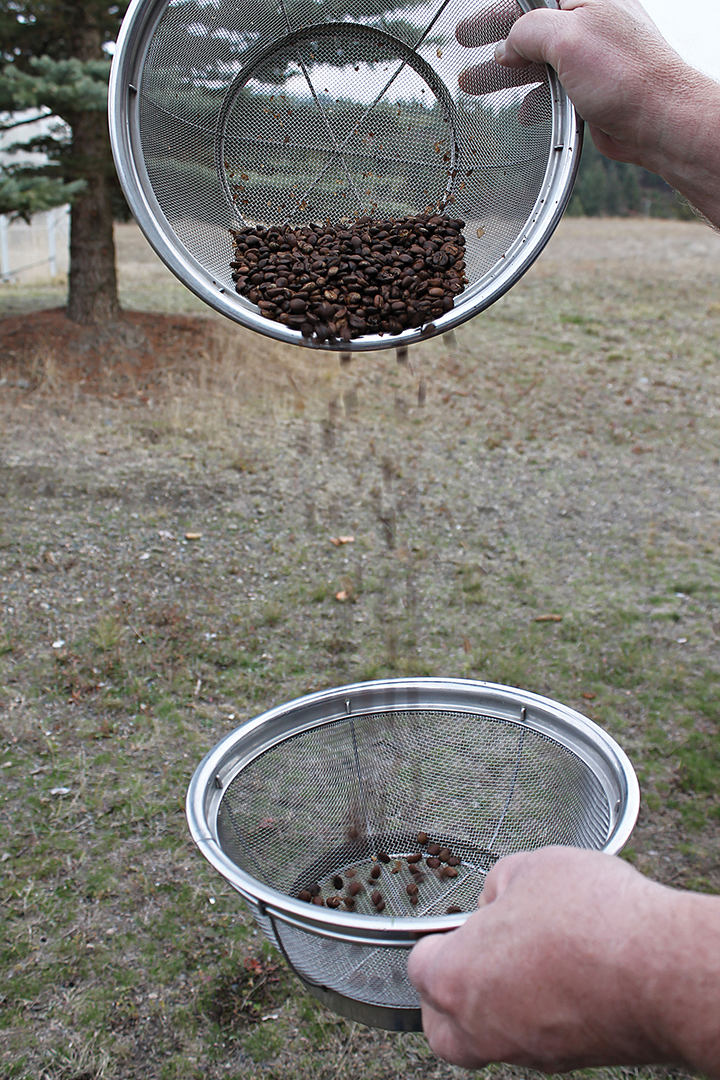
As the beans continue to darken, you will hear a noise that sounds like popcorn. This is called the first crack stage. When the popping stops, the beans are at the perfect stage for those who like a lighter roast (light roasts have more caffeine than dark roasts). If you prefer a dark roast, keep stirring until the beans reach the second crack stage — a light, crackly sound this time. When the beans are done to your liking, remove them from the stove and pour immediately into another container to cool. It’s important to cool them quickly, so shake them — outside if possible. A colander works well for this.
Remove the chaff and continue to cool the beans by pouring them from one container to another outside, letting the breeze blow the chaff away. Allow the beans to rest for a few hours uncovered, then put them in an airtight container. They can be used right away, but beans aged for a few days will make the coffee taste better.
Coffee beans swell a little as they roast, so that cup of green beans you started with should grow into almost a cup and a half of rich, dark beans — enough for eight satisfying cups of pour-over coffee.








Where can you buy green beans at half the price of roasted beans? Can you give a few examples? I’ve googled and haven’t found a source, unless you are willing to buy a huge amount, they cost about the same a already roasted beans.
That’s an incredibly long time for roasting coffee. My electric and gas air roaster does heat to around 460 but batch size is what determines how long it takes. Beans can literally bake at those long times and be a bit flatter in flavor than a 15-20 minute roast.
As a coffee roaster of more than 25 years I found this article to be pretty accurate and easy to understand, overall quite concise.
Thanks for this article! I needed an education about coffee. The pictures really help, and the description of the sound while roasting, too!!!