
By Jackie Clay-Atkinson
In some climates, winter’s no big deal — just a little rain and cooler weather. But for the rest of us, winter is something to be prepared for. I’ve lived in Michigan, New Mexico, Montana, and Minnesota, all of which have significant winters.
In Michigan, I remember just barely beating a blizzard home from a horse sale, fording snow so deep that it covered the headlights of our Blazer. Up on the high plains in New Mexico, we didn’t have so much snow but we did have wind and cold temperatures. We would fall asleep at night wondering if the water lines to the bathroom and kitchen would freeze.
When we lived above 7,600 feet in Montana, we were snowed in from early December to early June. Where we live now in northern Minnesota, we have plenty of snow and sub-zero cold. Last winter we set an all-time record of 90 days in a row below zero!
We know winter’s going to come, so we start preparing for it in the spring. Why spring? Because it gives us all summer and fall to prepare. It’s always easier to do a little bit at a time, rather than wear yourself out in last-minute frenzies.
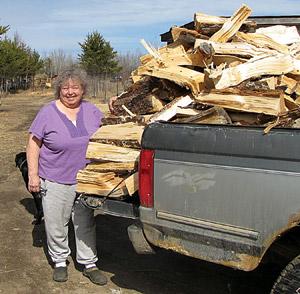
Cutting and splitting firewood
We start cutting and splitting our firewood in the spring, using mostly dead wood to start with to clean out our woods. You’d think that wood from a dead tree would be dry, but even dead wood contains a lot of moisture. Cutting and splitting firewood in the fall may be fine for the next year’s burning, but it’s not so hot (forgive the pun) for this winter’s wood.
A lot of people cut and split their firewood in the fall, stack it in the shed, and burn it all winter. But if wood has been cut, split, and stored under cover all summer and fall, it will be much drier and will burn with more heat than just-split wood.
We try to keep two years’ worth of wood in the woodshed — that way, it is well-seasoned. Also, wood that has sap still moist in the wood (green wood) or has not yet seasoned and dried can pose a danger of a chimney fire.
Your woodshed can be a designated building, a simple roof over an open shed, a room in the basement, or just some metal roofing laid over tightly-stacked piles. You just want air to flow over, around, and through the wood so that it seasons. Don’t stack your firewood next to the house or where water running off the roof will get it wet. You don’t want insects from the firewood to damage your house and excessive moisture from runoff will quickly rot the best of wood.
Split wood will season faster than unsplit wood, so split most of your wood, saving some big rounds for longer burns and some small pieces for kindling.
What kind of wood should you burn? Hardwoods such as oak, maple, and elm are the very best firewood. However, a lot of folks don’t live where these woods grow. Here, we have some nice black ash but very little maple and no oak. So what’s a homesteader to do? Burn what’s available and be glad you have it!
Unfortunately, when you burn resinous woods such as pine, juniper, or fir, you do tend to have more creosote buildup in your chimney or stovepipe. The more buildup, the more danger of having a chimney fire. We burn a lot of balsam fir as it often dies in our woods due to insect damage. We also burn pine slabwood and leftovers from our sawmill. To counteract the creosote deposits these woods leave behind, Will burns a very hot fire in our stove each and every day, safely burning out any deposits before they gain any degree of thickness. Our stovepipe is insulated and installed very safely so there is no danger to this procedure, especially when compared to only cleaning out the stovepipe once a week — or year! Creosote deposits become tar-like and thick; they are nearly impossible to remove with a chimney brush and can become very dangerous.
Readying your home for cold weather
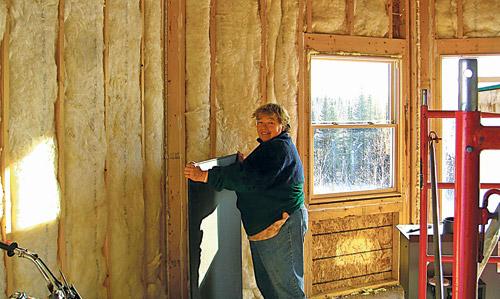
Want to reduce your fuel bill or the amount of firewood it takes to keep your family warm next winter? Add more insulation to your house.
Our little house in New Mexico was an old, single-story house with absolutely no insulation. It had all single-pane windows, too. Adding insulation to the attic helped a whole lot. Had we stayed there, we would have also added new windows and insulation in the walls and around the foundation.
In our current log cabin home, the roof is a double roof with plenty of insulation, the basement walls are all insulated, there is insulation under the floors of the addition and greenhouse, and all the windows are double-paned.
A few years ago, Will went all through the house, caulking every crack he could find around the windows, between the logs, and around door frames. Each year we still find a few more spots to caulk. Boy, does that make a huge difference!
A lot of older houses have little or no insulation in the walls, but now it’s getting cheaper to have insulation blown into the walls from small holes cut on the outside. Have an attic? Consider adding insulation between the floor joists and/or between the rafters. Do a good job and I guarantee you’ll be warmer — and burn less fuel.
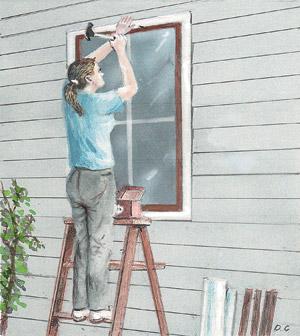
If you have old, single-pane windows, think about replacing them. Yeah, I know it’s costly. But how about only doing one or two windows a year on the north side of your house first? When we built our log house I couldn’t afford windows right away, so we put plastic sheeting over the holes. Then, as I could afford a good window, I bought it and got it set in. I’ve never been sorry I held out for quality windows.
For those windows you can’t afford to replace, tack plastic over the outside as fall approaches. To do that, first put the plastic up to the window (with a couple tacks on the edges to help hold it in place). Then nail lath board every four to six inches all the way around the window. To finish, trim the plastic sticking over the outside of the lath. Use the clear, 6-mil plastic. Cheap plastic may tear during storms and you’ll get tired of trying to look through cloudy plastic all winter.
Our farmhouse in Minnesota had old storm windows. I put up plastic on the outside and cut rigid insulation board to fit the upper portions of the windows for winter. I used one-inch insulation board and cut the pieces to fit snugly into place. That sure helped cut down cold air infiltration.
Be sure your doors fit in their frames and that they have a working rubber sweep on the bottom and that they meet an airtight gasket all around. If not, fix them before winter hits.
Frozen pipes are a huge problem in cold climates. We had trouble with our lines freezing, even though our water lines are eight feet underground. Being off grid, the water in our water lines doesn’t move as often as it does in a “normal” system; our pump only kicks on when we throw the switch to fill our storage tanks in the basement. Therefore, the water sits in the line for hours and can freeze when the frost goes deep and the temperatures are sub-zero. To take care of that, Will installed a heat-line inside of the black plastic water pipe, pushed from our basement, back 100 feet with an electrician’s “fish” tape.
When installing a new water line in cold climates, it helps immensely to lay the water line, then add at least four inches of rigid insulation board (meant for soil contact) over the line to prevent frost from sinking to the line. Be sure you know just how deep the frost penetrates in your climate. It can vary from a foot to more than eight feet!
Keeping water accessible to your barnyard may mean installing a frost-free hydrant on a water line that Ts off an existing line. A frost-free hydrant totally drains deep in the ground once the water has been shut off. Raise the handle and the water flows; lower the handle and it stops and self-drains. Installing it is cheap and straight-forward. Dig a ditch below the frost line from your main line to your barn, then T the new plastic line to your house line and lay out the new line down the ditch to your barn. Install the frost-free hydrant according to the instructions and bury the line. (If it crosses under a driveway or often-used pathway, take the precaution to add insulation over the line to prevent the line from freezing.) Now you’re set for winter and you won’t have to lug and drain hoses from the house.
Keeping your house water from freezing is possible. If you have any sinks/tubs on an outside wall, consider moving them. Our homestead in Minnesota had an old farmhouse on it. Unfortunately, the folks who improved the kitchen installed the kitchen sink on an outside wall with the plumbing running under an unheated, very shallow crawl space. My pipes froze every single winter. So when I remodeled the kitchen, I switched the kitchen sink to the opposite wall, running the plumbing down into the basement.
For short periods of extremely cold weather, just leave your taps dripping all night. Not only does this keep the water in your pipes from freezing, but it also causes the well to cycle more often than normal, keeping everything moving instead of turning to ice. Just opening the cupboard doors under the sinks will help a lot, too.
I used to have trouble with our pressure tank and pipes freezing in our well house in New Mexico. To fix this, I wrapped a heat tape around the water pipe that came up from the well casing. There was enough room between the casing and pipe to take a yardstick and gently shove wraps down the pipe as I wrapped it. Once they were down as far as I could reach, I plugged it in. Then I added a heat lamp on a thermostat above the pressure tank and insulated the well house — no more frozen water.
How will you keep your house warm if a sudden severe blizzard hits your area? If you’ve got wood or propane heat, you’ll usually do fine. (But remember that most propane furnaces rely on electricity to distribute the heat as well as to turn the furnace on and off.)
It’s a good idea to make plans for alternative ways to heat your home, just in case. I know of many folks who have had to abandon their homes during the winter when the pipes froze due to a severe storm knocking out the power for several days. Having a simple propane heater would prevent all that. There are many relatively inexpensive propane heaters available that you can easily run off a 100-pound propane tank. Consider a propane heater for your living area as well as your basement — a heater in the basement will not keep your living area warm enough.
Consider having a generator available to supply electricity for your needs. These may include running your furnace, keeping your freezer from thawing, and lighting your home. All can be run via electric extension cords from a safe location outside and away from windows. But a generator can’t be run 24/7 because of its gas consumption. If the power is out, you won’t be able to get more gas for it. Keep a couple of cans available and rotate the gas in them through your lawnmower, vehicles, and other gas engines to keep it fresh. You’ll probably only run your generator for a few hours, shut it down, then run it again to save fuel and keep things running.
Equipment and supplies are a whole lot easier (and cheaper) to find during the summer, rather than in the middle of winter.
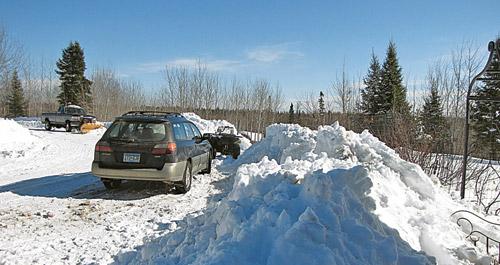
Keeping vehicles ready for winter
Here in Minnesota, summer is so short that we keep vehicles ready for winter at all times.
Be sure to test your radiator fluid to ensure that the antifreeze is strong enough for your climate. Pick up an inexpensive test kit (made up of a plastic tube to suck up antifreeze from your radiator and a few colored plastic balls). Follow the directions: so many balls floating indicate a certain safe temperature for your fluid. If necessary, add more antifreeze to bring up the safety level.
Be sure you have good tires on your vehicle before winter. Good tread on your tires keeps you on the road and ensures that you aren’t out changing a flat tire in horrid weather.
If you live where chains are needed, please buy heavy-duty chains of the best quality. Your life may depend on it. And before winter hits, practice putting them on. I got so I could chain up in less than 10 minutes. There are even places where chains are required to navigate mountain passes in bad weather. No chains; no driving.
Always keep good windshield wipers on your vehicle, but as winter approaches, make sure they are operating very well. Being able to see a snow-covered road may save your life.
As winter approaches, go through your vehicle, making absolutely sure you have a first-aid kit, a spare tire, a working jack, a flashlight, a warm blanket, and other survival gear in every vehicle you drive. I also keep a can of Fix-A-Flat in the car. The mechanics at the tire shop don’t like it, but I’d rather hear them grousing than have to stand in a blizzard changing a tire on the roadside.
As winter approaches, always keep your gas tank full. You never know when you may slide off the road or become stuck in a snow bank and have to run your heater to keep warm. With a full gas tank, your chances of survival are a whole lot better than if your tank is nearly empty! If this situation does happen, be sure to keep the tailpipe free of snow to prevent carbon monoxide poisoning. And only run your vehicle and heater infrequently so that you can remain warm longer in case you’re not rescued quickly.
Readying poultry and livestock for winter
All poultry and livestock require three things to survive winter: a draft-free shelter where blowing snow and sleet can’t reach them, good quality food, and daily fresh water.
In the spring and summer, having a nice breeze blowing through your chicken coop or barn is a good thing, but come fall, it’s time to tighten things up. Poultry and livestock can easily survive sub-zero temperatures if there isn’t a draft blowing in from outside. But that doesn’t mean they don’t need good ventilation. Caulk up any cracks, add lots of good dry bedding, and keep the door closed at night when it’s really cold.
We plan for our animals’ feed all summer. As we now make our own hay, we take care to cut hay when its protein is as high as possible — when the hay is tender and of good quality.
If you buy hay, hunt up your farmer or rancher during the summer so you are assured of being able to buy good quality hay at a reasonable price. Some farmers are now spraying their alfalfa with herbicide to control weeds, so be sure the one you will be using does not, especially if you will be using the manure on your garden.
When we lived in Montana and New Mexico, we hauled our hay all summer and fall, a truckload at a time, so we’d be sure to have our hay at home when we needed it. We didn’t want to be snowed in and have no hay.
In those dry climates, we were able to stack our hay outdoors, on top of pallets we’d picked up for free. These kept the hay off of the ground and let air circulate beneath them, preventing mold. When a stack was complete, we covered it with plastic tarps to keep the rain and snow off of it.
But here in Minnesota, as well as many other wetter climates, you absolutely cannot store hay outside. We store it in our storage barn in a big hayloft. It’s also a good idea to have enough grain on hand to see your livestock through any inclement weather.
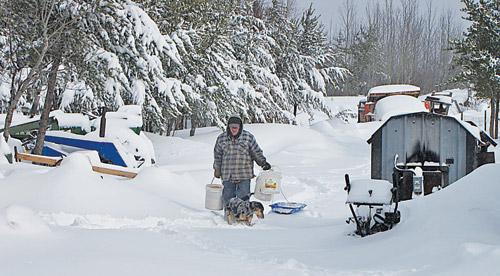
Having fresh water is a must for your livestock, no matter where you live. While poultry and animals can eat snow, having them depend on only eating snow is hard on them, as they expend a lot of calories melting snow in their bellies that they should be using to stay fat.
If you have minimal livestock and poultry, you can easily carry buckets of water to them twice a day. With more critters, you probably will be dragging hoses. To keep our water lines out to the barn from freezing in the winter, Will installed a heat-line inside the above-ground portion. But our best addition has been simply screwing an air fitting into a hose-fitting near the house. When we finish running water down to the barn and the livestock tanks, we shut off the well, unfasten the hose from the faucet, attach the little air fitting, and blow out the line three times to ensure all water is gone out of the entire 200-foot line and the hoses. Then we unhook the hoses down at the barn and drain them carefully, hanging them up so they stay ice-free until the next use.
Will built a wood-fired stock tank heater for each stock tank so we don’t have to fill the tanks every day. Luckily, most of you can simply use a floating stock tank heater to keep your livestock water tanks from freezing up. Even chickens can have a heated waterer in their coop, reducing the number of times you have to carry buckets.
In Montana, winters were cold but not as cold as here. We were able to get by off-grid by chopping the ice in our livestock tank and tossing the ice off to the side, filling the tank with fresh water about once a week, depending on use.
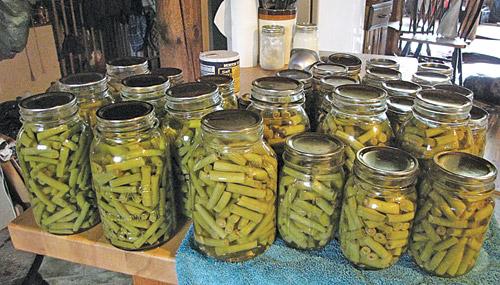
Putting up food for the family
I’ve had a lot of people ask me how in the world I can possibly can up all the food we grow. (After all, I’m a senior citizen.) My answer is simple — I just do a little at a time until we have enough. I’m done with partaking in canning marathons, but I’ve found that by putting up a little, then a little more as the summer progresses, I get it done.
Luckily, the garden produces in waves. It’s one batch at a time. I string this out over summer because we plant several varieties of each crop with different maturity dates. When one vegetable or variety is nearly done, the next variety is just getting ripe.
Of course, some crops will store, at least for a while. Why can up cabbage, rutabagas, squash, and pumpkin while I’m busy processing other foods? They’ll all wait comfortably in storage.
During the summer, we’ll be eating watermelons. So that’s the time to use the rinds for watermelon pickles. You don’t need bunches and bunches of them, so a couple batches is plenty. It’s true for many varieties of pickles as well.
I use the winter to can up my meat-mixed dishes such as meatballs in marinara sauce, chicken stew, chili, and so forth. I’m not so busy then, so it is easier.
As winter months can be treacherous in many climates, I make sure we always have plenty of food available. We like to try to keep a two years’ supply on hand at all times. That way when a mighty blizzard paralyzes the state, we put a loaf of bread in our wood kitchen range and decide whether we want chili for dinner or a roast.
With some intelligent preparation, winter isn’t scary. We look on it as a time of rest from our busy spring, summer, and fall work. It’s time to sit by the fire, enjoy good food and companionship, read a few good books, and plan for the next summer. Will and I actually enjoy winter — but then again, we’ve had a long time to learn to prepare well for it.


This was a very good, comprehensive article Jackie! It’s clear you’ve lived every incident and you learned from them; all about surviving in the country. Thank you.