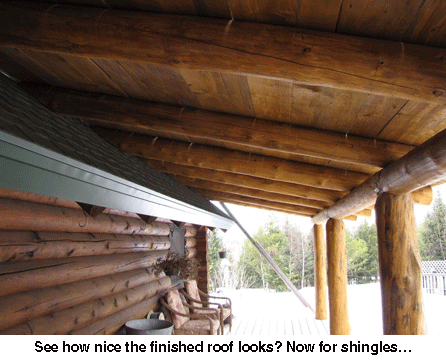
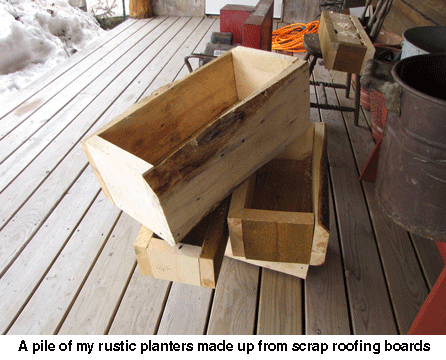
Will trimmed off the log rafters from the new front porch roof yesterday and was going to pick up the sawn off ends of the two-inch boards he’d roofed the porch with. I knew they were headed for firewood, which we don’t need. All of a sudden, I pictured rustic planters! So I ask him to saw them to size (whatever worked) for me while I went to get the cordless drill. With a square bit installed I screwed together five nice heavy planters of various sizes, using three-inch deck screws. Once finished, I drilled a few holes in the bottoms for good drainage. I know they’ll rot after a few years but until then, they’ll look great on the new front porch, brimming with bright flowers. We don’t waste much around here.
Just a reminder to all of you who said you’d like to come to our June homesteading seminar — time’s getting short and if you are planning on coming, let us know. There’s a lot of planning involved and we want to make every seminar truly great.
Our chickens are now starting to lay like crazy and yesterday I even got our first turkey egg. Wow! And with all those eggs, I made a quiche with mushrooms, onions, broccoli, ham dices, and cheese. For dessert I whipped up a lemon meringue pie, using an extra three egg whites for the meringue. Boy, did that taste good. We homesteaders really look forward to spring’s bounty, starting with eggs!
We still have plenty of seeds left so any of you who would like to order from our little seed business, feel free. There are plenty of Bill Bean tomato and Hopi Pale Grey squash seeds left! — Jackie


zelda,
No I didn’t but am planning on putting cut off, left-over “stickers” under them. The stickers are small diameter pieces of lumber we put between layers of our home-sawn lumber. As the lumber was used, we ended up with a ton of them. So I’ll just cut a few to length and lay under the boxes. I don’t want to screw them to the boxes as that’ll make them rot faster. Unscrewed, I can move them or toss them into the stove as they show rotting and replace them. I am going to line the boxes with heavy plastic to help them last longer.
Jackie, I can’t tell from the photo, but did you put “feet” on your planters to keep them elevated a bit and let the bottoms dry out? Three 1inch thick or less strips of wood per planter, across the width – each end and in the middle – either just set under them or screwed on should be enough. Or you could use thicker “feet” and elevate one in a group of three. Seeing what you did I’m motivated to use up some of my scrap wood pile. You make everything you do sound so easy!!
Rose Queen,
Sure, our seeds will be good for years if kept dry and relatively cool. I save mine for years just fine.
I love the boxes too and projects like that make ME want to do more, too! I get so excited over the endless possibliities!!! We’d love to have you come to one of our seminars so we can meet you in person!
Miss Iris,
You’re right, I LOVE my boxes and I’ll show you how they look full of flowers, too.
The porch does look very nice! Great idea to make those planters; can’t wait to see pics of them full of flowers.
Hi Jackie ! I would love some of your seeds. My question is can I save them for next season ? This year I only have containers for my garden but by next year I should be able to plant a regular garden.
Also those boxes you made are great and will look good with flowers in them. You inspire all of us to want to do more. The porch looks great and I hope I can come next year to your Seminar.
Will could sell those boxes! I know you wouldn’t give them up for anything! Please put some pictures on when they are full of blooms!
Comments are closed.