 |
|
| Issue #56 • March/April, 1999 |
My mother loved chocolate. She knew and understood it just as a wine master knows and understands wine. When she made some of her old world style bittersweet hot chocolate, the aroma filled every corner of our small apartment. Other days she might make one of her many chocolate fudge recipes, cakes, pies, puddings, brownies, or some other chocolate goodies. Consistent with her nature, she shared all of these treats with neighbors, friends, family, and anyone who was lucky enough to pay us a visit.
 |
A few weeks ago I was struck with a hard to resist urge for a cup of Nanna V’s old world style hot chocolate. I started to rummage through her old suitcase full of recipes trying to find, as she used to say, “a hot chocolate formula.” I found several hot chocolate recipes stuffed in a large manila envelope along with two tattered notebooks. In one notebook my mom had scrawled a bunch of her chocolate recipes, along with some interesting facts about how chocolate is made. The other notebook was full of detailed notes on candy making. There I found the secret to the dozens of elegant candies and other treats that she gave as gifts to everyone during the holidays. After a few minutes of browsing through this newfound treasure it occurred to me that there was fun to be had with this stuff. I selected a bunch of the chocolate recipes and headed for the supermarket with my three kidsSarah, Jason, and Michael. They’re a nosy bunch that never lets me go on shopping expeditions alone, especially if they suspect I’m working on some new recipes. We returned home with enough chocolate, sugar, and other related ingredients to start our own dessert shop. I didn’t waste time. I whipped up a batch of hot chocolate right away.
During the following three weeks the kids and I used my mom’s recipes to prepare a variety of chocolate desserts and beverages. We made cakes, brownies, pies, puddings, six chocolate drink formulas, and more fudge than I can remember.
|
My children are hard-nosed food critics. They even formed a food review panel to critique my recipes. Any recipe included in these columns must first get a unanimous thumbs up from the panel. It took many serious tasting sessions, followed by a lot of lively conversation, before the panel finally gave me an accordant vote on the following three recipes.
Also, Sarah made a special request. “Hey, Dad, when you do the recipe article, tell the folks some of that cool stuff about cacao trees and how chocolate is made. Nanna V would like that.” What is it about 13-year-old girls that turns fathers to mush?
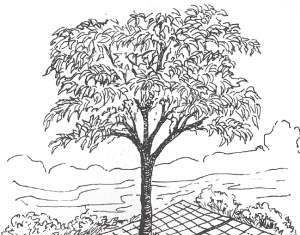
The word cocoa is a modification of the Spanish word cacao. The two words are often used interchangeably, but for the trees and beans, from which we get all things chocolate, we usually use the word cacao. The cacao tree is a tropical evergreen belonging to the theobroma genus. Literally translated from Greek roots, theobroma means “drink of the gods.” These delicate trees originated and continue to thrive in the hot, damp rain forest climate of the South American river valleys. Being very sensitive to light, cacao trees grow in semidarkness under the protective mantle of taller trees. These unique growing conditions exist exclusively in a band around the earth that extends 20 degrees above and below the equator.
Cacao trees were first cultivated by the Mayas around the 7th century A.D. They carried the seed north from the tropical Amazon forests to what is now Mexico. In the 16th century the Spanish planted cacao trees across South America, into Central America, and onto the Caribbean Islands. In the 17th century the Dutch transported the cacao tree to other places around the globe like Java, Sumatra, Sri Lanka, New Guinea, and the Philippines. Early in the 19th century the Portuguese planted cacao trees on an island off the west African coast. By the end of the century they were being cultivated on the African mainland along the Ivory Coast. Today these combined tropical regions produce over two million tons of cacao beans. The finest and most sought after beans, however, are still grown in the New World.
The Maya, Toltec, and Aztec people of early Mexico prepared a hot chocolate drink of ground roasted cacao beans mixed with chili peppers and water. This popular combination of ingredients produced a very bitter, sharp tasting drink.
The first Europeans to discover the cacao bean were crew members sailing with Christopher Columbus on his fourth, and last, voyage to the New World in 1502. Columbus returned to Spain with a sack of cacao beans. Little interest, however, was shown in the bitter, sharp tasting drink that the beans produced.
Cortez and Montezuma
Seventeen years later the Spanish navigator, Hernan Cortez, sailed to the New World to plunder the West Indies. When he reached the mainland, the Aztec king, Montezuma, thinking Cortez to be a god returning to claim his lost kingdom, presented him with an abundance of treasures from the Aztec empire. This included a large amount of cacao beans. Unlike Columbus, Cortez immediately saw potential economic value in cacao. When he asked Montezuma where the treasures were, he was taken to a large stand of cacao trees. Cacao beans were the valued currency of the Aztecs. With a wealth of cacao beans in his possession, Cortez was able to trade for a fortune in gold. When Cortez returned to Spain in 1527 he brought with him a large cargo of cacao beans and a passion of his own for chocolate.
As Europeans began to colonize the New World they began planting sugar cane in Haiti and the Dominican Republic. One day someone came up with the idea of adding sugar to their chocolate drink hoping to make it more palatable. Well, the addition of sugar created an instant passion among the colonists. The infatuation with this new sweetened chocolate spread rapidly to other conquered territories and finally back to Europe. It is believed that chocolate was one of the factors that sparked the development of sugar plantations in the New World.
|
By the beginning of 17th century, hot chocolate gained a great deal of popularity among the wealthy Europeans. Europeans also valued chocolate for its nutritional and stimulating qualities (see sidebar). Many also believed chocolate to be an aphrodisiac and a cure for a variety of physical and mental disorders. Late in the 17th century the first ready-to-eat chocolate in solid form made its appearance in London. This new innovation became an immediate curiosity to chocolate lovers. But because of its dry crumbly texture, chocolate in this early solid form received a cool reception in Europe. However, changes for the better were on the way.
The American and French Revolutions, along with the Napoleonic Wars, brought the production and development of chocolate to a temporary halt. The return of peace in the early 1800s, followed by the Industrial Revolution, sparked important changes in the chocolate industry. Innovations by French and Dutch manufacturers improved both the taste and texture of chocolate in all forms. The improved chocolate products were supported by flourishing cacao bean production around the world. These advances paved the way to making chocolateonce a delicacy reserved only for the wealthyan everyday treat available to all.
The cacao tree
Cacao trees bear their fruit in the form of gourd-like pods that grow directly from the tree’s trunk and the base of its larger branches. Each pod contains as many as 40 almond-shaped seeds embedded in a white bittersweet pulp. There are three main varieties of cacao beans grown around the world.
The original bean, cultivated by the Aztecs, carries the Spanish name, criollo, which means indigenous. This is the finest and most sought after cacao bean. It is very aromatic, with a slightly bitter flavor.
Next is the hardy, fast growing forestero, which means foreign in Spanish. The forestero has a very acidic aroma and a strong bitter flavor and represents over 80 percent of the world’s cacao bean production. Africa is the largest producer of forestero cacao beans.
The third variety is a crossbreed between the criollo and the forestero. This variety is grown in several parts of the world and its quality depends on where it is grown. The finest of these beans are grown in Central and South America. These three main varieties have several sub varieties, each having their own characteristic flavor and aroma. Makers of the Grand Crus quality chocolates will use the finest single variety cacao bean they can find. However, the vast majority of chocolate products are made from the subtle blending of a variety of carefully chosen cacao beans.
Picking and fermentation
When cacao pods ripen they are cut from the tree by experienced pickers using razor sharp machetes. The pods are split open almost immediately and the seeds, covered by a sticky white pulp, are removed and piled into baskets. Anyone curious enough to taste one of the seeds at this point will experience a bitter, acrid taste not at all like chocolate. After being removed from the pod, the beans are allowed to ferment in the pulp.
During this magical process the embryo is destroyed, preventing germination, and nearly 500 substances inside of each bean become active. The final flavor of the bean is determined during this critical process.
Depending on the variety of bean, fermentation will be allowed to continue from three days to a week. The length of the fermentation will determine the strength the bean’s final flavor. The longer the fermentation, the stronger the flavor. Each variety of bean, depending on where and how it is grown, requires a carefully calculated fermentation process. For some varieties, if the fermentation is too long the seeds can develop an overly strong, acrid flavor. For other varieties, too short a fermentation will leave the bean almost flavorless.
The final destination of the beans will most often determine the fermentation process. Beans shipped to most English speaking countries will be fermented for a short period, producing a fairly mild, almost bland flavor. Cacao beans intended for French markets will undergo a longer and slower fermentation which produces a strong, full-flavored bean.
|
||||||
After fermentation is complete, the beans are usually sun dried for one to two weeks. They are then cleaned, sorted by size and color, packed into jute sacks, hermetically sealed, and stored in cool warehouses to await shipment. With shipping, the grower’s job is usually done. Processing of the bean into chocolate is then preformed by manufacturers all over the world.
Art, science, or magic?
Preparing the dried beans for the production of chocolate and cocoa is a very sophisticated and precise process. As soon as the beans arrive at the manufacturer’s factory they are fumigated and cleaned to remove any dried pulp or other matter. The beans are then roasted at a temperature ranging from 250 to 350 degrees F for thirty minutes to two hours. The roasting process sparks the many substances activated in the bean during fermentation into performing their alchemy. The slow roasting process creates subtle browning flavors which combine with these substances to develop the familiar aroma and flavor of chocolate in each bean. The exact time and temperature of roasting is dictated by the quality and variety of the bean. Each variety of bean is usually roasted separately to insure quality results. The beans are then blended according to the manufacturer’s closely guarded formula.
After roasting, the beans are broken open and the shell is separated by controlled currents of air. The inner portion of the bean is now referred to as a nib. The nibs are ground into a thick paste, called chocolate liquor, which consists of small particles of nib suspended in an indigenous fat called cocoa butter. A second grinding is often performed to reduce the particle size of the nib to a desired range. Further processing of the nib depends on the intended product.
If cocoa powder is to be the end product, most of the cocoa butter is removed using a special press. The resulting paste is then formed into cakes and ground one more time. The resulting powder is sometimes treated with an alkaline solution to raise the pH of the powder from slightly acid to neutral. This simple process, called Dutching, darkens the cocoa, mellows its flavor, and makes it easier to mix the powder with a liquid. Of all chocolate products, cocoa powder contains the least amount of cocoa butterfrom 10 to 20 percent.
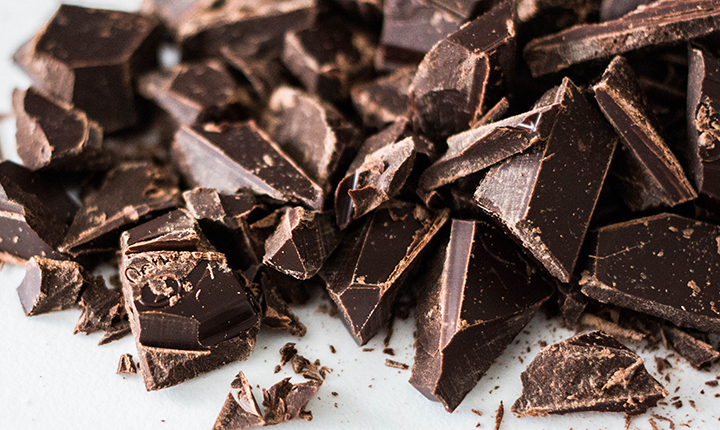
Chocolate liquor destined for production into baking chocolate or one of the many types of ready-to-eat chocolate is treated very differently from cocoa powder. Bitter chocolate, the type used solely for cooking, is chocolate liquor that has simply been molded into blocks without further treatment. It contains roughly 53 percent cocoa butter. Eating chocolate is further enhanced with cocoa butter, sugar, milk, vanilla, and other ingredients. The addition of these ingredients varies according to the type of chocolate being made. The three main varieties of eating chocolate are: bittersweet chocolate, sweet chocolate, and milk chocolate. Throughout the world chocolate manufacturers have their own carefully guarded secret formulas for making each of these varieties.
Ready-to-eat chocolate is also conched. Conching is a process that mellows the flavor of chocolate by evaporating excess moisture and volatile acids from the mixture. This unique process, which continues for several days, mixes the finely ground and blended chocolate at temperatures ranging from 130 to 160 degrees F while exposing it to a blast of fresh air.
Whatever the end product, and however it is made, chocolate is without a doubt one of the world’s favorite foods. It is my hope that the simple, but fun recipes in this article will demonstrate for you that the cacao tree truly produces fruits deserving the title “food of the gods.”
No-brain chocolate fudge
While growing up I watched my mother make tons of chocolate fudge and I don’t remember ever seeing a recipe in her hand. I was convinced that even a novice candy maker like myself could make fudge. When I found what I believed to be her secret unseen recipe, I was sure that I had found a no-brain road to success.
All of those years watching her breeze through batch after batch of fudge, without any difficulty, gave me a false sense of confidence. So I set my mom’s instructions aside, convinced that I could make fudge as well as she did.
After my third successive failure, however, my ego was displaced with a wave of common sense. In a desperate effort to avoid complete frustration I decided to sit down and carefully read my mother’s detailed notes on fudge making. When I finished reading, I clearly understood what I was doing wrong. I also, for the first time, understood the true extent of my mother’s candy making talent.
Fudge, according to my mother, is a special type of candy, because it can be made in an infinite number of flavor varieties. Each variety has some subtle differences in preparation. “But remember,” she would say, “regardless of the variety, fudge is only a simple candy. And candy is easily made simply by cooking a concentrated sugar solution to the right temperature, then controlling how you bring it back to room temperature.”
|
||||||
All of this sounded easy to me, until I tried it. I had to go back to my mom’s “fudge for dummies” notes for help. In short, this is what I learned:
Most fudge starts out as an 85 percent sugar syrup consisting of about a two-to-one sugar-to-liquid mixture. This is also called a saturated solution because the amount of sugar that can be dissolved in the liquid is at its limit. If any more sugar is added, even the smallest amount, it will not dissolve in this solution. But, if you now cook this mixture, much of the water evaporates, and the mixture becomes super saturated, that is, the mixture now has more sugar in solution than it should to be stable. But as long as the solution stays hot this super saturation is not a problem and the excess sugar will not precipitate out. But, as the solution starts to cool, it gradually becomes thick and sluggish. This slows the movement of the sugar molecules. Under these conditions the slightest disturbance of the mixture can cause these slow moving excess molecules to fall out of solution. This action continues until the solution is, once again, in saturated balance. Everything would probably be fine if all of these loose sugar molecules would just go away, but they don’t. They hang out in the form of large ugly crystals that can make fudge dry and ugly. Fudge that has fallen victim to the precipitation monster usually has a sawdust texture.
Nanna V would also caution: “Never make fudge on a rainy day. All of that moisture in the air gets sucked into your fudge while it is cooling and turns it soft and runny. Also, once you start beating the fudge, don’t stop until it is ready to mold into the pan. If you stop beating before the fudge is ready, those large ugly sugar crystals start forming. The only way to keep them under control is to keep stirring.”
By following the simple preparation method accompanying my mom’s recipe, you will be able to make delicious chocolate fudge every time, even if you don’t understand the science behind the whole procedure. All you need is a heavy-bottom sauce pan, a strong wooden spoon, a candy thermometer, a strong arm for stirring, and a Nanna V chocolate fudge recipe.
The candy thermometer is the easy way to determine when a sugar solution reaches the soft ball stage. Depending on the type of fudge being made, the soft ball stage will be reached when the mixture reaches a temperature from 234 to 240 degrees F. This fudge will be at soft ball stage when the candy thermometer reads 238 degrees F when the weather is warm. When the weather is cold and dry it will reach soft ball at 236 F.
In my next column I will dig further into Nanna V’s candy making notes. Making candy at home can be a rewarding family activity. Remember, all you need to make candy is water, sugar and a little know how.


