| Issue #105 • May/June, 2007 |
We have a good well with sweet water. It was already in place when we bought our property and had been in use for more than 20 years. We had looked in the well house a few times, during the winter, in particular, when a 100-watt bulb was used to keep the pipes from freezing. I understand the concept of wells, but had no practical knowledge. The well house was a small shed with a tin roof, built on a slab, with insulation in the walls and ceiling. There was one junction box with two electrical outlets. The pump was plugged into one outlet; the other was used for the lamp. Two brick rings, about two feet across, were next to each other in the slab floor, covered with wooden lids. There were gaps in the lid, between the timbers, and the flashlight reflected off water below. Two-inch PVC pipe came out of one lid, the other had a pump/tank combination sitting on it. The pump was a large electric motor about the size of a pool pump, and it was mounted on the side of a 30-gallon tank. It looked older than Moses.
|
The timbers used to make the lid were in pretty rough shape, old and rotting, and were going to have to be replaced someday in the near future. In particular, the lid supporting the pump was going to have to be replaced. Thirty gallons of water is a lot of weight to sit on rotting wood. I didn’t want to mess with it because it looked like a big project, so the first year we let it be. There were some mouse traps in the well house, but this is the country.
I was raised in the suburbs and spent a lot of time living in apartments and suburban neighborhoods as an adult, so what I knew about a well wouldn’t even fill a small hat. That all changed when a mouse fell into our well. It started last springthere was a smell to the water that was noticeable when you ran the shower. Women have a keener sense of smell than men (try sneaking past mom after beer and cigarettes), so my wife noticed the water before I did. I chalked it off to algae or something. In a day it got so bad that when you lifted a glass of water to your mouth the smell could make you gagthere was no mistaking the smell of decomposition. We immediately started using bottled water for drinking and cooking. It was obvious that the well had to be fixed fast. I’m pretty comfortable with plumbing as far as sinks, toilets and other minor tasks are concerned. It is a chore that can be frustratingalways seems to require three trips to the hardware store to complete any project. But the idea of messing with the well and my fresh water supply filled me with dread, and it couldn’t be put off a moment longer. We did have the basic tools and materials handy.
Starting out, we had to:
- inspect the works and remedy the source of the water contamination
- replace the wooden lids
- purify the water
Sounds simple, doesn’t it?
|
The first thing was to take off the lid covering the water intake. The lid crumbled away in my hands. I got most of it, but a lot of rotting fragments fell into the well. The surface of the water was about four feet below the floor, and there were Mickey and Minnie, floating face down in the water. There was also a ripe smell wafting up from the water (retch!). I tried a garden rake to scoop them outthat worked for Mickey and Minnie. Closer inspection with a flashlight revealed two more mouse corpses resting on the bottom of the well, two feet below the surface. I had to lie on the floor and could just barely reach them with the rake. I scooped up the first one and was gently lifting it out. Those mice must have been in there some time, because it disintegrated when it hit the surface of the water, oozing through the tines of the rake. They don’t teach you how to deal with this sort of thing in high school shop class. The idea of a pool skimmer came to mind, but we don’t live in an area where there are a lot of pool supply places. Fortunately, my wife had some cheesecloth handy, so we made a loop of wire, threaded the cheesecloth on it, and attached the loop to the end of a long 2×2. It looked like a long-handled ladle when we got done. That worked quite well for scooping stuff off the bottom of the well.
Next, we needed to replace the timber lids. That meant dismantling and draining the tank. We were very lucky that the whole works had not broken through the rotting lid. To be safe, we had purchased two 50-gallon plastic barrels from the local co-op. These barrels were made for shipping olives (I kid you not) and the co-op was selling them cheap as mouse-proof feed containers. They even came with gasketed lids. With a drill and a little hardware, I put spigots on the bottom of the barrels. We set these up on cinder blocks (about 18 inches above the ground) and filled them with water. We didn’t know if we would need them for priming the pump or well, but it seemed like a good idea to have some water handy. We drained the pump holding tank and disconnected it from the plumbing, breaking a few rusty fixtures in the process. The lowest drain plug on the tank was frozen solid, so I couldn’t flush out any sediment. At that time we weren’t ready to replace the pump and tank unless absolutely necessary. We did manage to get the water level down to the output side, removing about 2/3 of the volume, making the tank and water light enough to manage.
|
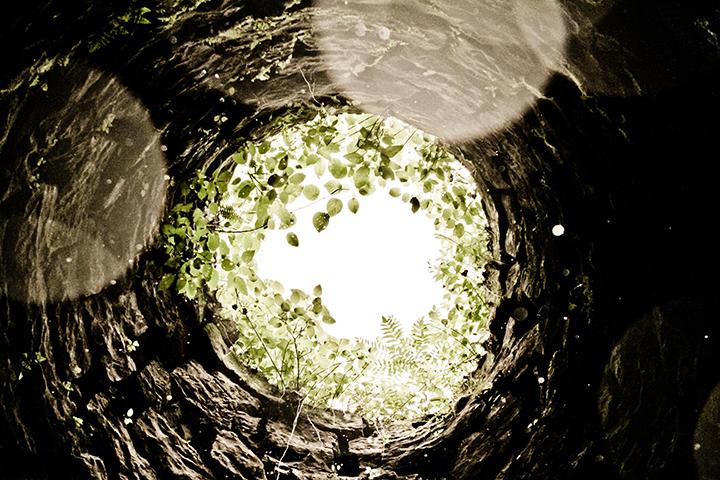
Once the second lid was off, I could get a good look at the layout of the well. The second pit was a mystery to me, other than collecting water dripping from the pump and tank, it seemed redundant. Both pits had a water level four feet below the floor, to a depth of about two feet, and were connected by a 12 inch pipe, below the water level. The bottoms of the pits were filled with gravel. We are fortunate to have a high water table, making all this stuff easy to see and work with. Filling the barrels with 100 gallons did not affect the water level at all. After scooping out pieces of rotten wood and ensuring there were no more mice, we made new lids. The mice had gotten through gaps in the old lids, so to prevent this from happening in the future, we covered each pit with ¼-inch hardware cloth. Around the gap where the intake pipe came through the lid, we added window screening. New lids were made out of one inch sweet gum boards, crossed with 2x4s screwed into the boards to hold the whole affair together. Sweet gum is a hard wood that we happened to have on hand, freshly sawn. We allowed a good overlap on the pits, the rim of which was one brick above the slab.
Next, we repositioned the pump and reconnected it to the plumbing. Old, garden-type cutoff valves were replaced with ball valves. They are a little simpler and less prone to problems than the ancient plumbing fixture we removed. The nipples leaving the tank were rusted useless, so we replaced those and got a new metal-to-PVC adapter. The pump turned out to be self-priming, so we didn’t need the 100 gallons of water in the barrels. While I was cussing and plumbing the works back together, my wife was on the internet looking for information on cleaning wells. Chlorine is the chemical of choice for water purification. We had removed the food source for any bacteria, to the best of our ability, and now needed to sterilize the water. With swimming pools, you call this “shocking” the waterusing a massive dose of chlorine to zap the water. The cheapest source of chlorine is bleach, so we bought a couple of gallons of generic bleach (avoiding any with soap or other additives). To figure water volume, we had two pits, two feet in diameter, at a depth of two feet. Each pit was d(pr2), where d is depth, p (pi) is 3.14, and r is radius (half the diameter); so 2´(3.14´[1´1]) or 6.28 cubic feet. That’s about 47 gallons (7.47 gallons per cubic foot) for each pit, or a total of about 94 gallons for both pits. My head was spinning from trying to pull all this stuff from high school math. The directions we found were for wells with a much greater volume than ours, so we shot from the hip. We tossed in about four gallons of bleach (roughly 4% by volume).
|
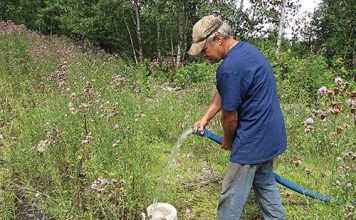
First, you need to get this bleach to every part of the system. You do this by running a hose from the well house spigot until you smell bleach. Once you’ve done that, you run the hose into the well, to keep the bleach water circulating. Next, you go into the house and run each cold water tap until you smell bleach. There were cautions about running hot water, so we shut off the hot water heater and left the hot water taps alone. I think the reasoning was that the hot water heater could corrode with bleach. After we had bleach water through the entire cold water system, we let it sit for 48 hours. The instructions recommended 24 hours, but I didn’t want to have to repeat the process any time soon, so went into overkill. After 48 hours, we turned the hot water heater back on. We ran the well house hose on the ground, outside the well house, to get the bleach water out of the well and pump. Once the bleach smell went away (clean water), we went into the house and ran hot and cold water until the bleach smell disappeared. That flushed the hot water heater and purged all the lines between the well and house. A smarter fellow than me would have run a hose through the window from each tap, to keep the chlorine from wreaking havoc with the septic tank, but I was pretty tired and wanted a hot shower really bad.
|
The last step was to check our work. A friend of mine that used to do well work, and advised me on this job, said the county would test the well for us. He had been retired a number of years, and things have changed. The county wanted $150 to test our water, and had such complicated requirements for collection that we would, in effect, be paying them to hassle us. My wife (did I mention I married a smart woman?) returned to the internet and found test kits for $15 (watersafetestkits.com). We bought two of them, just in case we turned up positive and needed to redo and retest. The county was going to check for biologicals, like e. coli and such. The test kits not only checked for e. coli, but also for lead, pesticides, nitrates, chlorine, hardness, and pH. Such a deal! All tests results were negative.
Here we are, six months later, and the water is as good as it ever has been. The septic tank does not seem to have suffered any ill effects, but we hit it a few time with Rid-X to recharge the culture. We walked away from the experience feeling pretty confident that we could handle the well. It is only plumbing, after all. We’ve also been looking around at pumps and tanks. Technology has made some dramatic improvements since our pump was installed. There are more efficient pumps out there that are simpler and give more bang for the buck than our old pump. The tools needed are simple: a pipe wrench, pipe cutter, Teflon tape, coping saw, and PVC glue. Short of the sides of the well caving in, I think we can handle most problems that could come up.


Well written brother,
I had to laugh out loud so many times, I have had such a similar life experiences. I can plumb, and can use the Internet. I am very grateful for what you wrote, it has helped me a lot on my way, WELL along my way!
Thanks for pointing out that after fixing or cleaning it well it can be smart to buy a test kit to help test the water to make sure that it is safe. My husband and I have noticed that our well water is starting to get murkier and we think it might need to be cleaned soon. I think since it seems kind of complicated it would be smart to hire professionals to do it for us so that we wouldn’t have to worry about messing it up or about testing the water on our own.