By Charles Sanders
My parents were children of the Great Depression. They learned to get by on very little, to make or repair or reuse almost anything, and never throw anything away — it might be needed later. That philosophy was learned and applied throughout their later lives. It showed in the stacks and shelves of items and material they “kept on hand” in case it was needed or could be used. I suppose that I learned that behavior, and have continued it to an extent, for better or worse.
Below, I’ve noted some of these things I’ve done around our place to get things accomplished. Sometimes, money was the issue; on other occasions, it was time. Often as not though, I just simply enjoy seeing what I can come up with.
I hope you find some of these ideas useful. Perhaps they will spawn ideas of your own. I’m sure you can improve on what I’ve noted here.
Chickens
As autumn approaches, the amount of daylight decreases and the egg production of the home flock can go down. Hens need at least 14 hours of daylight per day to maintain egg production. To extend the egg-laying season in your flock, you can provide extra light during the dark portion of the day. I did this by putting a light on a timer to come on in the morning at the appropriate time. I roughly figured how much would be needed to be added to the available daylight to equal the required 14 hours. The timer came on in the morning, jump-starting the hens’ day. The light went off after a couple of hours and the hens took to the roost as the daylight waned in the evening.
When raising chicks, I like to use two heat lamps hung at different heights. By putting one at about 18 inches above the floor and another at about 24 inches, the chicks can choose the area that is most comfortable for them.
When starting your chicks, placing a few ordinary glass marbles in the feeder will help them begin using the feeder. The chicks will peck at the colorful marbles and begin to pick up bits of feed as they do.
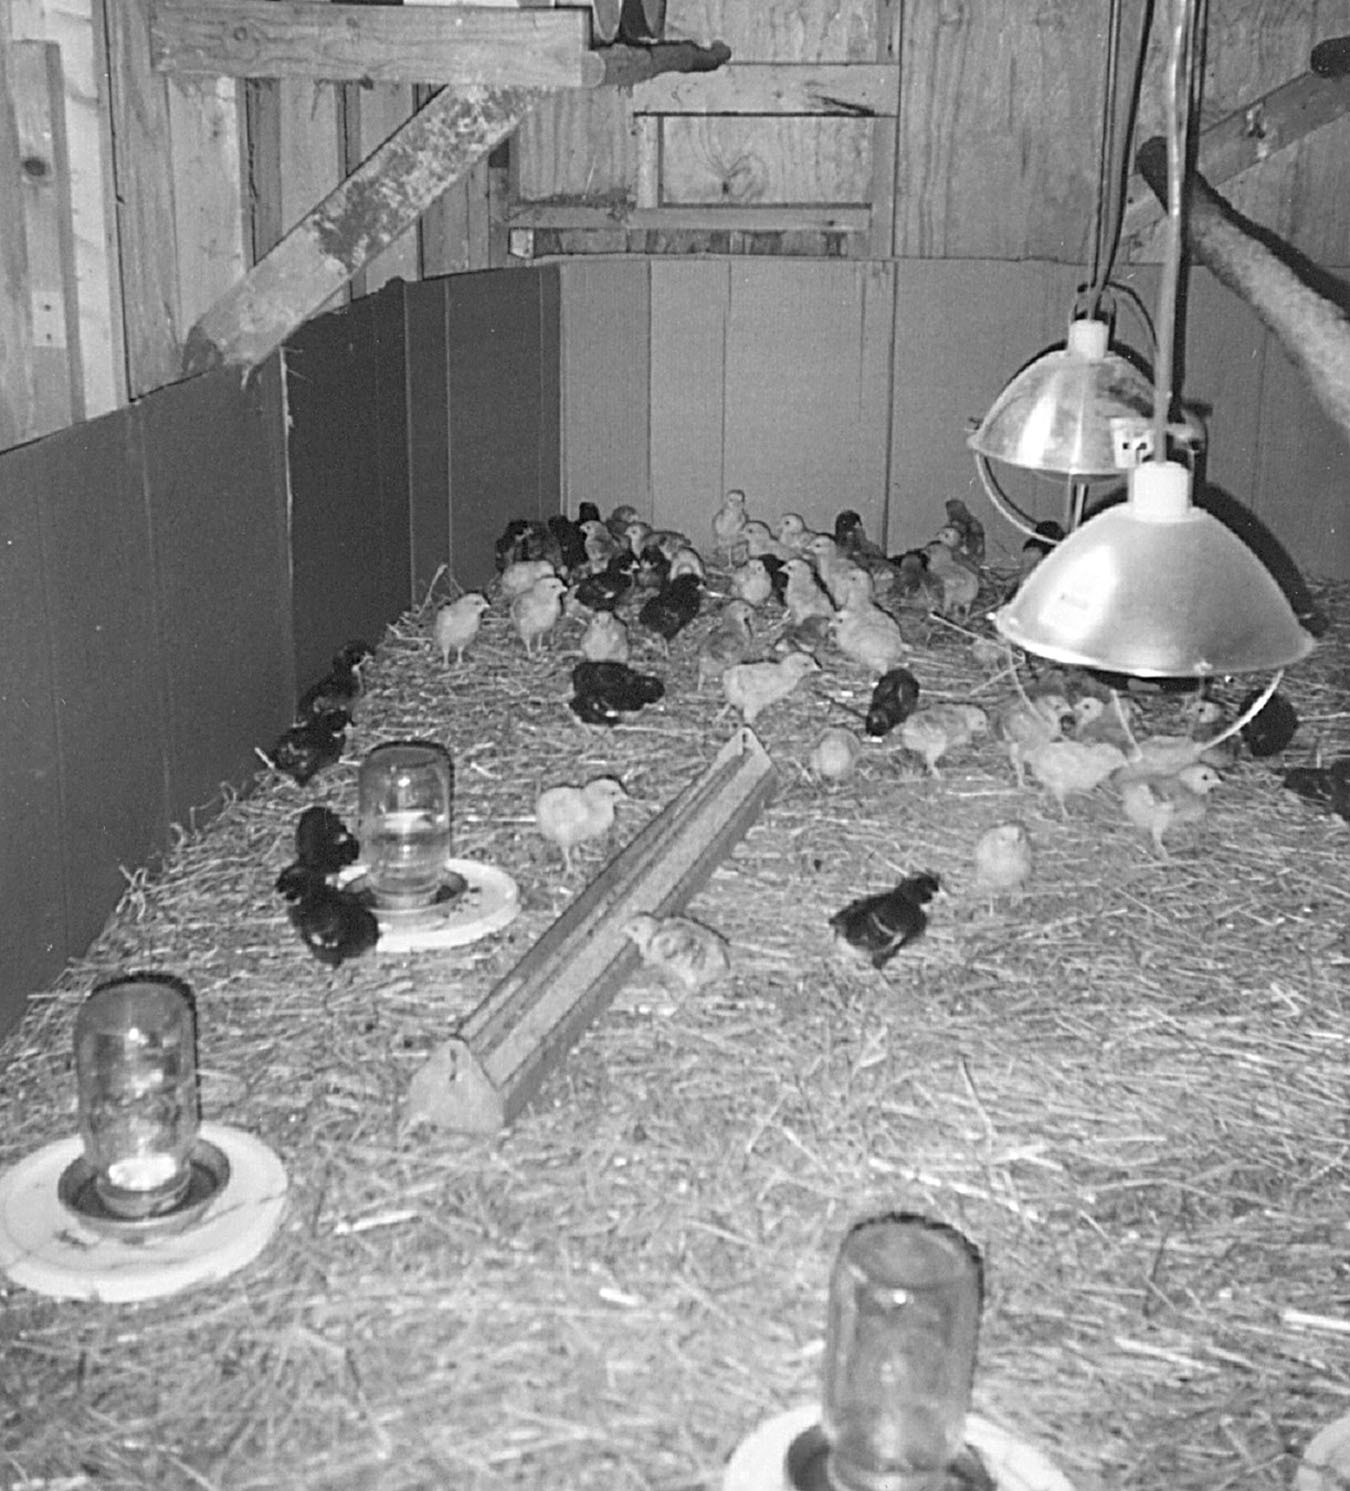
Here we are starting a bunch of new chicks. The heat lamps are adjustable for height (and warmth). Cardboard has been added and corners rounded to prevent chick pileups. The waterers are sitting on bucket lids to help keep litter out of them, resulting in cleaner water and drier bedding for the chicks.
We have started new chicks in a plastic childrens’ swimming pool. Use a pool with sides tall enough to keep the little peepers from jumping out.
Once the chicks were large enough to be allowed into a larger space, we turned them out into the chicken house. Before we did, however, I stapled cardboard up around the base of the room. I rounded the areas in the corners as well. That will eliminate any corners where the chicks can pile up on one another.
In the shop
If you have a barn or shed door with a hasp like the one shown in this old illustration, you may have difficulty with the doors lining up properly allowing the use of a padlock. The doors on old sheds and barns often sag and make lining up the hasps difficult. You can remedy this problem by making a simple modification on one or both sides of the hasp. To do this, remove the hasp and use a file to make the bolt hole into a slot. Reattach the hasp and tighten the bolt down to just not quite tight. That will permit the hasp to move up or down and make it easier to line it up when locking the doors. Attach the hasps using carriage bolts with the nuts on the inside of the doors to prevent removal from the outside.
I obtained a used solid-core door panel and used it as a work bench. In this case, the door was already made in a convenient width — two feet, but a door of greater width could be used or ripped and the raw edge placed towards the back. In fact, by making a good smooth cut, the left over piece could be used as a back for the bench. Using lumber I had on hand, I built a sturdy frame and included a shelf beneath part of the bench. I made it 34 inches tall so that once the door panel was placed on top of it, the bench height would be about 36 inches, a good height for most work. Use a heavy, solid core door if at all possible to stand up to the tasks and chores the bench will be supporting.
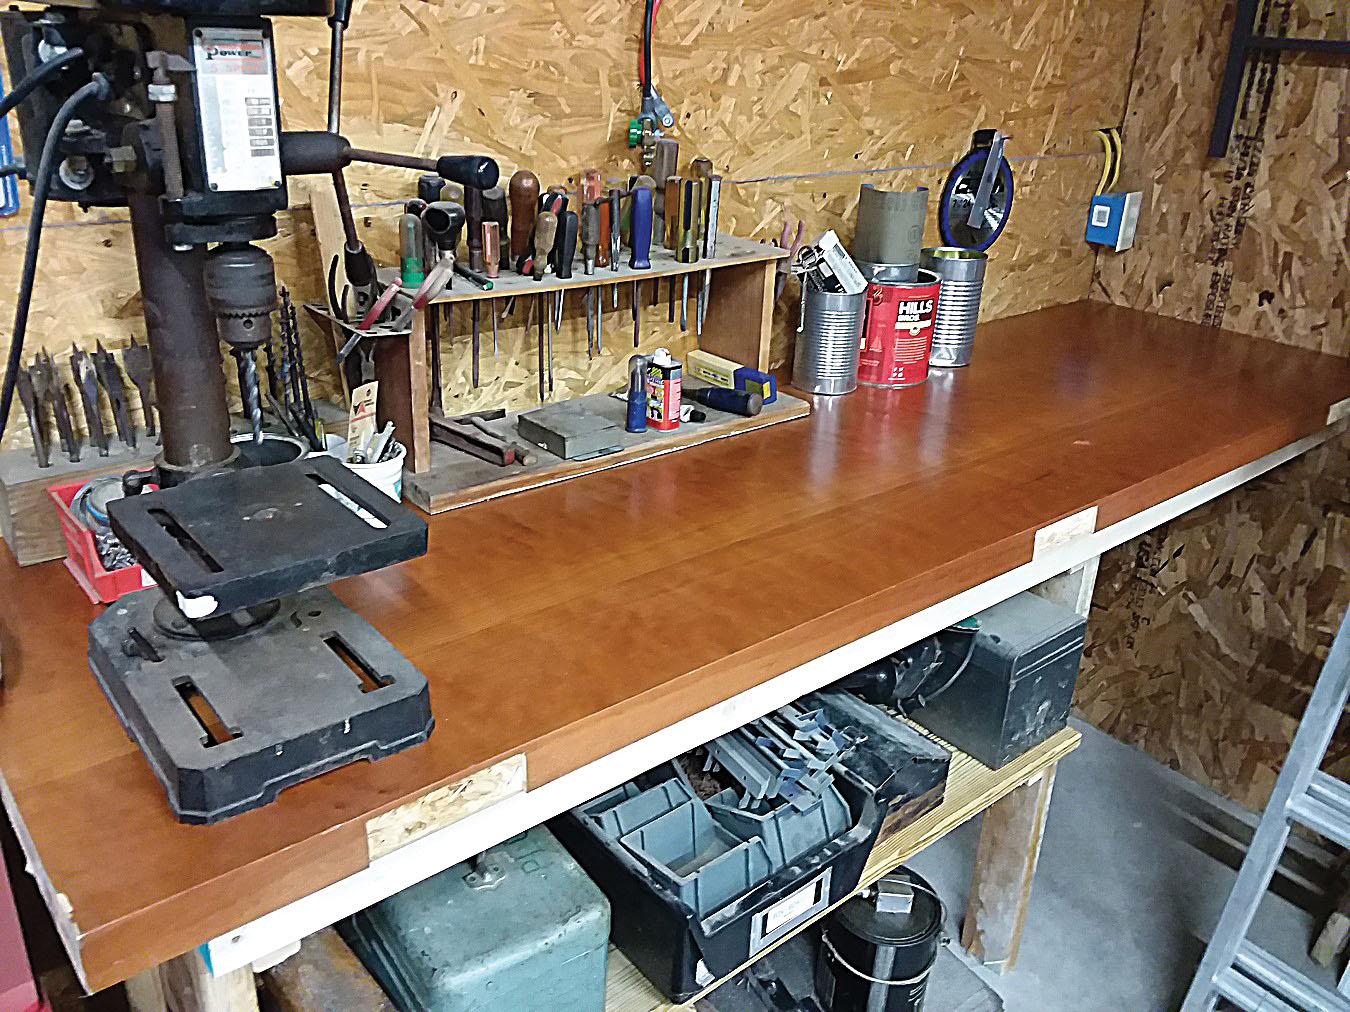
This heavy door panel made an excellent workbench top.
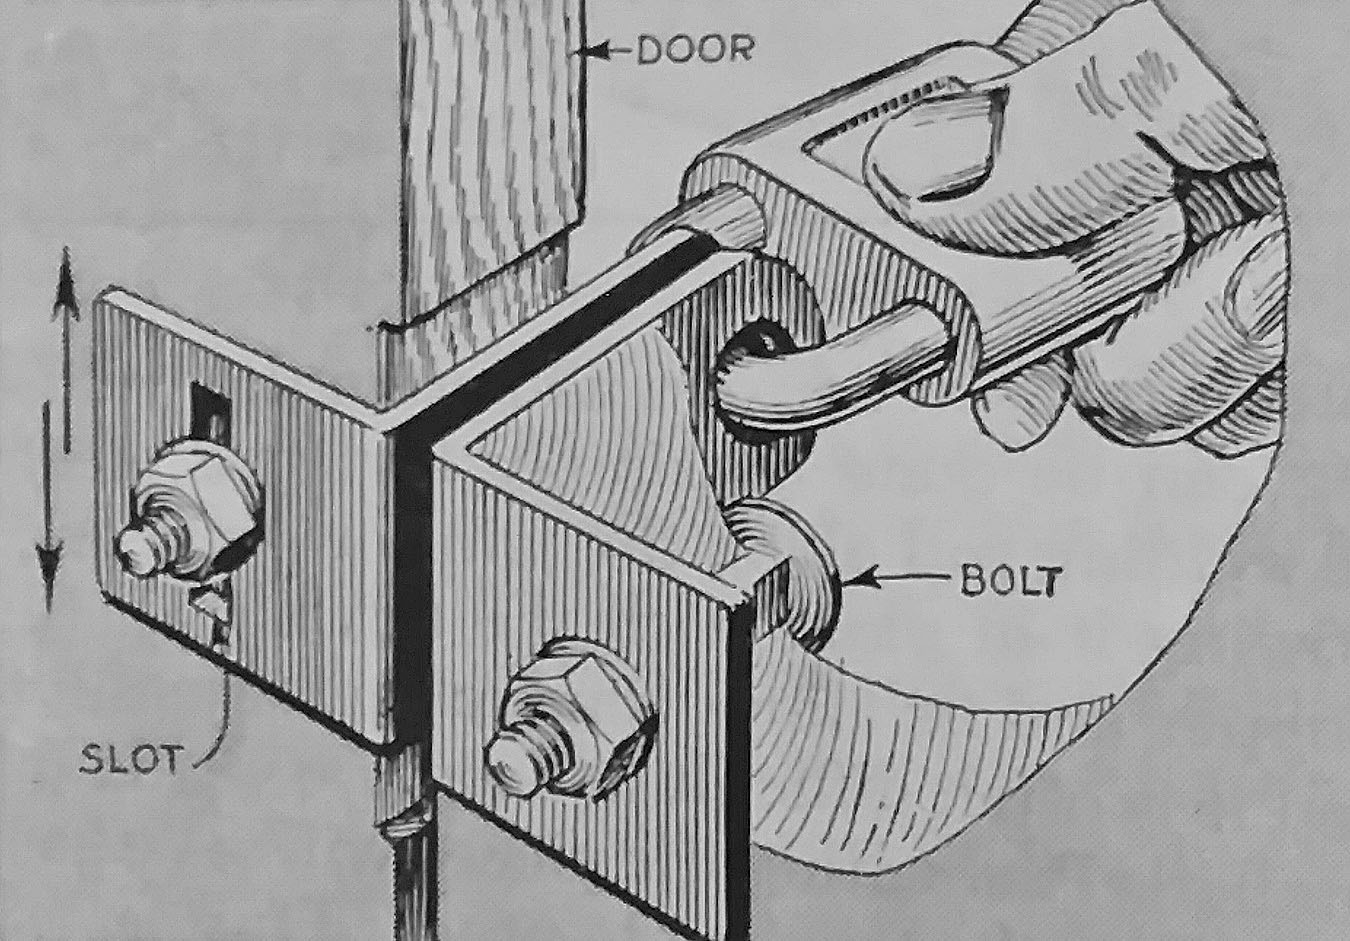
By converting the bolt hole into a slot, a door hasp can be made moveable and more easily aligned with the lock.
Years ago, I began using empty one-quart oil containers as bins for a wide variety of hardware in my shop. As I gathered a supply of the bottles, I set a board as a gauge on my bandsaw and cut the tops off of each bottle just below the shoulder. Next, I used scrap lumber to build a shelf to accommodate the new bins. In spacing the shelving, I measured the height of the bottle and added a quarter inch or so. A permanent marker is used to note the contents of each bin on the shelf.
More recently, I’ve taken to using recycled peanut butter jars for the same purpose. They are plentiful (around here, anyway!), fit the shelf along with the other containers, and since they are clear, it’s easy to view the contents.
In the orchard
Young fruit trees in our orchard sometimes need some help growing into the proper or desired shape. Simple limb spreaders do the job. I picked through the scrap pile and in no time, had cut a bucketful of spreaders for use on our apple trees. I simply ripped some pieces of left over deck boards and cut a notch in each end. I made the spreaders in random lengths to be used as needed in the orchard.
Also, whenever I’m transplanting a new tree, I use a piece of corrugated plastic drain tile from which to make a trunk guard. I simply cut a piece of the plastic tube with a utility knife, then split it from one end to the other. Then, I carefully open up the slit tile and work it around the trunk of the newly transplanted tree. Be careful as you do this so as not to tear through the thin bark on the transplant. Once it is in place, I work it into the soil a bit so that it will remain upright and not rub the tree. The guard will protect the tree from rodents and actually help keep weeds down inside it for a good while.
If you have mature fruit-bearing trees, picking the fruit can sometimes be a problem, especially the fruit high in the tree. I made a picker to help with the chore. I first obtained a length of metal electrical conduit. Then, using some scrap welded wire, I shaped a cylinder about 5 or 6 inches in diameter and about 10-12 inches tall. I cut the top wires and left 6 or 8 of them, carefully bending the tips over and crimping them down. Using a piece of an old cotton sheet, I sewed a cylinder the length of the sheet and about 6 or 8 inches in diameter. I attached the cloth cylinder to the bottom end of the wire basket. Using a couple of hose clamps, I clamped the cylinder to the conduit. In the photo, you can see the finished product and some of the details.
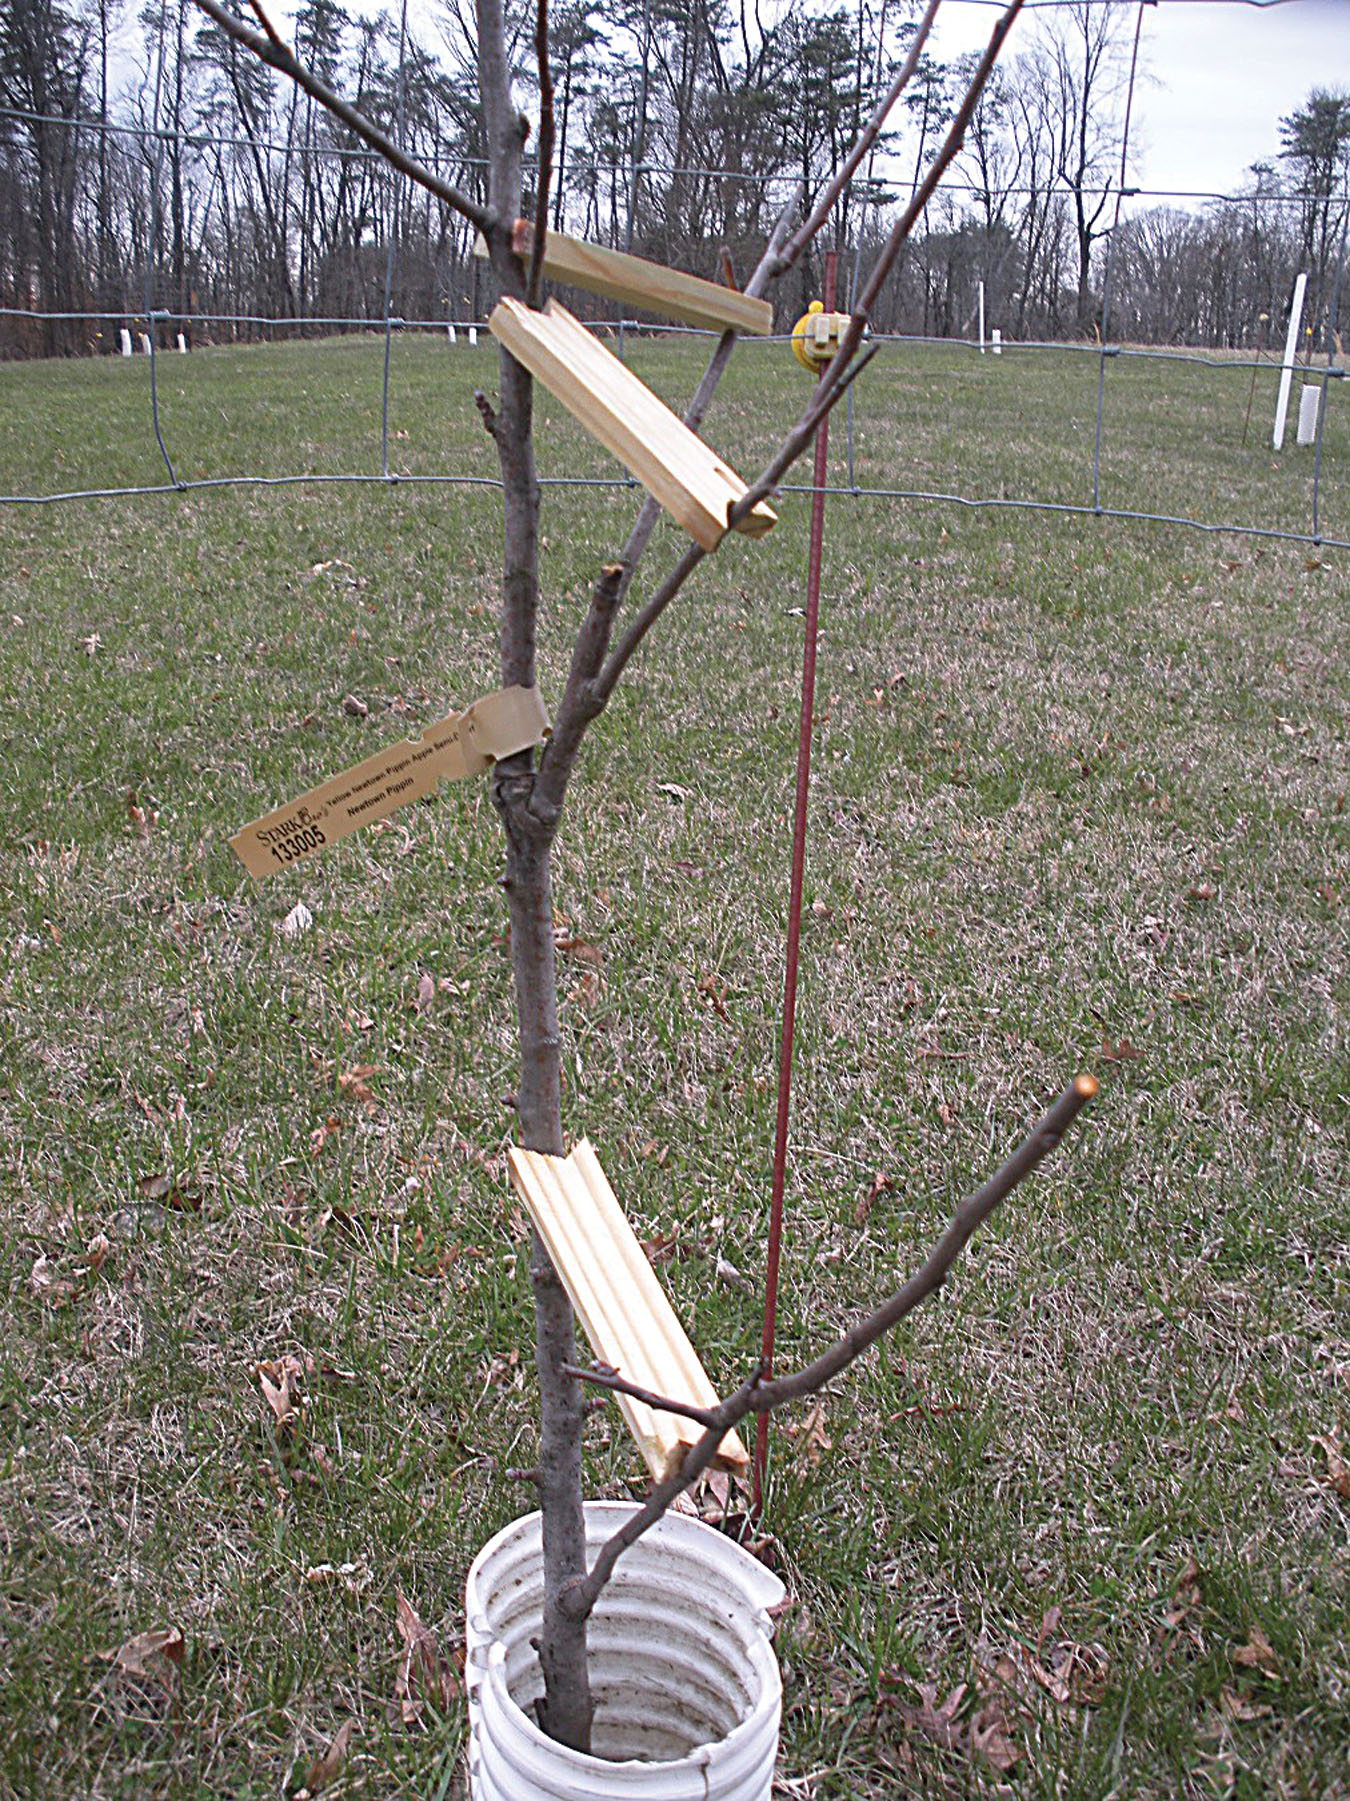
Limb spreaders cut in various lengths from scrap lumber are notched to help keep them in place. They are used to help create a more desirable shape to the tree. A piece of corrugated drain tile protects the new tree from rodents.
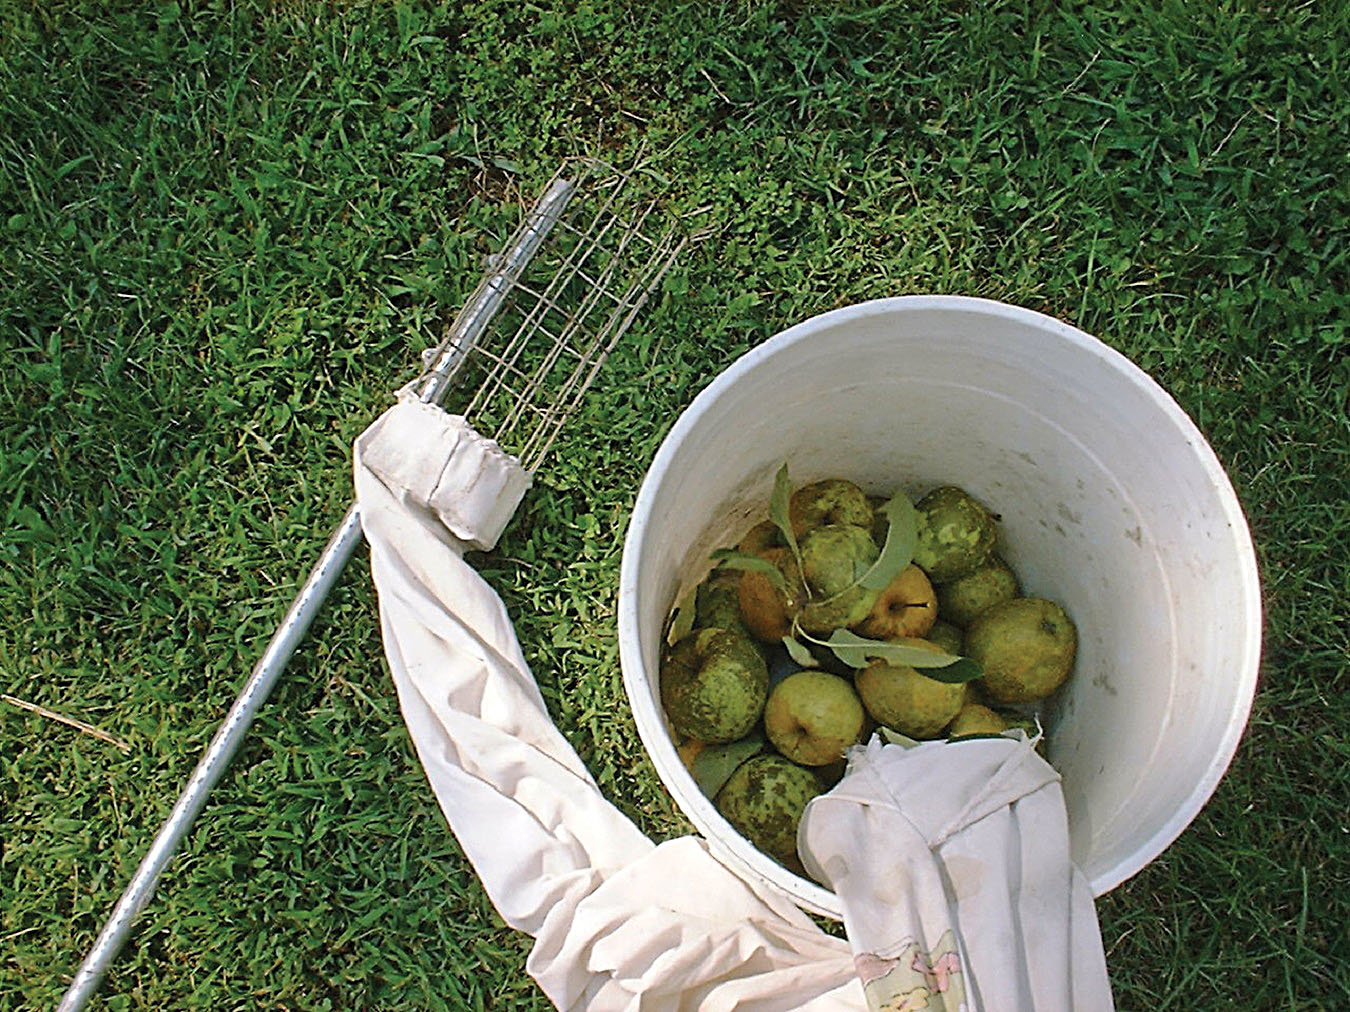
A bottomless apple picker is a great help when harvesting apples.
To use the apple picker, I first made a couple of loose turns of the sheet cylinder around the conduit where I could hold it. Then, I used the picker to reach up into the treetop and with the round wires in the back of the basket, I’d pluck apple after apple from the tree. The bottomless wire cylinder allowed the fruit to drop into the cotton cylinder. Since the sheet was loosely wrapped around the conduit, they slowly fell downward. This prevents the apples from thumping into each other and bruising them. Once I had a dozen or so apples picked, I simply held the sheet cylinder over my bucket and allowed the fruit to drop into it. It made for “easy pickings” of fruit that I might not otherwise have been able to reach.
Miscellany
When using a mousetrap where the chickens or other animals could be harmed by it, try this tip. Just invert a short scrap of ordinary roof gutter over the trap. The mice will have easy access, and the chickens won’t.
Wooden fruit boxes can be made into handy garden carriers by stapling lengths of heavy cord and knotting them together to make a handle. You can also add some stiff wire and a length of scrap PVC pipe to make a more rigid handle. I use one of these boxes to carry my beekeeping tools when working the hives.
Another handy item to have around the homestead is a sturdy wire sifter. I made one from scrap wood and wire cloth. It is about 2×2 feet square and has ¼-inch wire mesh on it. It is useful for sifting compost, garden mix, and other garden materials.
When we were using a handpump to help water our cattle, I had to make plans to keep the pump operational during the winter. Ordinarily, a hand pump on a well is susceptible to freezing and bursting in harsh winter conditions. I used this trick to keep the well from freezing and functional during the winter. I pulled the pump up out of the well and drilled a small (⅛-inch or so) hole in it about 10 feet or so down the pipe. Then I screwed in a metal screw to plug the hole. It would remain that way throughout the warm months of the year. As winter arrived, I pulled the pump out and removed the screw. That allowed the well pipe to drain out after use and prevent freezing and damaging the pump. It does require, however, priming the pump when you use it. That is done by pouring water down the throat of the pump as you work the handle until a good suck is created. During the warm months of the year and with the screw in place, priming the pump is not required, as the water does not drain back down the pipe. Don’t make the hole too big, or you may have difficulty in priming the pump.
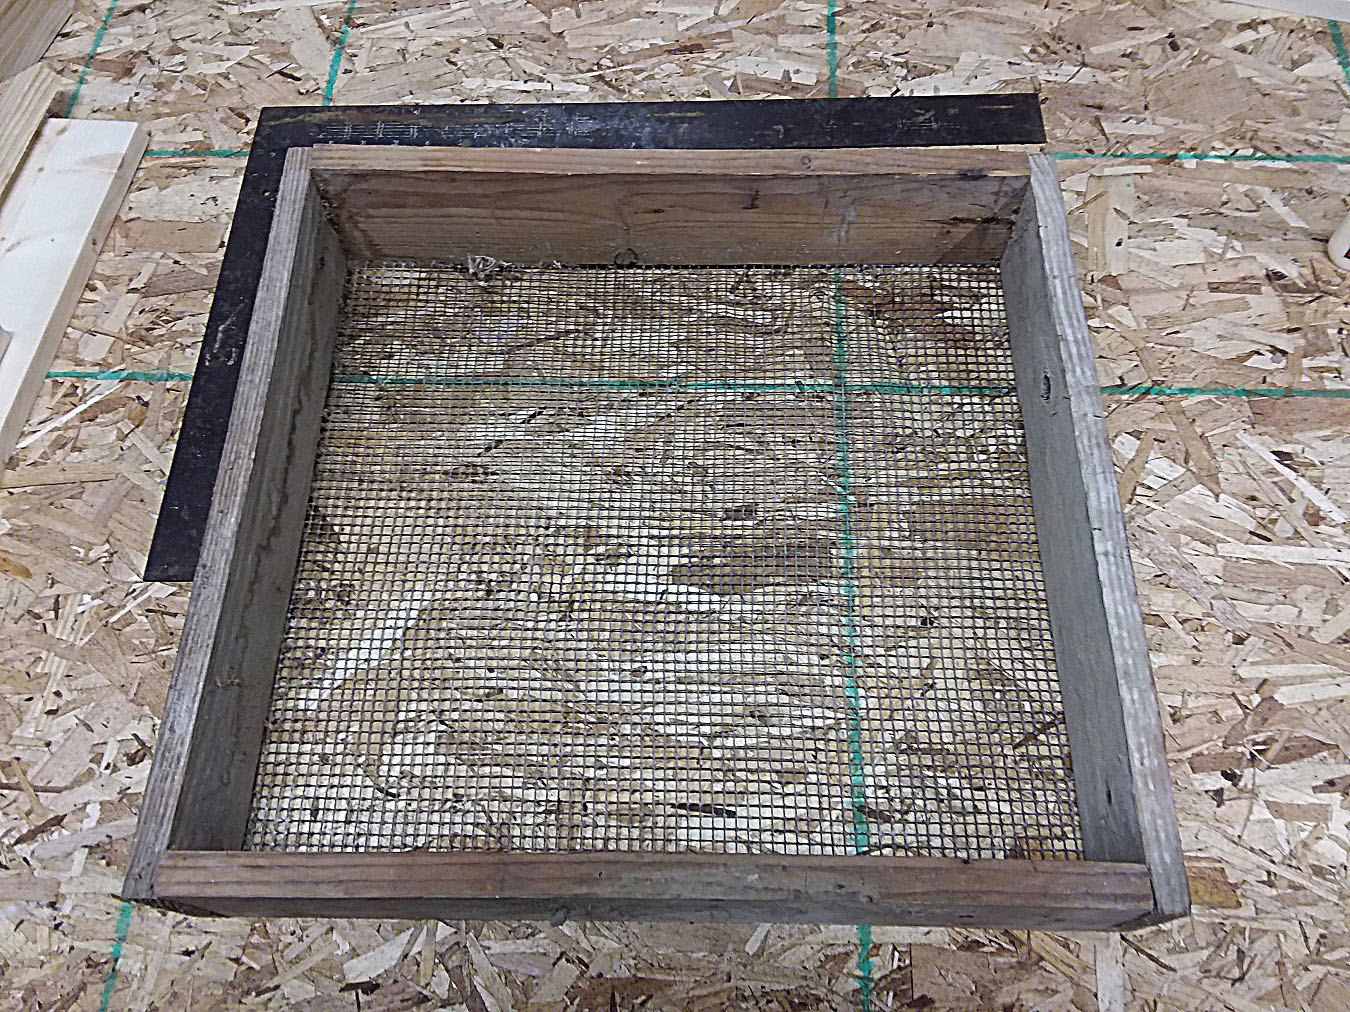
A sifter is useful for many things around the homestead. It’s easily made from scrap boards and some wire mesh.
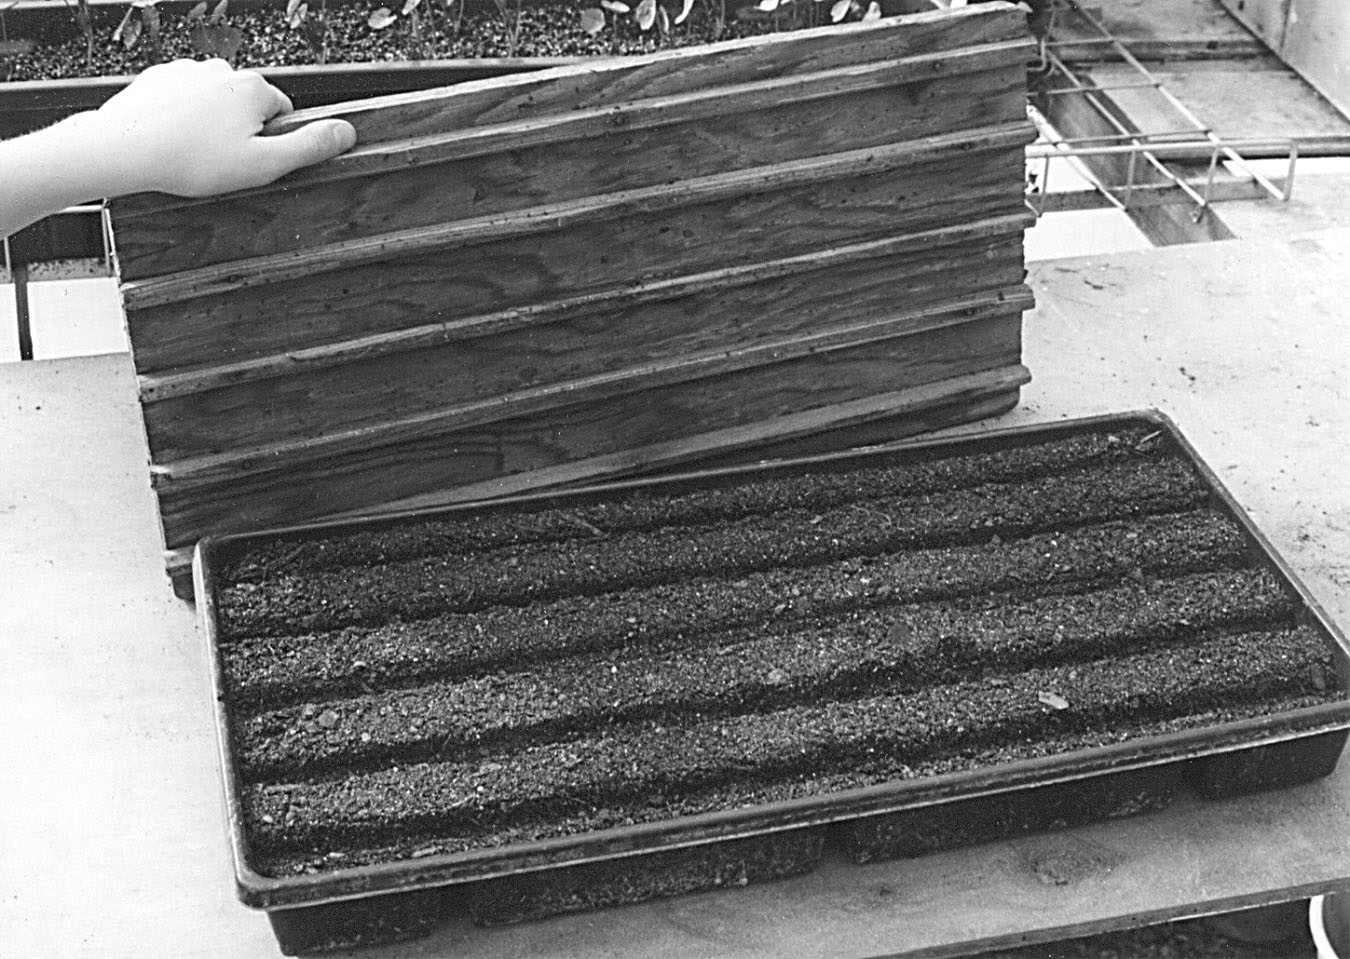
This row maker is easily made and can save time when starting a lot of seeds.
Back when we were starting lots of garden plants, I made a row maker to use in trays of starter mix. To do that, I first traced around the outside of a plastic plant tray on a piece of plywood. Next, I made a line about a half-inch inside the traced line and used it to cut the plywood to size. That made the piece small enough to fit just inside the tray.
Next, I cut some wooden strips the length of the plywood and a half-inch wide and a half-inch tall. I attached the strips to the plywood with some glue and brads, spacing them evenly across the board. Finally, I added a piece of wood as a handle. The row-maker is used by simply setting it onto a tray of soil mix and pressing it down into the mix. The result is five neat rows, ready for seeds. Quick and easy.
One final tip: When I’m working in the workshop, I sometimes smoke a pipe. There are times when I want to set it down while working. I made a simple pipe holder for the purpose by using a piece of an old leather belt. I cut a piece about 9½-inches long. Using an awl, I made two holes in it towards each end. Then I used my pop rivet gun to bind the ends together. Voilà! A custom leather stand for my pipe.
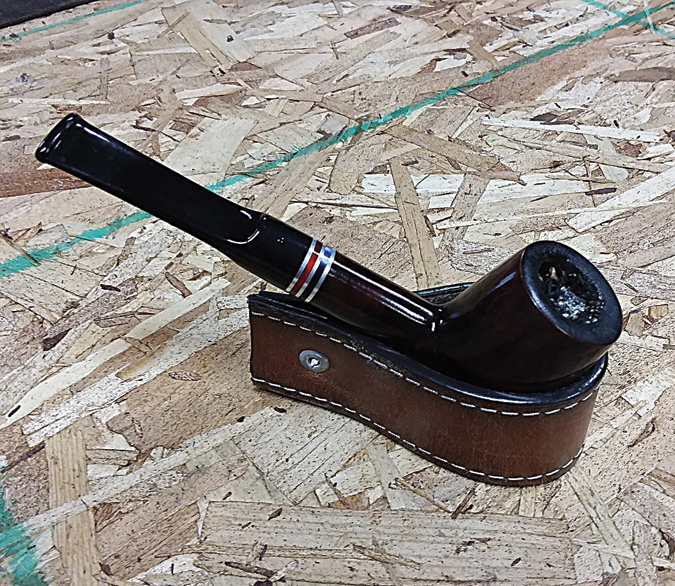
This pipe holder is made from an old belt. It’s handy when working in the shop.
I hope some of these tips will benefit you in your own pursuits. Sometimes we get bogged down or disillusioned when our projects don’t exactly turn out like we envisioned them. That’s okay. Use what you have and make it your own.


