By Melissa Souza
Garlic is easy and rewarding to grow. I use it throughout the year, as it is extremely easy to store. Garlic is one of the most commonly used ingredients in cooking around the world, but there are also many health benefits to adding it to your everyday cuisine. It is reported that high blood pressure, hypertension, blood clots, and infection can be prevented or cured by ingesting garlic.
Evidence of garlic use has been found as far back as the ancient Egyptians. During the Black Plague in Europe, gravediggers added crushed garlic to their wine in order to protect themselves from the plague. During World Wars I and II, wounded solders put garlic on their wounds to prevent gangrene or infection.
Planting
Garlic is grown from a single clove. Plant the clove pointy-side up and be sure to leave on the thin paper wrapping. Select the plumpest bulbs for replanting each year; this will give you a larger garlic bulb next season. Each bulb is placed about an inch into well-fluffed soil, and will then produce one plant with an average of 20 cloves. There are many different varieties of garlic, so do your research before planting to see which type suits your needs.
When choosing where to grow your garlic, select a place with deep, rich soil and good drainage. Garlic likes lots of sunlight, so don’t plant your garlic in shaded areas where it can fall victim to rot. Garlic will grow in soil with a pH above 6.0, but a pH of 6.5-7.0 is best. Add lime to your soil if you need to boost your pH.
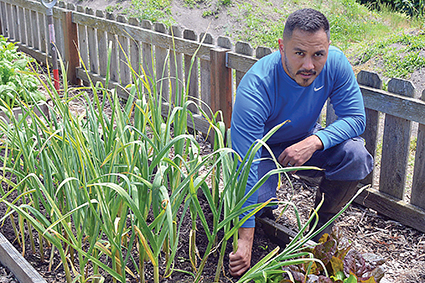
We plant the biggest and best bulbs from the previous season about 4-6 inches apart in early fall. They stay in the ground all winter long, and the green stalks begin to grow early in the spring. In mid-spring, each plant will send up a smooth tube with a seed pod on the end called a scape. Cutting off the scapes allows the plant to redirect its energy from producing seeds to improving the flavor and size of the garlic bulb.
Make sure to rotate your crops yearly so that you are not growing garlic in the same area that it grew the year prior. If planted correctly, you will reap a rewarding crop of garlic each year.
Harvesting
Once the garlic leaves start to yellow and the plump garlic bulbs start to push their way above the soil level, it’s time to harvest. We harvest our garlic in mid-June here in Washington, but each region will be different. To harvest, we loosen the soil with a flat-head shovel or pitchfork, and pull straight up to avoid breaking off the stalk.
Brush the loose dirt from each bulb. It is best not to wet or wash the bulbs, because this will make it more difficult to properly dry. We like to then braid the stalks to dry.
To braid garlic, lay one down the middle, and crisscross two on each side to form an “x” over the middle one. Then lay another one straight down the center. From there, braid the right side over the middle stalks so that the right one is now your middle strand. Add another bulb to the right side. Then braid the left side over the new middle stalk so that it is now the center stalk. You will now start adding garlic in. Lay a new garlic on the left side with its stalk down the middle. Now lay a new garlic down the center of the braid. Every time you braid a strand, it becomes the new middle strand, and you add in a garlic. Once you reach the end of the garlic, simply braid the strands to the end of the stalks, and secure with twine or the stalks themselves. There are many YouTube videos that show step-by-step garlic braiding, and it is much easier to understand once you’ve seen it demonstrated.
Hang the completed braids in the sun to dry for 1-2 weeks. These garlic braids are an attractive way to enjoy your garlic as both decoration and spice all year long.
If you don’t wish to dry your garlic, it can be frozen for longer storage. There is really no need to dry garlic first if you are adding it to canned goods, such as dilly beans, kim chi, salsa, and spicy pickles. However, if you are storing your garlic for any length of time, it is very important to dry it to prevent rot.
Using garlic scapes
Garlic scapes are part of the garlic plant that are so often looked over. They are the smooth tubes that grow out of the center of each garlic plant, and what will eventually grow the garlic seed pod and flower. They are quite delicious, and are ready to harvest about a month before your garlic will be.
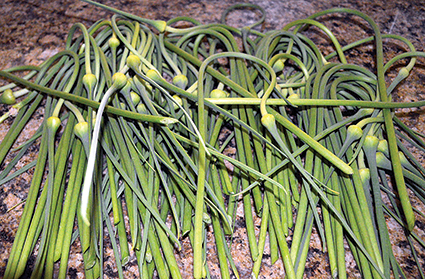
Wait for the scapes to be above the rest of the plant and curl over. Once it forms that loop, it is ready to harvest. Cut the scape as far down as you can without damaging the garlic plant leaves. Scapes are easy to preserve, but they will keep for weeks in the fridge.
Scapes taste similar to chives or green onions with a hint of garlic. They can be eaten cooked or raw over baked potatoes, added to pasta dishes, or processed into pesto. We have also dehydrated and powdered them to use all year.
One of my favorite ways to preserve our garlic scapes is to freeze them in cubes. I can pull these out any time and add them to sauces, soups, salad dressings, and scrambled eggs.
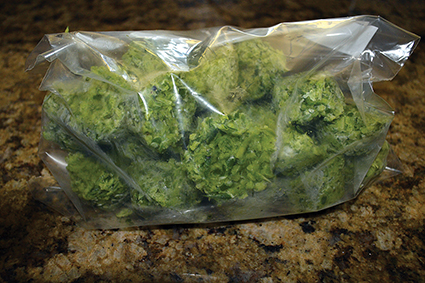
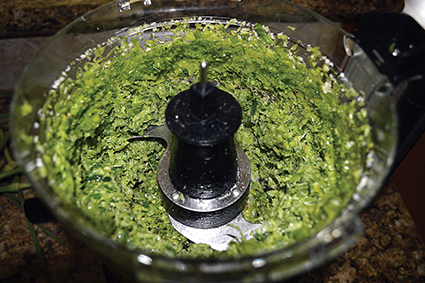
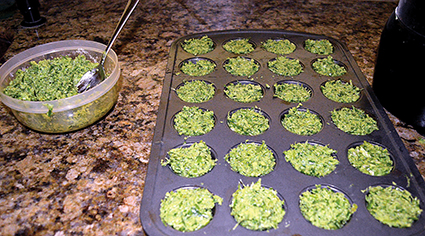
Garlic scape flavor cubes:
garlic scapes
olive oil
salt and pepper
Cut the stringy top and seed bulb off, and discard. Slice the remaining scapes into 3-4 inch sections.
Add your chopped scapes to a food processor, drizzle with olive oil, and sprinkle with salt and pepper.
Process about 2 minutes to where scapes are small, but still have texture.
Scoop the mixture into ice cube trays or small muffin tins, and freeze four hours or until firm.
Remove frozen cubes, and store in freezer bags or freezer containers up to a year.


Have you got any other herb or herb lik planting info, such as onios, cloves, camomile and ny other lovely scented doo dahs. I’m not much of a gardener however I think it nice to grow a nice scented herb garden so all any any help is great