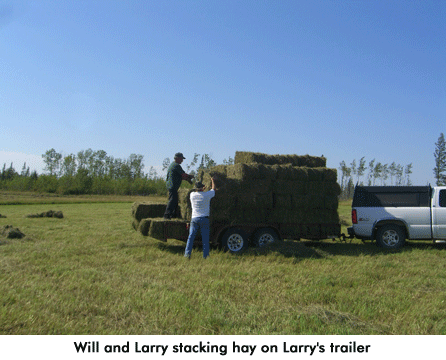
The last week has been very busy. Will baled 300 more square bales for our friend’s daughter and husband. They have sheep and goats on their homestead and round bales are inconvenient for them. It IS much easier to feed smaller animals square bales in the barn, which is why we bought a baler! Will even gave them a hand stacking the bales on the wagon and trailers, to make sure the hay stayed on the load on the way home.
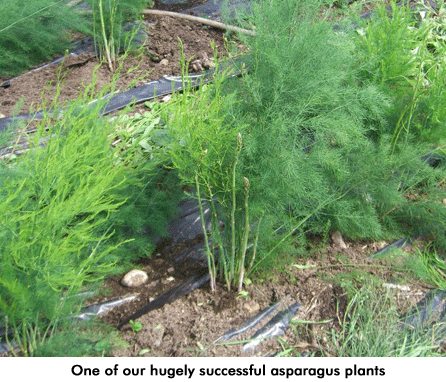
You wouldn’t believe how our asparagus, planted this spring from Nourse Nurseries, has grown! I’ve never had asparagus take off like that, EVER. Instead of one or two spindly stalks, each plant has produced more than a dozen vigorous spears. Some are large enough to harvest, and the plants are continuing to send up spears, even though it’s fall. WOW! Maybe the plastic mulch or all the rain is helping but I know I’m buying more plants, come spring.
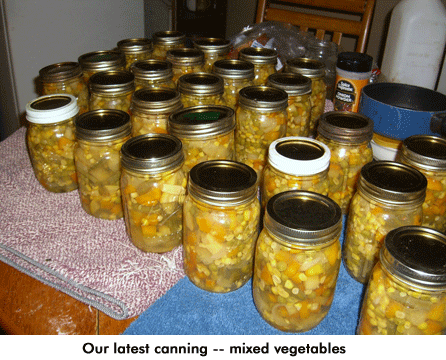
And we’ve continued canning — dill pickles, bread and butter pickles, more pizza sauce, and last night, 28 pints of mixed vegetables. David and Will picked while I went to the doctor for a check up. Then I cut up vegetables all afternoon — carrots, green beans, corn, summer squash, and potatoes. And those were last fall’s potatoes! David and Will were going to carry up the last of the potato bins, which was about half full, yet. (We did have 550 pounds!) And lo and behold, the potatoes, although sprouted, were still hard and good! We picked out about a peck to use, then I called my friend, Jeri, to come get what she and her husband could use. I’ve never had potatoes store that well. We used plastic totes with lids in our basement. The temperature now is about 59 degrees, and all winter, about 40 degrees, without heat. I guess they liked the combination. We will repeat that again!
Our tomatoes are burying us right now and I’m really impressed with the Mexican wild tomato, Punta Banda, from Native Seeds/SEARCH. I’ve grown it before and liked it. This year it’s fantastic. It’s a small tomato, but very clean and meaty for sauce. And hugely productive, although ugly and sprawly. I can live with that. It’s food that counts on this homestead!
Readers’ Questions:
Preserving garlic
I am a new subscriber and a fellow reader told me that you had a way of canning garlic instead of letting it sit in my SMALL pantry over the winter for use. I use a lot of fresh garlic in my cooking and my mother in law gives me garlic every fall. The problem is that when I go to use it toward February it is bad.
Darcy Reuterdahl
Missoula, Montana
Check out the prior blog to see another alternative, which I often use, and that’s dehydrating garlic; it’s quick, easy and the garlic takes up very little room in your little pantry. If you wish to can it, it’s best pickled, as pressure canned garlic can lose a lot of flavor. To pickle it, here’s a recipe:
12 heads of garlic, separated and cloves peeled
3 cups white vinegar
1 tsp pickling salt
1 cup sugar
Mix vinegar, salt, and sugar in large saucepan and bring to a boil. Add garlic cloves and boil 1 minute. Fill hot, sterilized jars with cloves to 3/4″ of top, then ladle boiling pickling solution over them, leaving 3/4″ of headspace. Process for 20 minutes in a boiling water bath canner. If you live at an altitude above 1,000 feet consult your canning book for directions on increasing your processing time to suit your altitude, if necessary. — Jackie
Food floating in jars
I am ordering your book today, so maybe the answer is already contained therein, but I’m canning tomatoes and pickling peppers again this week and there’s something that happens to me every time no matter what I do. I don’t know if I’m packing my tomatoes (or peppers or pickles) too tightly or too loosely, or if something else altogether is to blame, but some of the jars come out looking half full, like the pickles or tomatoes are floating on top of half of a jar of water. It’s safe, I’m sure, but not very appealing. Especially for giving!
I used to pack loosely, and this happened. Now, I pack more tightly, and I also noticed that after I add the hot liquid, after a few minutes, the ones I poured first, the vegetables have started to shrink or compress and now there is more room in the jar. So, I have begun adding more peppers/tomatoes to fill it back up, instead of more liquid. I am also pushing them down in and adding more as I go. This does seem to help, but it still happens! Is there something else I should be watching out for or doing?
At least if I shake the jars a little the next day, they seem to remix and it doesn’t look quite so unsightly, but sometimes they will separate again over time.
ALSO, I often see a lot of little tiny air bubbles after they’ve finished sealing. I’m apparently not stirring the jars around the sides enough with the little plastic knife… but I’m wondering if they are still safe to eat? Will those air bubbles cause a problem?
FINALLY, I have always wanted to know why some recipes call for 1/2″ of head space, others 1/4″, etc. Why is this important? What if I’m not accurate–what is the potential consequence? I would really love it if books would explain why when they are telling you to do something. If it’s for looks or efficiency, etc., then I don’t have to worry about safety. Obviously, if it’s about safety then I want to know that, too!
Lynn Hurst
Landrum, South Carolina
Congratulations on the BIG step Lynn! Once you do it, you’ll laugh at how easy it really is! I promise. As to your floating tomatoes — fruits float when cold packed. To get fruit that doesn’t float, tomatoes included, pack them hot. I don’t know why, other than tomatoes do cook down a bit, even when cooked for awhile, and when you can them, the raw tomatoes do lose juice and get smaller, AND float. The food is perfectly safe, but just different looking. Don’t worry about the bubbles, either. If the jar is sealed, your food is perfectly good.
The difference in headspace is this: Some foods, like meat and corn, will swell on processing and if you don’t leave, say, 1″ of headspace, the food will get right up to and push on the lid, compromising the seal. Foods that just swell a little require only 1/2″ of headspace. Others, like pickles and jelly, don’t swell at all, and only require 1/4″. Also, some foods, if touching the lid, will leave a dark stain on it as the acid reacts to the metal of the lid. So you don’t want the foods to possibly touch the lid.
I hope you like the new book and get plenty of ideas from it! — Jackie
Canning salsa
I’m trying to find a recipe for a pressure canned salsa. Could I safely pressure can this?
3 quarts peeled, chopped tomatoes
1/3 cup hot peppers
2 1/2 cup green peppers
4 cups chopped onions
1/3 cup garlic
1/3 cup cilantro
3 Tablespoons lemon
2 tablespoons lime
1/3 cup white sugar
1/2 black pepper
1 tsp cumin
1/2 coriander
1 tsp salt
Cook 10 minutes.
I think I could process it at 10 Lbs pressure for 40 minutes? What do you think? What if I were to add a can of tomato sauce to get it more thick? How does that effect a recipe like this?
Mrs Jo Bolin
Elk River, Minnesota
I process most of my salsas, including ones that I use tomato paste to thicken, for 15 minutes in a boiling water bath canner. — Jackie
Canning turkey
I recently lucked into 2 or 3 pound turkey tenderloins. (I didn’t know that turkeys had tenderloins) I would like to can these. What would be the best way — cut into 1 inch thick filets and hot packed or jar length pieces and raw packed? I ‘m glad that you and your sweety were able to walk away and not too badly injured from your fall
Robin W.
Sumter, South Carolina
I didn’t know turkeys had tenderloins, either. It seems that the meat cutters are making a lot of “new” cuts lately. I’m assuming that these are large breast strips? If so, I’d pack them as hot-packed breast strips, cut to fit conveniently in pint or quart jars. I’d boil the meat in seasoned water, till nearly done, then pack hot in the jars with the cooking liquid covering it. Process as for all meat: 75 minutes for pints and 90 minutes for quarts at 10 pounds pressure. — Jackie
Mexican bean beetles
Probably the biggest problem I’ve had this summer in my vegetable gardens is Mexican bean beetles. What a battle. I always grow beans of many varieties, both for green beans and for hard winter beans; each season I’ll expect to see a bean beetle here or there, maybe find a mess of eggs to squish, but it’s really not that bad. I just squish what I see and keep on going. This year the population is terrible. Squishing dozens of members of all 3 parts of the life cycle daily for the last month. My beans are badly affected. Have been spraying Bt hoping that at least I can poison the caterpillar stage. My question for you is the future: from your experience, would you say that this is just a bad year for these for my area and that next year might be a more normal year, or should I take a year off from beans next year? My research suggests to me that they won’t overwinter here. Any suggestions?
Jeanne Allie
Storrs, Connecticut
I would go ahead and plant beans again next year and be very aggressive in spotting any first beetles in your plantings. Dust your plants right away with rotenone or pyrethrin powder, then keep a vigilant watch. It’s probably just a bad year for bean beetles but sometimes you’ll get a couple bad years, so keep watch and get them under control right away. Be sure to remove and burn all bean plant debris to ensure that no beetles overwinter in your garden. You can never tell when they may survive! Planting early bean varieties will also help, as bean beetles are usually worse in late summer to early fall. — Jackie
Copra onions
You recently said that you like copra onions because they are one of the best for long-term storage. I’ve been looking on the Internet for copra seeds, and there aren’t a lot of places that sell them. For those that do, the postage is much more expensive than the seeds. Two questions in this regard: are copra onions heirlooms from which seeds can be saved? If not, do you have a good source for seeds? We plant our onions here in October or November, so I’m already looking for a good onion seed source. I know we’re one of the ‘short-day’ areas, but I’d like to experiment with the copras if possible.
Dallen Timothy
Gilbert, Arizona
Copra is a hybrid onion, but it IS a great storage onion. I got my seed from Jung Seed Company, but Johnny’s Seeds and Territorial Seeds also carry it. — Jackie
In-ground storage
We visited Old Williamsburg, Virginia. In their garden they have a hole in the ground w/glass for lid & is a sort of cold storage. Any idea what they would have used it for? We have ours dug, looking for some glass & want to use it? Not sure what to do with it. I loved the idea, & it looks so unique I just had to have one. It requires you to get down into it about two feet in the ground & stands 2 feet above the the ground ..I am only 5’2″ so confused how to use it. I would need help out if I went in! Hah! hope you can help. I did inquire of Colonial Williamsburg as well but would like your ideas as well. Have not heard from them yet.
Judith Cahow
Monterey, Tennessee
The dimensions are strange, so I’m not sure. I’ve used in-ground cooling on several homesteads where we had minimal refrigeration. As the underground temperature, especially on the shaded north side of a building, is much cooler than in the house, it allows you to keep many foods fresher than if you just left them in a cupboard. I used a large cooler. To access it, I just lifted the lid, kneeling down over the hole. Let us know if you find more information. It’s interesting, with the glass cover and the two feet above ground thing. — Jackie
Canning meatballs
How to can meatballs in mushroom soup.
Greg Pongrac
Stoystown, Pennsylvania
Greg, here’s a recipe from my new canning book that I use a lot:
5 lbs ground meat
3 C cracker crumbs
5 eggs
3 C chopped onion
1 sweet green pepper (optional)
1 1/2 tsp salt
1/2 tsp pepper
1 family-size can cream of mushroom soup plus 1 can water
Mix ground meat, cracker crumbs, beaten eggs, onion, pepper, and seasonings. Then form into meatballs the size of a golf ball. Gently brown in a large frying pan with minimal oil. Turn as needed to brown evenly. Pour mushroom soup and water into frying pan with meat drippings and heat, stirring well to mix in drippings. Pack hot meatballs gently into hot wide-mouth pint or quart jars to within an inch of the top, then ladle on hot sauce to just cover the meatballs, leaving an inch of headroom. Carefully wipe jar rim clean. Process pints for 75 minutes and quarts for 90 minutes at 10 pounds pressure. If you live at an altitude above 1,000 feet, consult your canning book for directions on increasing your pressure to match your altitude, if necessary. — Jackie


Jackie and Sue, what varieties of asparagus from Nourse Nurseries did you plant? I have very sandy soil. I’ve been picking wild asparagus for many years along ditches in the neighborhood. As new people have moved in, they don’t use their asparagus but yet they forbid people from picking it. What a waste of good food. So I’m going to need to plant my own! Any secrets to planting it? Location? Depth? Water amounts?
I also planted asparagus from Nourse this year and it is growing great! They are an awesome company with a fabulous customer service department! I too will be ordering from them again in the Spring.
Congrats on your wonderful harvest.
I hope you are improving rapidly from your fall.
Hello, Jackie. In reference to Judith Cahow from Tennessee in regards to the “glass covered” hole in the garden. Could it be a cold frame? These are used to start seeds or harden off seedlings before the weather allows planting in the garden. They are sometimes used to extend a garden also. That’s why it is dug about two feet deep and has a glass lid, so the sunlight can get through. But care must be used to make sure it doesn’t get too warm, even with snow on the ground! Prop open slightly to even the temperature inside the cold frame. My mother and grandmother used these with much success, and I have thought about it myself since I live in the mountains of North Idaho. Also, using a discarded wood framed window is the way I’ve seen them done. Hinges are easy to apply this way. My best to you, Jackie and happy gardening!
Mexican bean beetle: Experiment with silver or metalized reflective mulch. I have not used it for bean beetles but do use it to control/eliminate cabbage worms and flea beetles. It is very effective.
Mexican bean beetle: You might try planting the very early varieties of the types of beans you grow, if your soil drains well or you garden in raised beds (seeds might rot in cold, wet soil). If you are growing bush types, floating row cover will provide a mechanical barrier. Another thing to try is mulch (something rough and tough like straw) either before or after your beans sprout. Be sure you remove, bag and throw out all plants and leaves from this year’s crop. Any type of organic plant material shelter near your garden will overwinter them, so get rid of anything you can. I had a few bean beetles two years ago. I’ve concentrated on early varieties, floating row covers and mulch, haven’t had any since then.
Comments are closed.