By R.E. Rawlinson
The homesteading lifestyle can require a number of tools to cultivate the garden, maintain the home, repair the tractor, and build various pens and coops. We use them so often that we don’t really think about them until we don’t have the one we need. The conundrum is that while we may need quite a few tools, the homestead lifestyle is not noted for generating a lot of disposable income and new tools are not cheap!
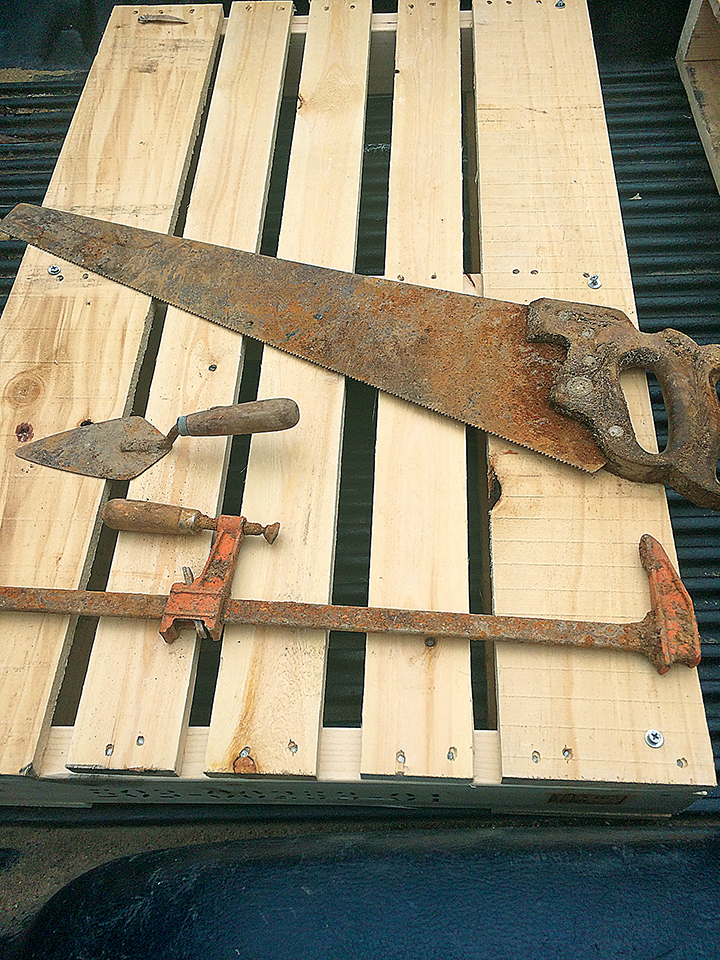
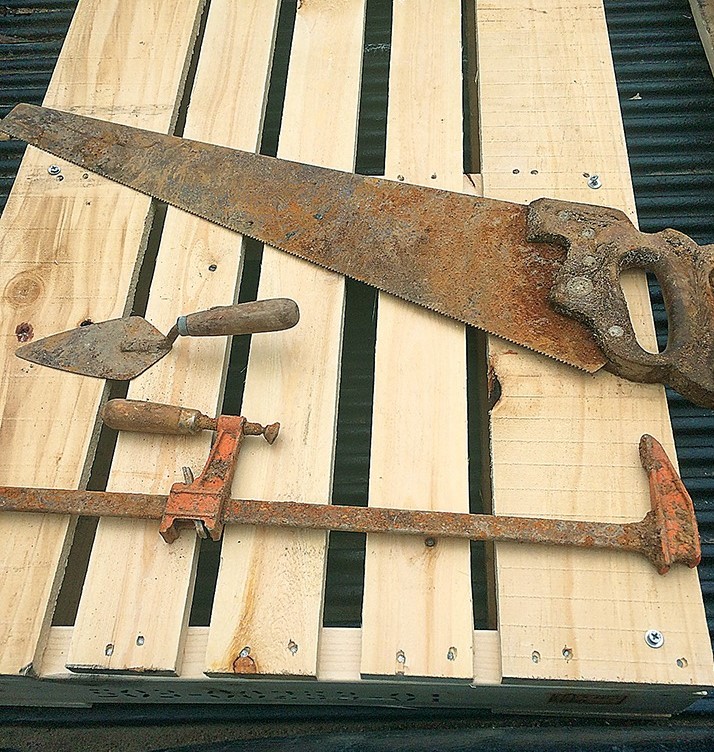
Because I believe that we have an ethical responsibility to get the most we can from the resources available (and I’m cheap), I like to get older tools. The world is awash in perfectly good old tools of every kind and older tools tend to be much better quality than new ones. Though they may look rough, they just need a little TLC to give many years of service for very little cost.
Finding old tools
Since I’m notoriously frugal and am always coming home with free or inexpensive old tools, I’ve learned the easy way to resurrect them. Sources of old tools might be obvious: garage sales, moving sales, thrift stores, or antique shops. Less common sources for old tools might be: the landfill, dump, or even underground. A friend of mine is an avid metal detectorist whose interest is in coins and artifacts but often finds old tools which he passes on to me for rehabilitation.
Almost any common tool is going to contain some significant amount of ferrous metal (iron or steel) and in most cases the biggest obstacle to restoring it will be rust. The sight of heavy rust can be enough to cause some folks to give up on a tool, but there is nothing scary about rust. If iron is exposed to moisture and oxygen, the electrochemical reaction of corrosion will occur. The water acts as an electrolyte and allows the iron to give up electrons and return to its “wild state” which we call rust. Unfortunately, rust represents metal permanently lost from the object. We can remove rust and prevent it from happening again, but we can’t put the missing metal back on.
The first step to bringing a tool back to life is a clear-eyed assessment of how much remains. The aforementioned metal detectorist friend gave me a Colonial axe head; I would love to save it and return it to service but the cold hard truth is that there is just not enough metal left and if I remove the rust it would be unrecognizable, so it hangs on my wall as-is.
Once you decide that a tool is worth saving, you must decide on how to remove the rust. There are several different
options.
Wiping or brushing
The simplest method of removing rust is by wiping or brushing. Physical removal with a brass wire brush or a wire wheel on a grinder will do a good job with heavy, loose rust on larger objects.
Chemical treatments
Smaller objects or severely rusted ones are better subjected to chemical treatment after removing as much loose corrosion as possible with a brush. When considering chemical treatments, remember the value of the tool itself — you don’t want to spend $20 cleaning a $2 chisel unless there is something pretty special about it!
The best commercial product I have used is Evapo-Rust, a safe and easy-to-use product. Follow the label directions of course, but the short version is simply to submerge the object and check it occasionally. The rust will dissolve and the liquid can be saved for reuse until it gets saturated and ineffective. It’s an excellent product, but it also costs about $20 a gallon.
Another product commonly found at the hardware stores is called Naval Jelly. It is basically a thickened, jelled form of phosphoric and sulfuric acid. I do not recommend using this product and no longer use it myself. At around $4 per 8 oz. bottle, it is relatively expensive and too aggressive; it changes the metal somehow and makes it brittle and will ruin any kind of good cutting edge. If you do choose to use this product, safety glasses and gloves are a must, along with a disposable natural bristle brush to spread the product on the rust. In just minutes, the acid will dissolve rust and if left a little too long can dissolve the iron itself.
Vinegar
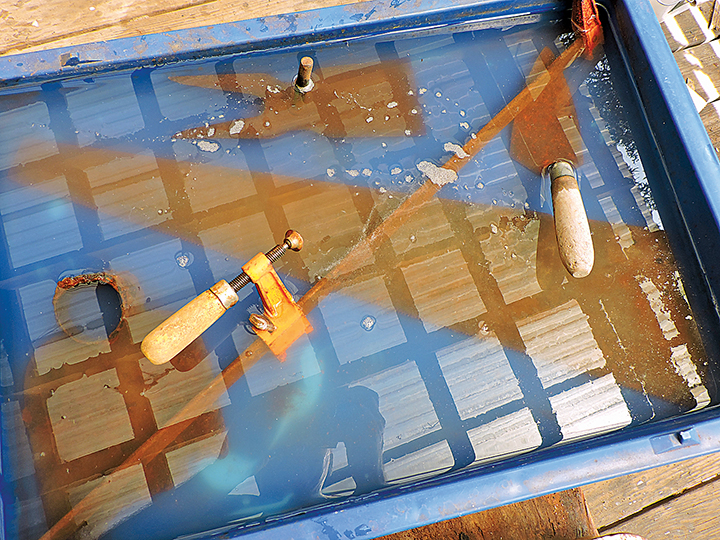
My favorite rust remover doesn’t come from the hardware store at all, it comes from the kitchen — plain old white vinegar is 5% acetic acid and works very well. I will usually buy a couple of gallons whenever I see the store brand on sale for less than a dollar per gallon.
The great thing about vinegar besides the low cost (have I mentioned I’m cheap?) is that it is gentle and somewhat reusable. Treating a rusty object is simplicity itself — just brush off the loose dirt and flaky rust before submerging the object in the vinegar. No special safety gear, containers, or brushes required and anything you do use won’t be harmed and is easily cleaned with soap and water. Once the object is submerged in vinegar there is nothing to do but check on it every hour or two, within minutes you will see small bubbles forming as the acid begins to dissolve the rust.
Vinegar is a very gentle acid, but it will dissolve and pit steel if left long enough. A heavily rusted piece may need to be soaked overnight.
Electrolysis
Another popular method of rust removal is electrolysis, in which the part to be cleaned is submerged in an electrolyte solution and a small electric current passed through it. The rust is carried off the part and drawn to the positive electrode. This method does work well but I find it overly complicated, especially when compared to a simple soak in vinegar.
Other considerations
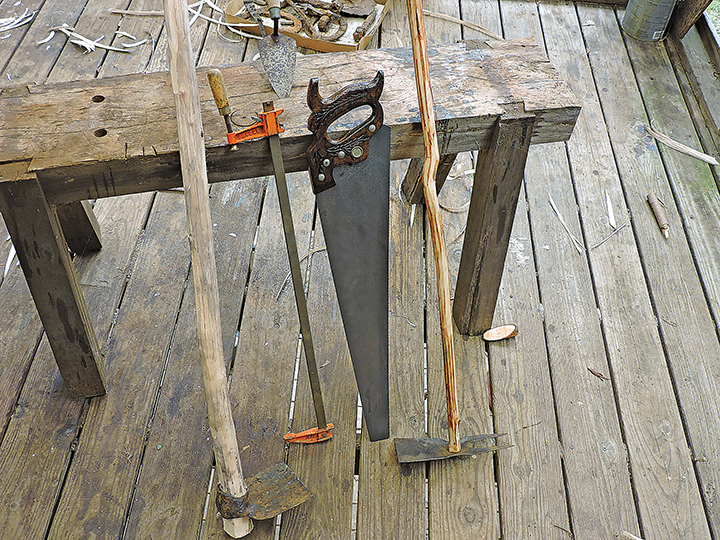
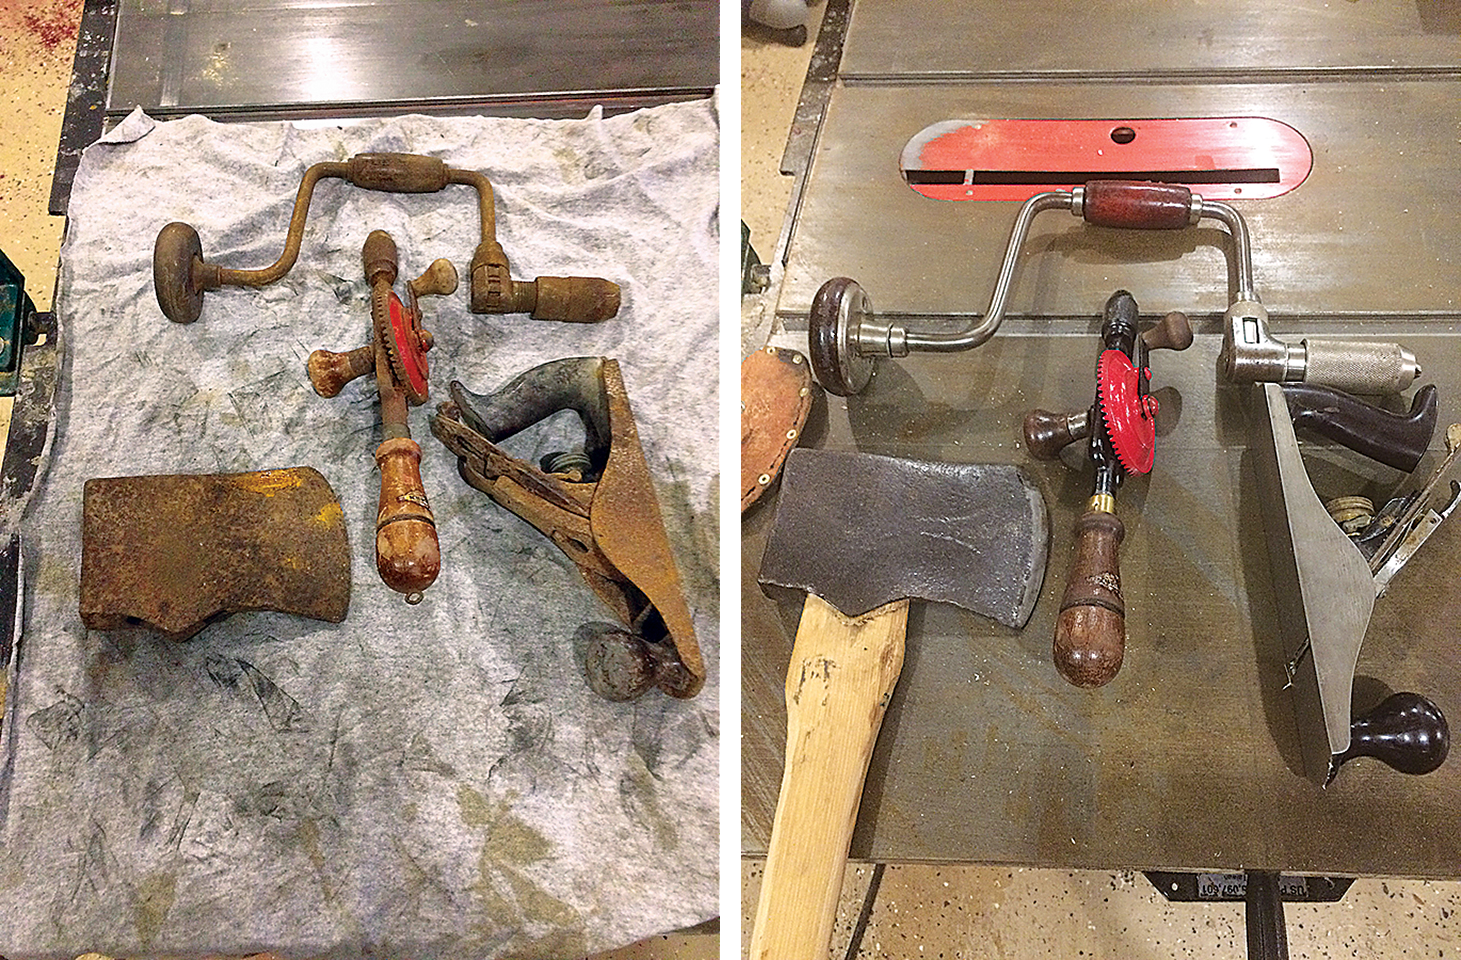
Tools that have multiple components such as planes and hand drills should be taken apart before treating for rust, if possible, to allow for a thorough cleansing. They may even need to be soaked first to allow for disassembly. Once the rust is dissolved, rinse everything in clean water, dry it, and give it a light oil coating to prevent further corrosion. Some tool restorers like to use water with baking soda to neutralize the acid, but I think that’s overkill.
Rust prevention
Since we’ve gone through the trouble of removing the rust, we should give some thought to preventing its return.
To prevent rust, you just need to prevent one of the conditions necessary for rust to occur: oxygen or moisture. It’s pretty hard to keep oxygen away from tools, so the easiest thing is to keep moisture away by storing restored tools in a dry place and keeping a light coat of oil on the iron and steel surface or maintaining a paint or wax coating.
I have used all the methods described here and will certainly try any new methods that may come along but for now I will stick to cheap, common, safe, and reliable vinegar.
I hope you’ll give it a try. Happy de-rusting!






That was a great article, thanks for sharing!
Great article!
I too have used vinegar and evaporust to get the rust off tools I want to save.
I am partial to the evaporust as I have “HEARD” that vinegar continues to “etch” or function as an acid long after it is washed off. I did use baking soda to “neutralize” the vinegar. so I didn’t experience the etching… I DID lose a tool by leaving it in the vinegar too long! Just an expensive lesson! I live in South Carolina and did a small experiment – I had a plane blade and put it in vinegar to get the rust off, then cleaned it up – think bare metal and left it – in just a few hours there was a brown “tint” to the blade! So I encourage you to use some kind of rust preventitive to keep the rust from coming back. While WD-40 is a typical choice, it is not as effective as a “real” oil – I LOVE Jojoba oil or Camilia oil, but they are expensive… I am a woodworker and do not want oil to interfere with any finish I choose, so it is a small price to pay, but a simply light oil, 3in1 or hoppes 9 work perfectly fine – if you have motor oil and thin it with mineral spirits, that works too… but, the Camilia oil comes in a spray bottle and I can pull the lever cap off the plane, pull the blade, spray the plane, the cap and the blade and confidently put it away… Did I mention that I work in an unconditioned space? my garage… yup – prevention is important
Great article thanks. Can I ask do you need to remove wooden handles etc before submerging or doesn’t the vinegar effect them?
I’m probably even cheaper than you so each summer I make wine from our local wild Mustang grapes. I’m totally unscientific about it and occasionally some “goes bad” during the fermenting process so I change its name to “rust remover” and it works great. It frequently has the added feature of “blueing” the iron like a gun barrel.
Excellent. I’m sure you know you can go even cheaper by making your own vinegar. It’s easily done by allowing apple cider (free of preservatives and pasteurization) to “go bad.” This also happens when you’re making Apple Jack and your kid pulls the airlock out of the carboy.
Great suggestions! I’ve converted some old, rusty, about-to-be-thrown-in-the-garbage tools to good, functional tools in my shop. Thanks for the article.
Very helpful article. I have had some of my Craftsman tools start to rust after having them since the 70’s. I will try your suggestions for removing the rust, starting with vinegar since I always have some of that around. Thanks so much — Sheila
Great article—thank you!