| Issue #119 • September/October, 2009 |
The next time you go to the grocery store or supermarket check out the price of a pound of already prepared barbecue. If you’re shocked at the sticker price, but still have a hankering for barbecued meat, you have another alternative. If you have an outside grill with a cover or a larger traditional smoker, you can produce the best juiciest meat or fish you have ever tasted. Except for the coldest parts of the country, you can have good homemade barbecue almost all year round.
First of all, let’s get some terminology straight. Throwing four frozen pieces of meat over a tub of flaming charcoal, then slapping them between some hamburger buns is not barbecue. I know, you put them on your barbecue grill and slathered them with barbecue sauce, but it’s still not barbecuing done correctly. You’ve just grilled four hamburgers at about 700° F. Real barbecue takes a bit more preparation and demands a combination of controlled heat and smoke. Don’t confuse this with “cold smoking” where you need a smoke house and weeks of time. Many people cringe at the thought of smoking any type of meat but it’s not that hard at all and after a meal like this the oven will take second place. But the preparation for the “smoke” is a bit more time-consuming than setting a thermostat and timer on the oven.
Meat
Probably the most popular (and easiest) meats to barbecue are chicken, ribs, and pork roasts. A cooking temperature of 225 to 250° F is a perfect range. This is the temperature goal of any meat that you decide to smoke. The mantra of all pit masters is, “Low and slow is the way to go.” If you have a larger traditional smoker, all three meats can be ready at the same time. To save even more time, we can prepare the meat while the smoker is getting up to speed.
|
Fuel
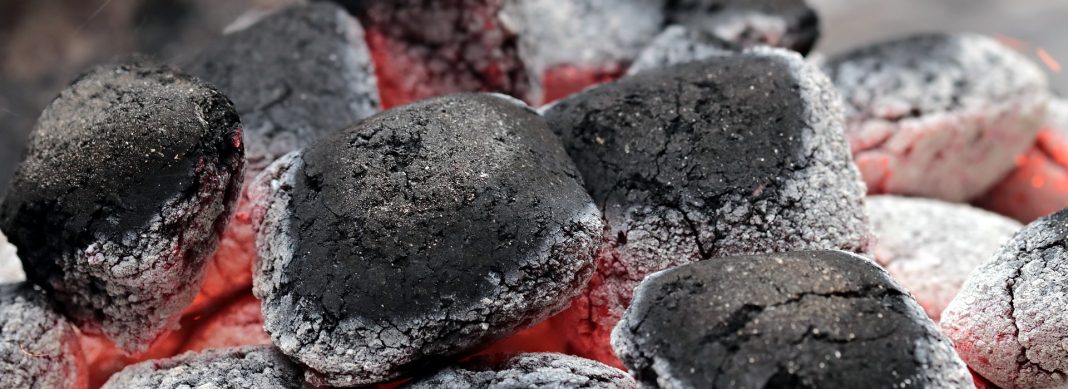
The absolute purists of barbecue believe this involves the use of burning hardwood coals for regulating the temperature. The thought of using charcoal or gas is out of the question for them. If you have the time and place to burn the wood until it becomes flaming coals, then go for it. If not, we can cheat a little. Lump charcoal, or even regular charcoal, should be ignited in a charcoal starter chimney. Let the charcoal burn until it becomes glowing coals. Depending on the size of your smoker, you may have to add some unburned charcoal to the pan or firebox and put the burning charcoal on top for it to catch. If your smoker has a water pan, now is the time to fill it about three quarters full with water, wine, fruit juice, beer, soda, or any other drinkable liquid. The liquid will evaporate and permeate the meat. For a gas rig, just set it on medium heat and let the temperature reach about 240° F. Either way, stabilize the smoker at about this level. Have some chunks (or chips) of aromatic wood such as pecan, cherry, apple, or hickory cut in sizes convenient to your pan or firebox. Never use pine, cedar, or treated wood. Some folks like to soak the chunks in water while the charcoal is getting ready.
Preparation
If at all possible, start this the night before, especially with the ribs or pork roast. Letting the spices, called “rub” in barbecue terms, sit on the meat overnight enhances the all-around flavor of the finished product.
Chicken: Remove the livers and neck from the inside of a chicken and rinse the outside and inside of the bird with cold water. Pat the chicken with paper towels to remove excess water, both inside and out. Take a small unpeeled lemon or orange, or peeled onion, or a combination of all three, and cut them into quarters. Place them inside the cavity, citrus rind and all. To make it look pretty you can use some butcher’s twine and tie the legs and wings. Take about a quarter cup of good olive oil or melted butter and brush it all over the outside. This will serve to brown the skin a bit. Sprinkle the outside with your favorite seasonings or you can try the following rub recipe:
Chicken rub
1 Tbsp. paprika (gives a subtle flavor and great color)
1½ tsp. onion power
1½ tsp. salt (kosher, if you have it)
1 tsp. black pepper
1 tsp. garlic powder
dash of cayenne pepper (optional)
Mix well and put in a shaker with medium-sized holes and shake it all over the outside of the bird.
Ribs: For ribs, turn the slab with the bone side up. You will notice a thin membrane covering the bones. With a butter knife, pry a corner of the membrane up, grab it with your thumb and index finger, and pull the membrane off the bones. You can use a paper towel for traction while pulling. This allows the smoke to penetrate both sides of the slab. Season both sides.
Roast: For the roast, be careful not to trim too much fat off the top. Your cardiologist will have a fit but the melting fat will serve to make the meat below more tender as it slowly cooks. Again, sprinkle your seasonings all over, or try the following pork rub:
Rib or pork rub
¼ to ½ cup prepared yellow mustard
2 Tbsp. each brown sugar, sugar, salt, chili powder, black pepper, cumin
1 Tbsp. paprika
1 tsp. cayenne (optional)
Mix well and put in a shaker with medium-sized holes.
Slather the mustard over the entire piece of meat. Use a brush or your hands. (There will be absolutely no mustard taste after it’s cooked and the vinegar in the mustard will tenderize the meat a little.) Shake a good coating of the rub all around and gently push it in the mustard with your fingers.
Wrap the chicken, ribs, or roast tightly in plastic wrap or tin foil and place them in the refrigerator over-night.
Smokin’
When the temperature of the smoker gets to at least 240° F, you’re ready. Put a couple of wood chunks on the fire. For gas, use chips wrapped in a double packet of tin foil with three holes punched on top. Lift the lid and put the chicken (breast up), the ribs (meat side up), or the roast (fat side up) on the rack. In the short time it takes with the lid open, the temperature will drop quickly. Get it back up to 225° F and maintain it by regulating the bottom vents and by adding some pre-burned charcoal as necessary. Depending on the size of your pit, pan, or firebox, that should be about every hour or so. Resist the temptation to peek inside the cooking area. Every time you raise the lid the temperature drops drastically. Remember this old adage: “If you’re lookin,’ you ain’t cookin’.” Also, keep an eye on the water pan if you have one. Keep it at least half full during the entire session. The goal is to keep the temperature consistent and to have a steady thin stream of bluish-colored smoke coming out of the exhaust. Thick, billowing, grey smoke means there is too much unburned wood or charcoal in the firebox or pan.
|
Is it ready yet?
Because of the varying factors such as outside temperature, wind, efficiency of the pit, and a thousand other reasons, a good meat thermometer is a must. Checking for doneness should always be accomplished by meat temperature, not by time in the pit. A general rule of thumb for cooking chicken is that at 225° F it should take about 30 to 40 minutes a pound. However, the accurate way to tell when it is ready is to insert the meat thermometer into the thickest part of the breast of the chicken. It should read 175° F.
A good size slab of spare ribs should also read 170° F and take about five hours. If you intend to slice your pork roast, the thickest part should read about 175° F and take about an hour and a half a pound. If you intend to pull the pork apart for sandwiches, take it up to 200° F. Pulled pork is common in the southern part of the country.
I don’t have a smoker
Fear not. With a kettle-type barbecue grill you can still have some great tasting meat. And what’s more, it takes less time. The technical term for it is “indirect cooking” but I call it “grillinsmokin’.” Place a disposable aluminum pan, about the width of the bottom of the meat, in the grill. Fill it about one quarter full with your favorite liquid. Then, place your pre-burned charcoal around the outside perimeter of the pan and add chunks or chips. Replace the rack and put the meat over the pan and put the lid back on. The cooking temperature should be 325 to 350° F. The finished temperatures are the same as traditional barbecue. As an added bonus, the drippings in the pan make an excellent gravy. Keep an eye on your water pan as the liquid will evaporate at a higher rate.
I once smoked a turkey, a brisket, two slabs of ribs, and a dutch oven full of beans on a big vertical smoker in 25 degree weather. Granted, it took a lot more charcoal and wood but the results were well worth it. During warmer conditions, however, the benefits of sitting back with your favorite beverage, watching the smoke slowly rise out of the pit, and anticipating the rewards of your labors is certainly one of life’s many pleasures.


Only wood. Maple is good, too.