
By Robert Van Putten
Issue #177 • July/August/September, 2019
For as long as I can remember, I’ve always wanted a rustic log cabin deep in the forest. I believe there is something unique about this simple, elemental form that calls to the spirit of all Americans. It recalls our pioneer ancestors and beckons us to return to the land, to a simpler life, and persists as one of our best living traditions.
When my wife and I started homesteading in the late 90s, I naturally thought of building a log cabin first. After all, we had forest land with plenty of timber. But when I was 16, I’d spent two weeks working on a log cabin high in the Colorado Rockies, and I vividly remember the experience. We had three adults and two teenagers working; we used pry bars, come-alongs, and a winch to move massive logs and roll them up ramps to place them on the walls, where they were laboriously notched and fitted by someone perched up there with a chainsaw. It was heavy, bruising, and dangerous work. In fact, it was too much work for me. I’m not a large or strong man, and I don’t own heavy equipment for moving massive logs. So instead, my wife and I built ourselves a straw bale cottage, and have lived there happily ever since.
I have made plenty of “log cabin” garden beds (see “‘Log cabin’ garden beds” in Backwoods Home Magazine Issue #159, May/June 2016). To quote myself, “Every time I make one of these I imagine I’m building a trapper’s tilt deep in the wilderness,” and that’s exactly what I eventually did, although calling my backyard a wilderness is stretching things!
What I ended up making was a fancy version of the old trapper’s tilt. Trapper’s tilts were small, temporary log cabins built along trap lines and in hunting camps. Often made without foundations and of unpeeled logs, they were easily and rapidly made. Back then, every woodsman knew how to knock these simple shelters together. Building a log cabin that is 400 square feet is a big job, but anyone can knock together a 90-square-foot trapper’s tilt.
I wanted this tiny cabin to be hidden. I didn’t want it visible from Google Earth, or for tax assessors and hunters wandering through my 40 acres to stumble upon, so I selected an overgrown depression on a north-facing slope for the build site. No road leads to the site, which is always a dead giveaway.
Foundation
My wife and I leveled a spot just big enough for the trapper’s tilt with a mini-dozer, a pick, and a shovel. The “foundation” is nothing more than pressure-treated 4x4s on the ground. I don’t expect frost heaving to be a problem because we leveled the area by removing material (not building it up), the soil is thin, and we get heavy, insulating snow.
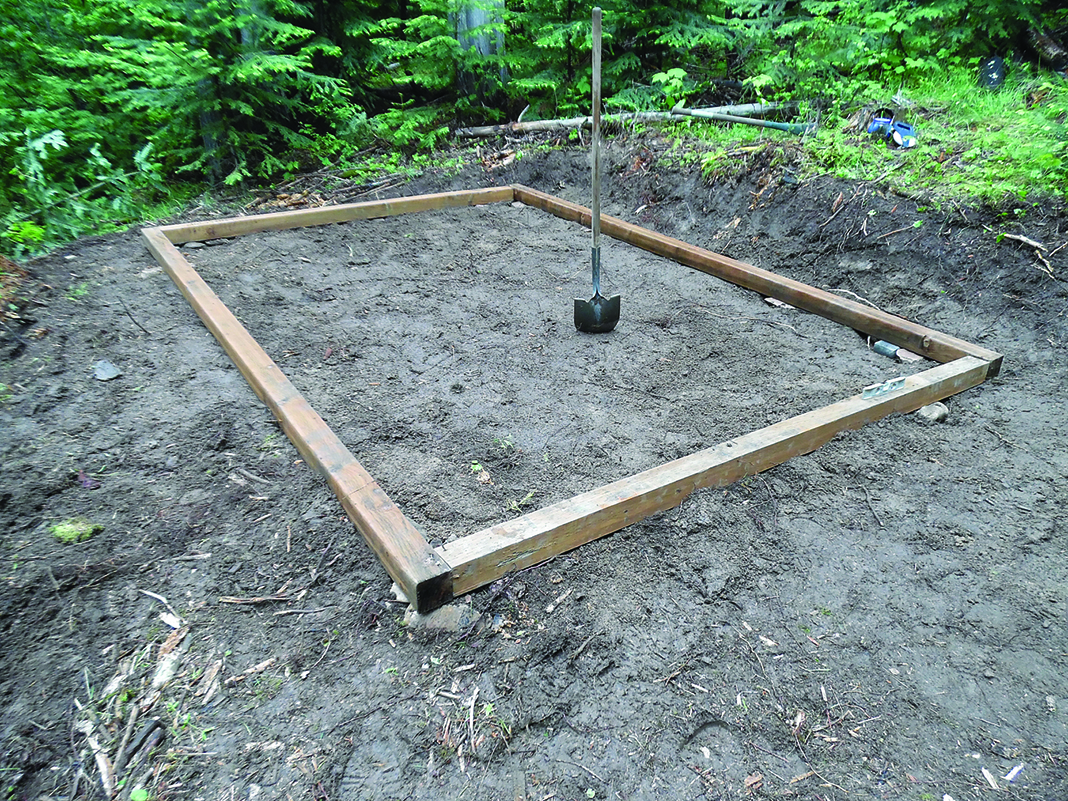
The foundation consists of pressure-treated 4x4s right on the ground.
Getting logs
I thinned stands of cedar all around my 40 acres and can’t tell where a single tree was felled now. I needed 14-foot logs for the long side of the cabin and 10-foot for the short end. I cut the logs to length where felled and I dragged the branches off to burn piles.
The first important trick to building a cabin the quick and easy way is to use only logs that you can carry yourself! I used small trees, with a maximum circumference of 16 inches (5 inches across).
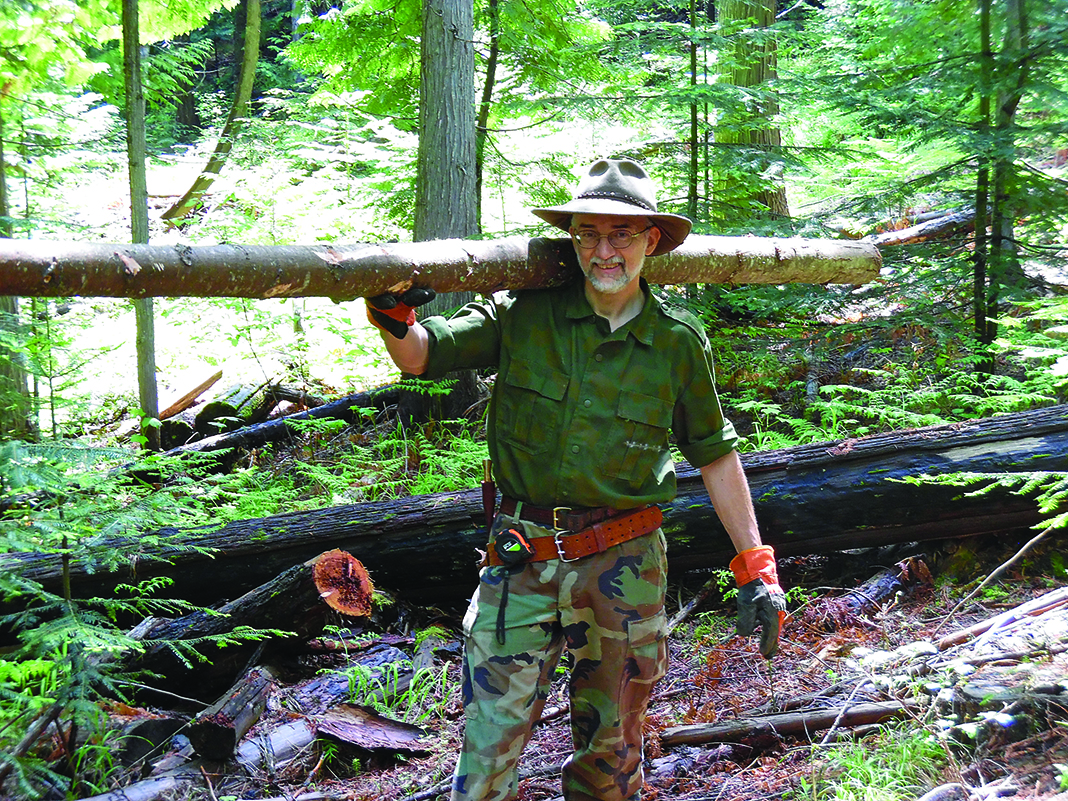
I only used logs I could carry myself.
In all, I felled 37 trees for 65 logs and chopped 128 notches. We built the cabin in late May when the sap was running. This made the cedar trees very easy to peel. We scored a line down each log with a knife and peeled the bark off in one piece. Then we stacked the bark sheets flat and saved them for the roof. If we’d built later in the year, the bark would have to be peeled with a drawknife.
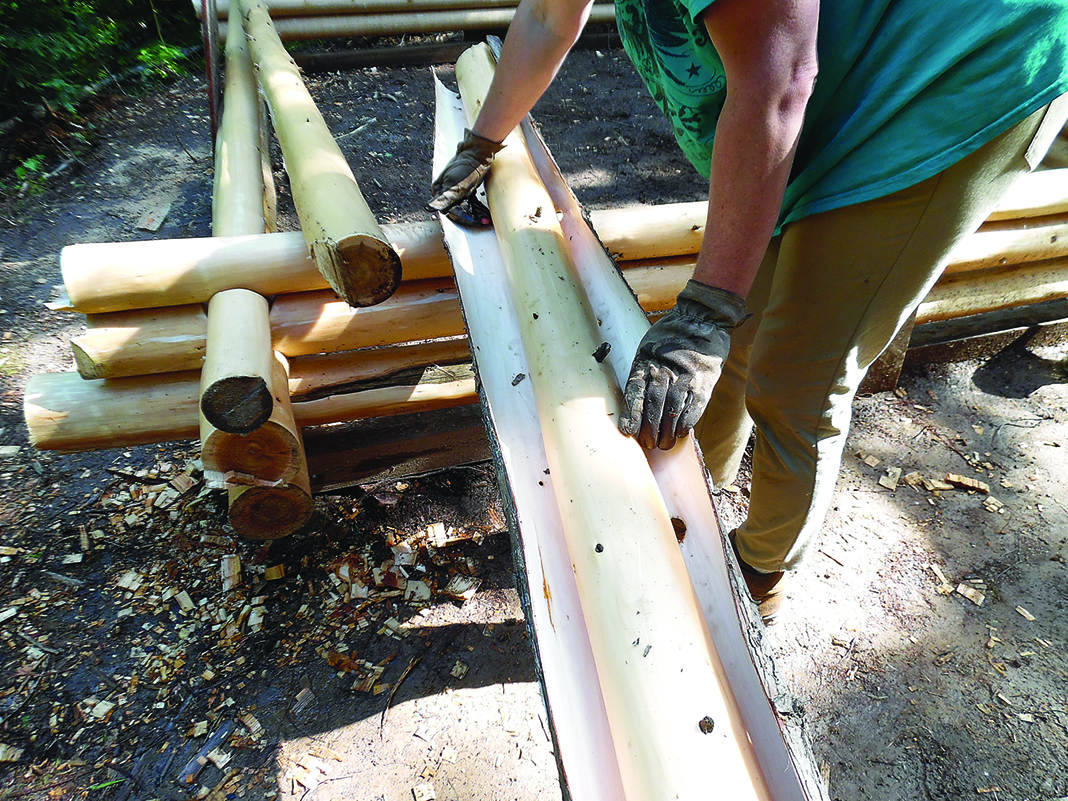
Since we harvested logs in late May, the bark was easy to peel off in one piece.
Building the walls
The second trick to build a cabin the easy way is to “log up” fast by notching the logs on top, which is how homesteaders and trappers in a hurry (or just lazy) have always done it. Conventional wisdom holds that logs must be notched on the bottom, to avoid water traps which will rot the logs. Maybe so, but I have some experience doing it that way and it’s much more work. Old cabins in my area were notched both top and bottom! The notches never fail; it’s the roof that goes first, then the foundation (if there is one). It also helps to use rot-resistant trees. All cabins in my area, this one included, are made of cedar. Building a roof with generous overhangs to keep drips off the walls is also essential.
In the old days, the first two sill logs were half buried in the earth. Mine sit up off the ground on the 4×4 foundation, so there was a gap below the second two logs, which we filled with mortar later. No fancy tools are needed, just your favorite axe. Keep it sharp and swing carefully. Concentrate on aim alone and let the weight of the axe do the work. Mark the width of the notch-to-be. Chop a notch halfway through the log, and nail through the notch into the log below with galvanized 30D nails. This holds everything in place and nailing through the notch lets you use shorter nails. Cut the notch on the other side, and roll the top log into place in the wall.
The work goes fast; no time is wasted scribing or measuring, the log you’re chopping is held by the logs below, and it’s easy to chop green logs. Don’t season the logs first — it makes chopping notches much harder. It helps to temporarily nail a board to each side of the growing cabin to keep the logs from sliding if they are slippery, as my green cedar logs were.
My journal records that it often took just three minutes to chop a notch, and that the average time to set a log was about 12 minutes. Before long, the walls were done.
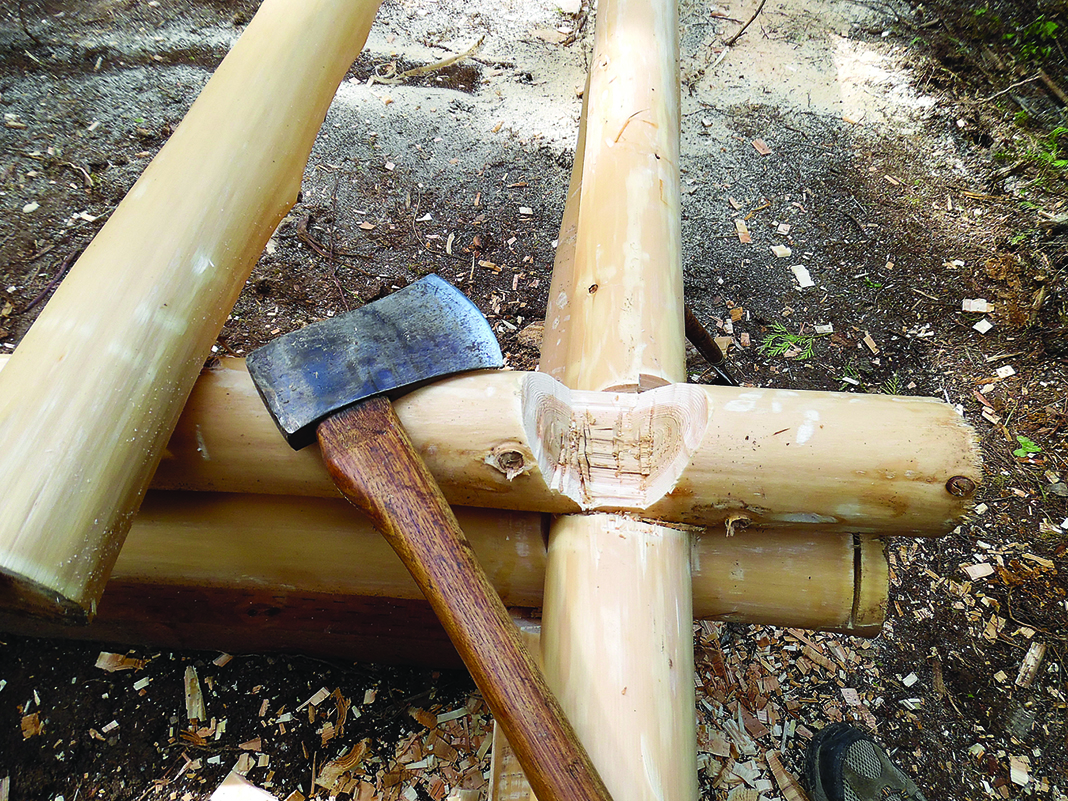
I notched the top of each log with a sharp axe.
Building the roof
The third trick to a quick and easy cabin is the single-pitch or “tilted” roof, which is how the trapper’s tilt gets its name. On the short side walls, all the fat ends of the logs are set to the front of the cabin, which naturally gives the roof its pitch without any carpentry at all. It isn’t much of an angle, but it’s perfect for a sod roof. On the long ends, alternate the butts.
The roof is made of three 14-foot tamarack poles set across the top lengthwise and covered with 16-foot tamarack poles. Most of these poles were dead and seasoned standing saplings from tamarack groves. The poles cantilevered out over the front of the cabin for a four-foot porch. At this point, I stopped working on this project for a full year. I had lost my job in town and was busy making the transition to self-employed backwoodsman.
The next spring, we finished the roof by covering the poles with the sheets of cedar bark laid down like shingles, then a salvaged above-ground pool liner and scrap of sheet plastic on top of that. We covered the perimeter of the roof with tar paper to cover up the pool liner because I didn’t want the bright color showing, and then we covered that over with dirt, bark scraps, and clumps of moss.
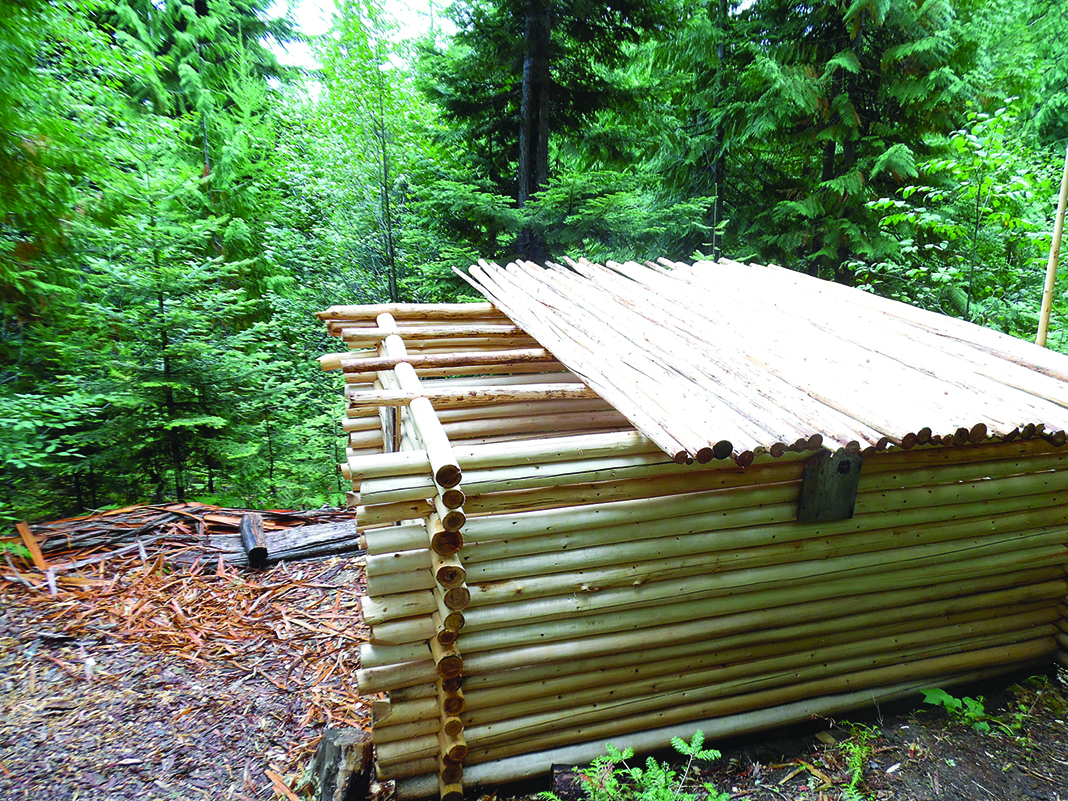
Various sizes of tamarack poles make up the roof.
Doors & windows
Next, we cut the doors and windows in the walls with a chainsaw. We nailed temporary planks in place on each side of the openings-to-be to keep the logs from moving while cutting. Then we framed the holes with 2x4s. I scrounged windows from here and there; two are glass doors from an old cabinet, two are old basement windows, and one a pane of glass I framed myself. I left a gap over the windows to prevent them from breaking as the cabin settles. I made the door of ¾” plywood covered with log slabs on the outside and old hardwood flooring on the inside, with a homemade latch mechanism of wood operated by a string from the outside.
The logs had turned almost black during the year they were left alone. Painting them with a bleach solution brightened them back up.
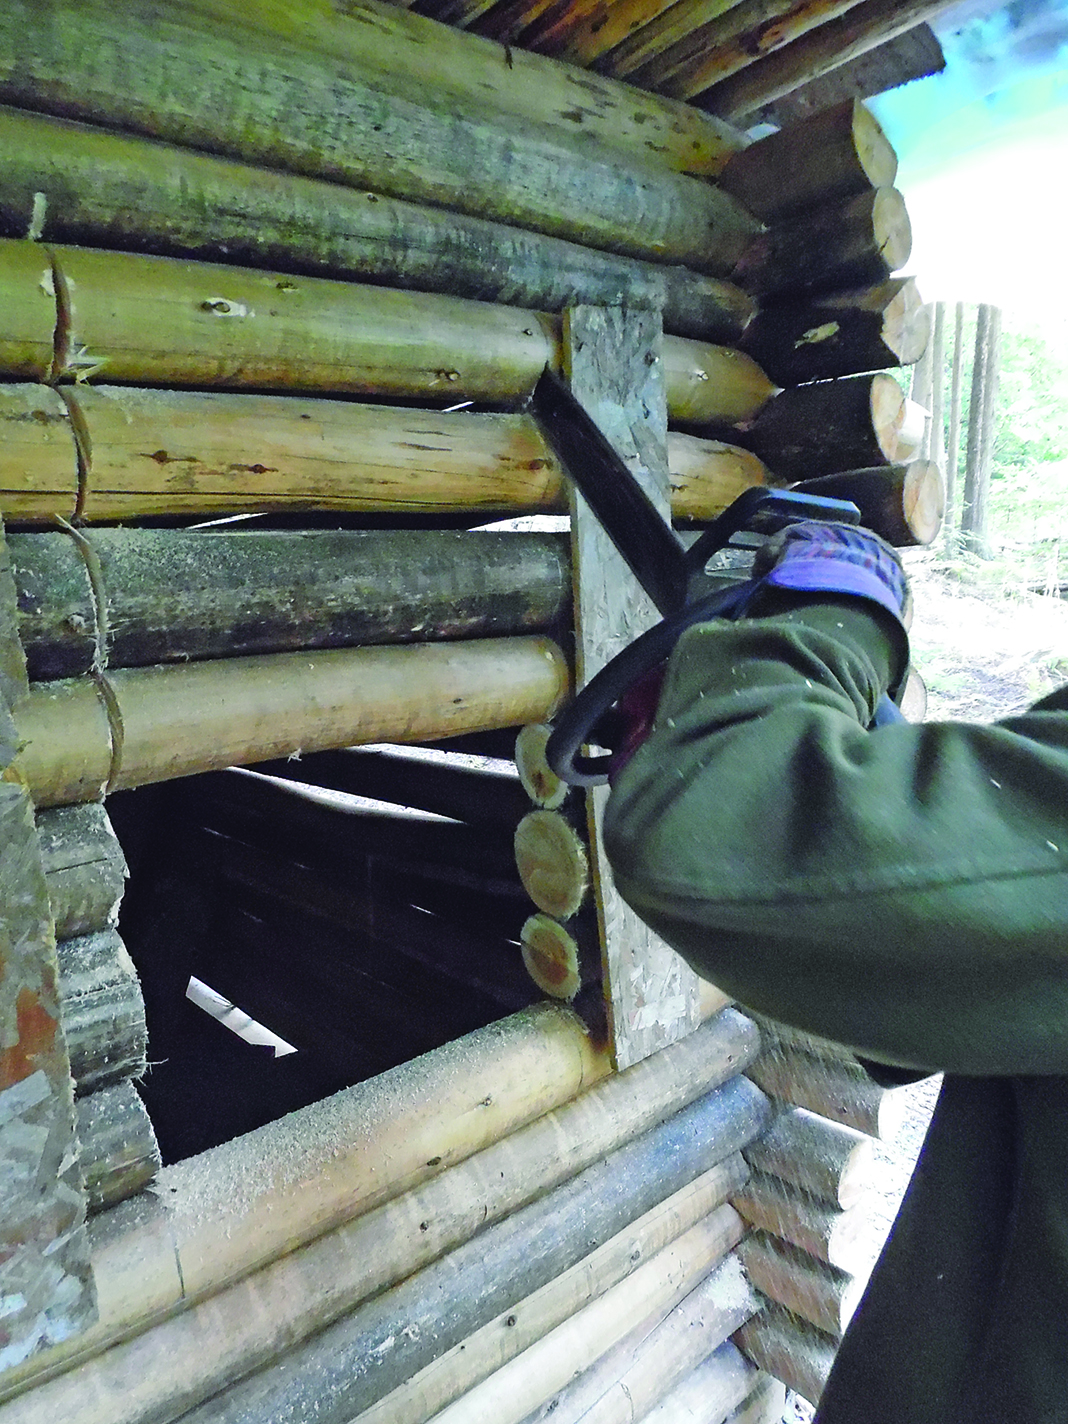
We used a chainsaw to cut the doors and windows in the walls.

The logs had blackened a bit, but they brightened up with some bleach solution.
Building the fireplace
I had intended to make a sheet metal stove for heat (see “Build a stove pipe wood stove” in Backwoods Home Magazine Issue #163, January/February 2017). But I had grown up in a home with a fireplace, and missed having one. Pioneers made them of stone and clay, and even used wood for chimneys. How hard could it be, right?
I couldn’t afford brick and our homestead has no stone, so I gathered rocks everywhere I went and carted them home in our car. From a visit to Colorado came slabs of red sandstone for the hearth. From the channeled scab lands of Washington came basalt for the firebox, and most of the stones are round cobbles from a friend’s homestead.
This cabin might not need a foundation, but a fireplace does. I cut a hole in the wall and dug down three feet. Below grade, I set a mix of stones, concrete, old barbed wire, and iron rods from cable spools. I boxed up a form for the base above grade and then laid the hearth. Beyond that, it was all free-laid stones. I chose a small Rumford-type fireplace and followed the dimensions I found online. I mixed the mortar and concrete in a wheelbarrow with a hoe. I could lay two courses of stones a day before I had to stop and let it harden.
The Rumford design is the most efficient for heating. It features a shallow firebox with angled sides and a curved breast above, which forms a Venturi effect, drawing air and smoke upwards. I formed the curved breast of bed frame angle iron and layers of mesh, filled mortar, and small stones. Conventional wisdom holds that fireplaces must be made of firebrick and refractory mortar. Maybe so, but I know this one will last longer than both the cabin and me. Several times I have come across a lonely chimney, the last survivor of an old homestead, as this will be in a century or two. It’s my first fireplace, but it was easy enough, works well, and I’m proud of the result.
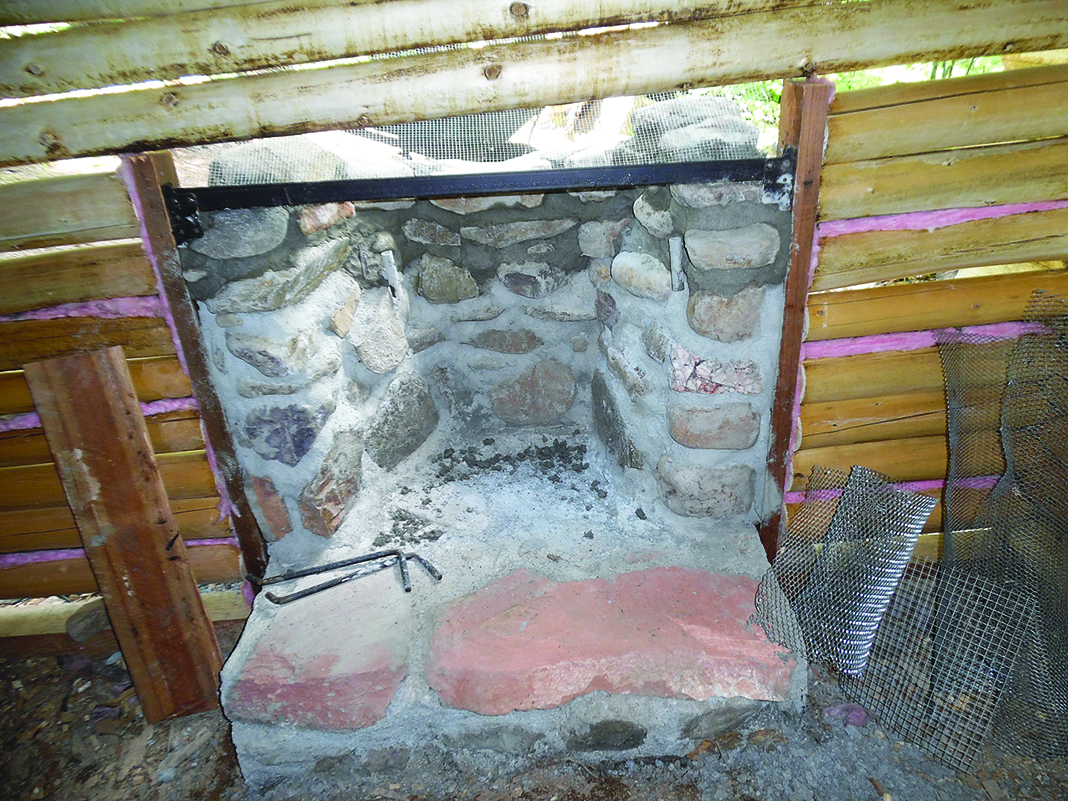
I built a small Rumford-type fireplace from scavenged stones.
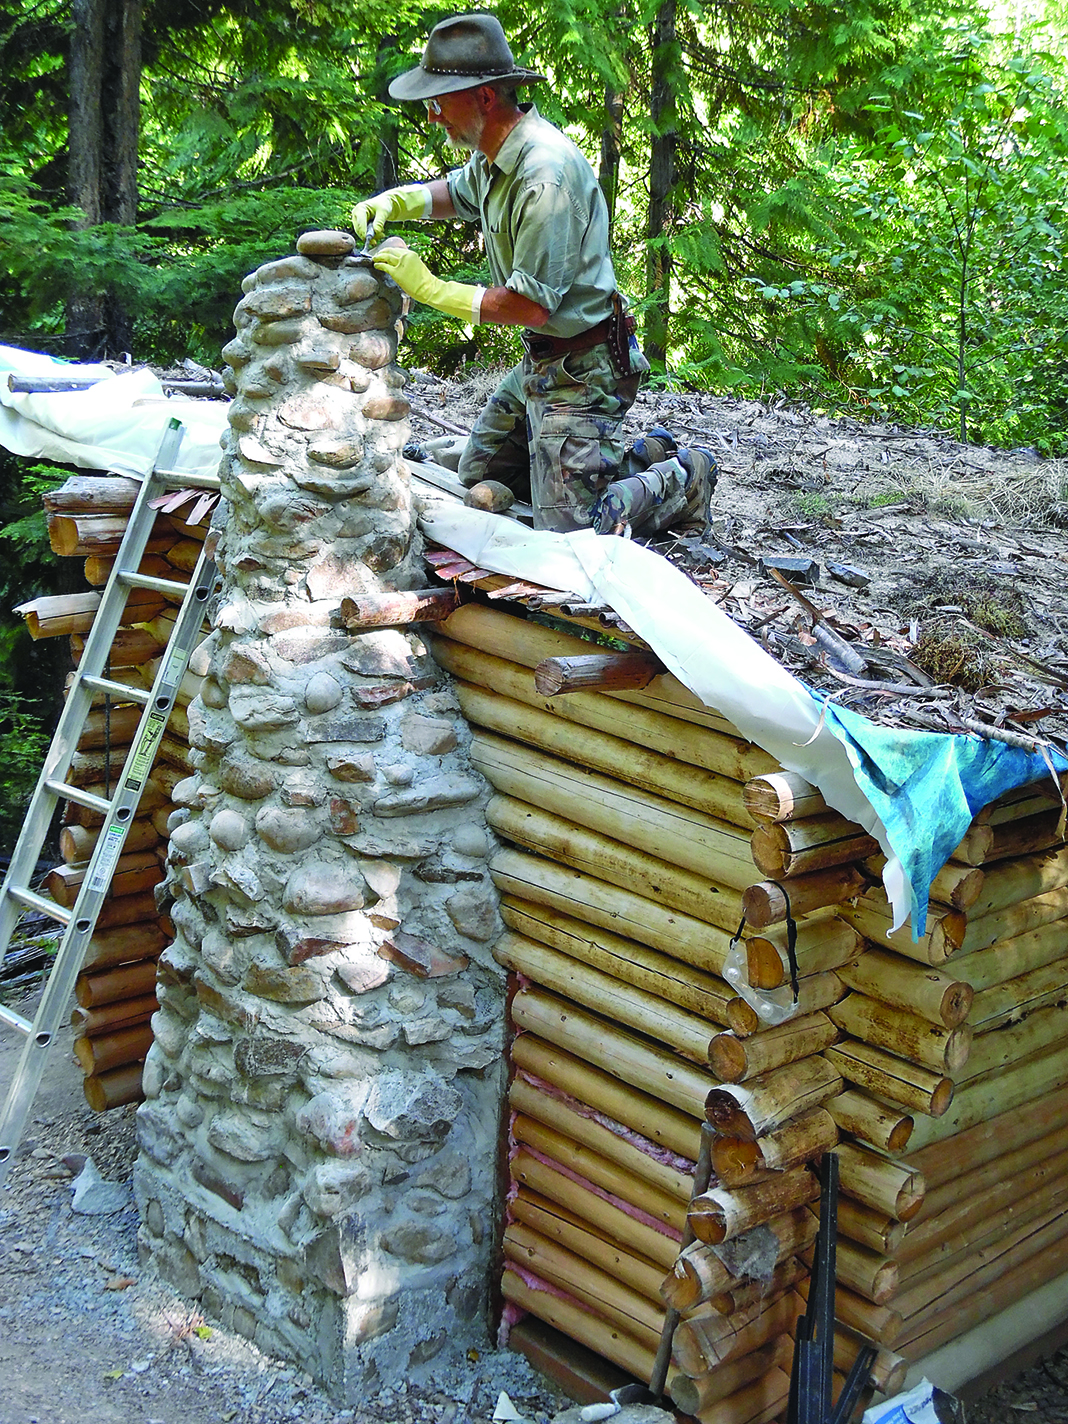
I could lay two courses of stones a day before I had to stop and let it harden.
Interior walls & floors
We varnished the inside walls and painted the outside walls with a preservative. We got all the paint, varnish, and preservative free from a recycle center. They might not have been the products I’d have chosen, but the price was right and I’m not picky.
The most tedious task was chinking between the logs, both inside and out. For this I used a mix of sand, Portland cement, lots of lime, and dried grass clippings from the lawn mower, blended with a ½” drill and mixing paddle. I soaked the grass before mixing so it wouldn’t draw the water from the mix and harden it. This chore took about 30 hours.
We covered the dirt floor with 1½” styrofoam, then plastic sheets. We dug dirt from the site and screened it to get the sticks and lumps out, then mixed it in a wheelbarrow with 10% Portland cement. We stirred water in for a thick consistency and then troweled the glop down smooth, 2″ thick. The finished level is even with the top of the 4×4, well above outside grade which is important for a dry floor. Soil-cement is the best floor for a remote cabin because most of it comes from the site itself, with a minimum of material hauled in. I would never build anything, from a shed to a home, with an elevated floor. That’s just asking for mice. A solid floor, be it soil-cement as here; brick-on-sand as in my cottage; or concrete slab, is cheaper than a wood floor, cooler in the summer, warmer in the winter, can’t rot, and is vermin-proof.
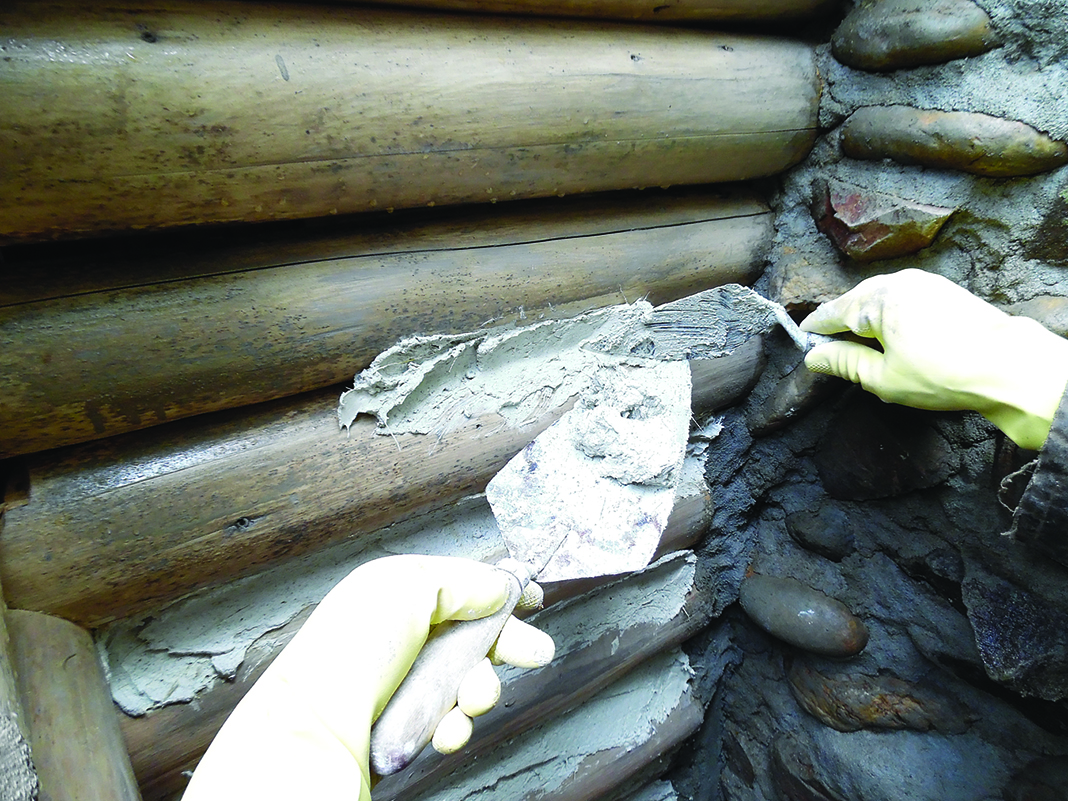
Chinking between the logs was the most labor-intensive part of this project.
Finishing touches
The cabin is 11’4″x8′ inside (a little more than 90 square feet). It’s surprising how comfortable this small space can be. The “tiny home” thing isn’t new.
One end of the cabin is dominated by the fireplace. To one side is stacked firewood and the other side holds a small kitchen counter. The other end of the cabin has a 4-foot-wide bed platform and an end table. In the middle of the long wall opposite the door is a table, set so one person sits on the bed and another on a chair. It’s the perfect spot to sit, drink tea by the fire, and read and write.
There is plenty of storage under the bed and on shelves. Candles and an oil lamp provide light. Instead of a mattress, we use sleeping bags and pads, and store the bedding in bins under the bed when we’re not there. Freeze-thaw cycles are not kind to canned foods, so we only store dry foods here (and in a cabin, everything must be set up with vermin in mind). However, I’m happy to say that this little cabin is so snug that not a single mouse has ever gotten in!
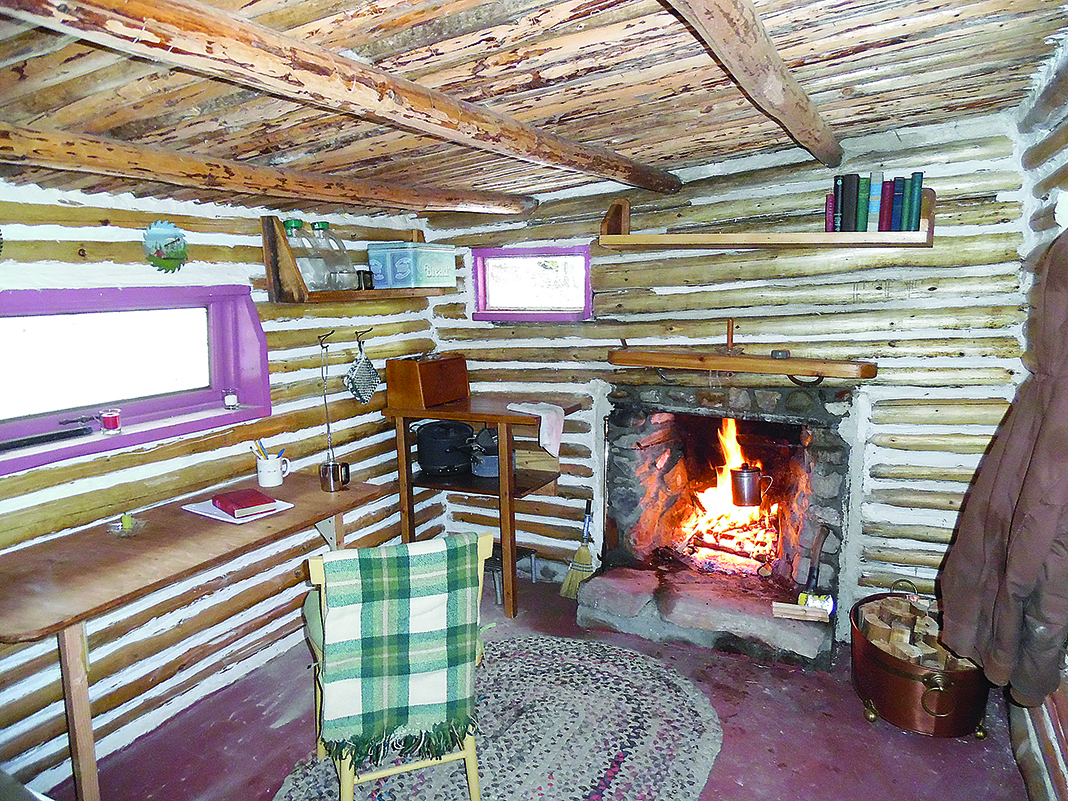
The cabin interior has a bed on one side and a fireplace on the other side, with enough room for a writing desk.
We store a ladder and a shovel under the porch so we can dig out the chimney when visiting in winter. Additionally, we have an “out” with a seat (but not the “house” part) dug nearby, and a stream down the hill provides water.
Very few people know where my hidden refuge from the world is. At long last, I’ve realized my dream of a rustic cabin in the woods. What more could a backwoodsman ask for?
The total cost was $418.10, much of it for 1,440 lbs of concrete and 1,120 lbs of mortar used in the fireplace.
Recommended reading
Your Cabin in the Woods by Conrad Meinecke, published in 1945, is the most enthusiastic book on cabin building and cabin living that I know. It can be found free online.
The Wilderness Cabin by Calvin Rutstrum, published in 1961, is hard to find, but worth the hunt. Filled with details for many types of cabins, this book taught me how to make a trapper’s tilt.


Nice job. Does retain warmth, or does it chill right down when the fire burns down on winter evenings?
Interesting reasoning on the floor that I had never heard of. I had always considered it a must to have an elevated floor (mainly to have the dry storage underneath, you’ve made me reconsider.
I have half a mind to make one of these. Did you put the cement floor in before doing the walls? Thanks
Very cool! Keep living the dream!
Thank you for sharing…wonderful information here. It truly is a beautiful tilt.