
By Lisa Nourse
Issue #177 • July/August/September, 2019
Any medical professional will tell you that adding fish oil to your diet has incredible benefits. Oily fish is rich in omega-3 fatty acids which provide many health benefits. Fish oil can reduce blood pressure and lower triglycerides. It can also increase levels of “good” HDL cholesterol, slow the development of plaque in the arteries, and help to reduce inflammation. Medical professionals will also tell you that it is better to get your fish oil by eating oily fish two or three times a week rather than taking a supplement. The fish contains vitamins, minerals, protein, and other nutrients that you just can’t get from a supplement.
At least one study has shown that omega-3 fatty acids have declined in Atlantic farmed salmon, meaning you would need to eat more in order to get the same benefits. However, fresh oily fish is not available in a large part of the country. In these cases, it is better to get your omega-3 from a supplement or from plant sources (this is also a good option for those who simply don’t like the taste of fish).
I live right on the Pacific coast — near a river and multiple fishable streams. I happen to love fish and I also happen to have a family that loves to go fishing. So we are blessed to be able to have fresh fish with our meals often and have enough to can for the times when we are unable to go fishing or don’t bring home a catch.
Canning fish
Our favorite kinds of fish to can are smoked steelhead (a type of trout that migrates to the ocean then returns to freshwater to spawn) and tuna. The best steelhead run is during the winter and tuna is during the summer, so we can fish twice a year.
All varieties of fish can be canned using the methods below. Other seafood such as clams, shrimp, crab, etc. have different methods and processing times.

Smoked steelhead
Cleaning and cutting up the fish:
Rinse the fish with clean water then cut from the anus to the gills. Remove the innards and the blood line that runs along the spine. (Use a spoon to scrape off the blood line.) Then rinse the fish inside and out again with clean water. Once the inside of the fish is clean, take a knife and go in by the gills, turning the knife so it runs parallel with the backbone. Run the knife down the backbone on one side and then the other — this makes two fillets with minimal bones. Once you have the fillets, you can clean them up of any excess fins or bones as needed.
Cut cleaned fish into 1½-inch-wide pieces. We clean and cut the fish, then vacuum seal and freeze it until we have enough to fill the canner.
Smoking the fish:
We prefer to can our steelhead after it has been smoked for 45 minutes. The smoke flavor intensifies with canning, so 45 minutes of smoking is just right for us.
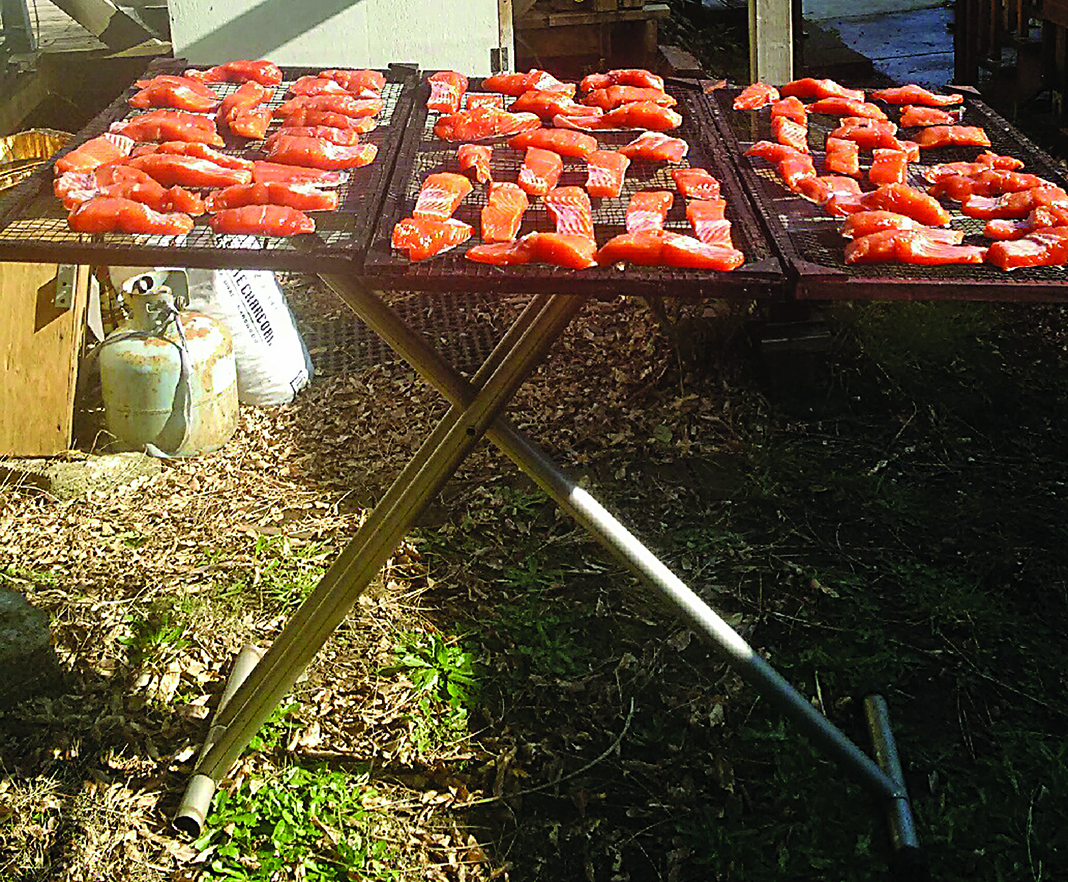
Brine the fish for 24 hours in a mix of three parts water, two parts sugar, and a little bit less than one part salt. After 24 hours, pull the fish out of the brine, rinse it, and pat it dry with paper towels. Then lay it out on the smoker screens in the sun until it achieves a glazed look or becomes tacky or sticky to the touch. Doing this creates a nice surface for the smoke to adhere to. The amount of time this takes will depend on the weather conditions. You can speed up the process by placing a fan to blow across the fish.
In the meantime, get the smoker ready. Different smokers will require different methods of getting ready, so just follow the instructions in your manual. We use a homemade smoker that my nephew built.
Once the smoker is at a full smoke (fully ready) and the fish is tacky, put the screens in and let the fish smoke for the desired length of time — we smoke it for 45 minutes.
When the fish comes out of the smoker, peel the skin off, if desired. You can leave the skin on or take it off, but it is easier to peel it off after smoking rather than before.

Lay the steelhead on racks in the sun until it becomes tacky before smoking.
One batch of smoked steelhead out of the canners
Canning the fish:
Start with clean jars. The National Center for Home Food Preservation says it is no longer necessary to sterilize the jars if canning a product for more than 10 minutes; the high temperatures in the canner will sterilize everything. It is best to use wide-mouth jars for canning fish, and only use pint or half-pint jars. It is not recommended to can fish in quarts.
After the fish has been smoked, pack the pieces into jars, leaving one inch of headspace. Pack the fish in tightly and fill all of the little crevices.
Note: When canning steelhead it is not necessary to remove all of the bones, they will soften and not be noticeable once the fish is canned.
Add ½ teaspoon of salt per pint, if desired — it is not necessary for preserving; it’s just for taste. Do not add liquids.
Clean the jar rims with a clean rag dampened with vinegar. Put on lids and rings and place in pressure canner to which 2-3 inches of hot water has been added. (Lid companies say it is no longer necessary to warm the lids in near-boiling water, but I still do so.)
Process fish according to your canner manufacturer’s directions for 100 minutes at 11 pounds pressure if using a dial gauge canner or 10 pounds pressure if using a weighted canner — adjusting for altitude if necessary.
When the processing time is up, turn off the heat and leave the canner undisturbed until pressure drops to zero, then let cool another 10 minutes. Remove the lid carefully — tilted away from you to prevent steam burns. Let jars sit in the canner for another 10 minutes then remove without tilting them, and place on a folded towel at least one inch apart. Let sit undisturbed for at least 12 hours. Remove the rings, wash the jars of fish with warm soapy water, rinse, dry, and store in a cool, dry place out of direct light.
Canning fish stinks
We can fish outside because the smell can drive you right out of the house and it will linger for days.
When canning outside, it is best to use a sturdy double-burner outdoor range placed in a non-windy area. You can also erect a windscreen of plywood if necessary, but make sure there is no breeze that will make it difficult to control the flame of the burners.
Set up your stove on a sturdy flat surface and check that it is level before beginning to can.
It’s also a good idea to always start off canning with a full propane tank.
After canning fish, you will have to wash your canner well to take out the smell. I have heard that you can add ½ cup of lemon juice or a couple of tablespoons of white vinegar to the water in the canner to reduce the smell, but I find that a good washing with hot soapy water after canning the fish works just fine.
Canning tuna
Last year we booked a trip to fish for tuna with Winchester Bay Charters out of Winchester Bay, Oregon — absolutely fantastic people to fish with. We brought home enough fish to can a bunch and be able to give some away. Other years we buy our tuna right off the boat from one of the local fishermen.
We can tuna basically the same way we do steelhead except we don’t smoke the tuna first.
Cleaning and cutting the fish:
Gut and fillet the fish and remove the dark meat. Some people do not remove the dark meat but we find that it adds an undesirable strong flavor. (The dark meat can be canned separately for special treats for your dogs or cats.) Cut the tuna into medallions and pieces that will fit in the jars.
Canning the tuna:
We raw pack the tuna without adding additional liquid. You can add a couple of tablespoons of olive oil to the bottom of the jar before filling with tuna if you prefer. You can also add salt if you want, but we do not. The tuna will shrink a bit and kind of meld together when it is canned, so you want to pack the jars tightly and fill all the nooks and crannies with smaller pieces.
Clean the jar rims with a clean rag dampened with vinegar. Put on lids and rings and place in pressure canner to which 2-3 inches of hot water has been added.
Process tuna according to your canner manufacturer’s directions for 100 minutes at 11 pounds pressure if using a dial gauge canner or 10 pounds pressure if using a weighted canner — adjusting for altitude if necessary.

Tessa watches Daddy fill the jars with chunks of tuna.
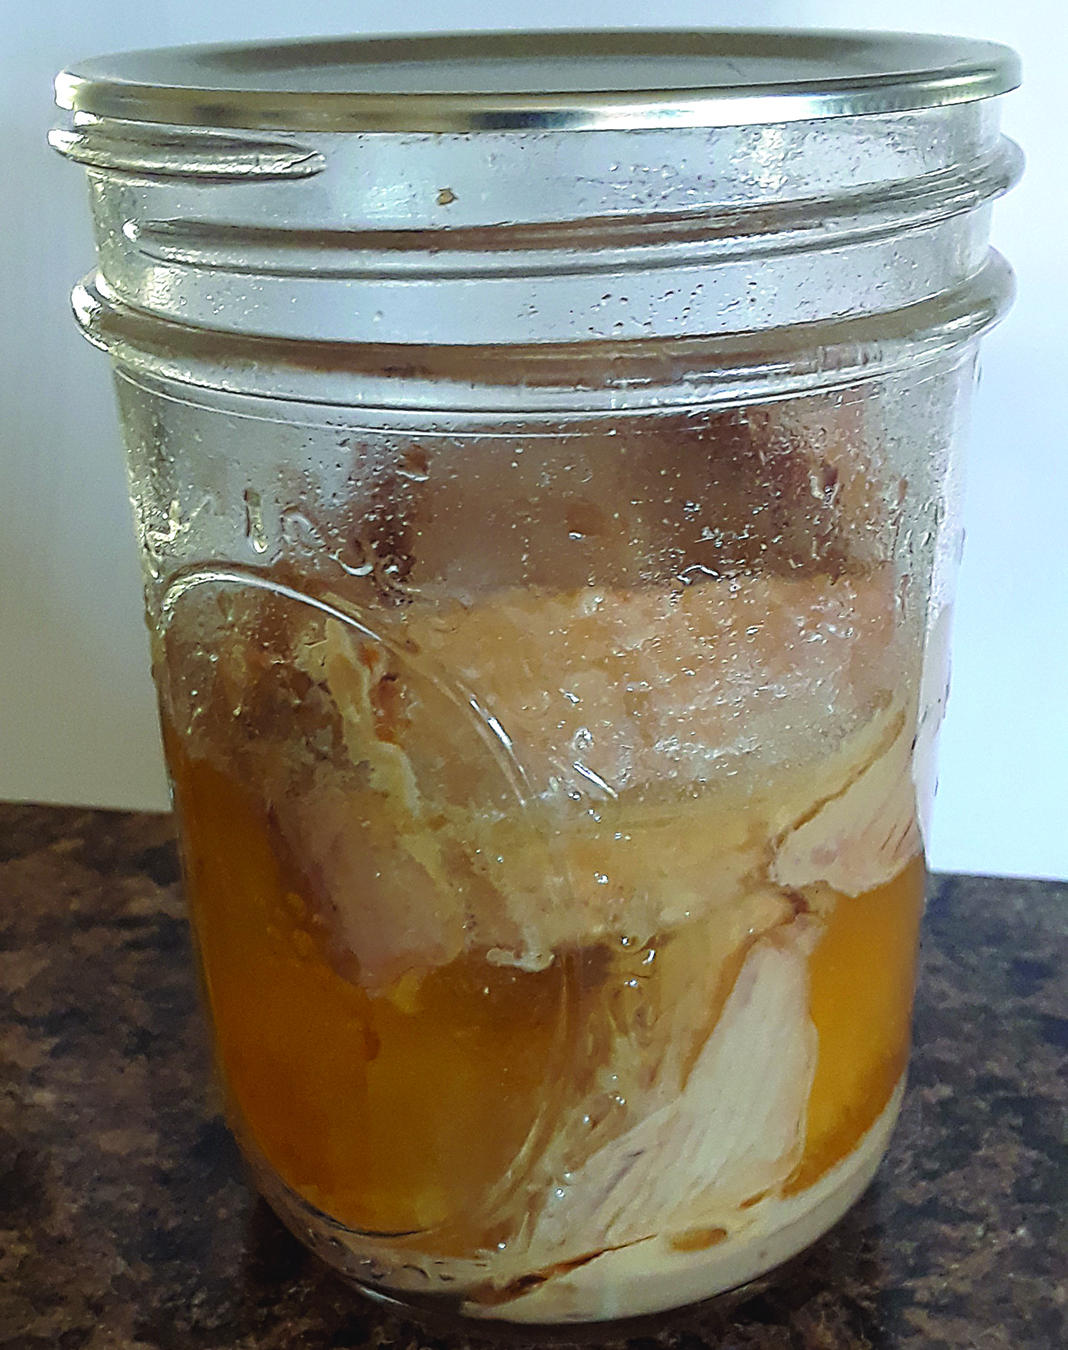
When tuna is raw-pack canned it shrinks and melds together in the jar while producing its own juices.
Recipes for using your canned fish
Tuna rice bowl
1 cup jasmine rice
1 cup water
1 half-pint canned tuna
2 Tbsp. mayonnaise
1 tsp. minced garlic
1 tsp. basil
salt and pepper, to taste
1 medium zucchini
1 tsp. olive oil, for sautéing
1 tsp. granulated garlic
1 tsp. parsley
2 or 3 radishes, sliced
Rinse the rice and add it and the water to a pot. Heat uncovered on high until just starting to boil. Then stir the rice, cover, reduce the heat to low, and let the rice simmer for about 20 minutes, or until the rice has soaked up all of the water.
Remove the rice from heat, fluff with a fork and leave the lid off so it can cool a bit.
Drain the liquid from the tuna and dump the meat into a bowl. Add the mayonnaise, minced garlic, basil, salt and pepper, and mix well. Set aside.
Cut the zucchini into inch-long quartered pieces.
Add about a teaspoon of olive oil to a pan and heat over medium heat. Add the zucchini and sauté until they are a little browned. Add granulated garlic, parsley, and more salt and pepper as desired and continue cooking until the zucchini is still a little firm, but slightly translucent.
Put the rice in a bowl and top with the tuna and zucchini. Add some sliced radishes as garnish.
Smoked steelhead spread
1 cup flaked, smoked steelhead
¼ cup sour cream
¼ cup mayonnaise
3 Tbsp. chopped green onion
2 Tbsp. dill relish
½ tsp. Worcestershire sauce
dash garlic powder
Mix all ingredients together and place in the refrigerator for an hour or two before serving on crackers or toast.
Zucchini tuna fritters
1 half-pint canned tuna, drained
1 small zucchini, grated — I have also used grated carrot when I didn’t have zucchini available.
1 Tbsp. white onions, finely chopped
1 or 2 Tbsp. cornmeal, or you can use bread crumbs
1 Tbsp. grated Parmesan cheese
1 egg
½ tsp. salt
¼ tsp. pepper
2 Tbsp. butter, for frying
In a large mixing bowl combine tuna, zucchini, onion, cornmeal, Parmesan cheese, egg, salt, and pepper. Stir well, breaking up the tuna with a fork. Add more cornmeal if the mixture is too soupy. Heat a frying pan on medium-high heat. Melt butter in pan and with a spoon, drop clumps of fritter mixture (about ¼ cup each) into the pan.
Press fritter lumps flat with the spoon. Scoop up any fraying edges to make nice round fritters. Cook until golden on one side, then flip and cook until golden on the other side. Serve with homemade tartar sauce and a nice salad.
Homemade tartar sauce
¼ cup mayonnaise
2 tsp. horseradish
2 Tbsp. dill relish
1 Tbsp. scallions, minced
½ Tbsp. fresh dill, minced or 1 Tbsp. dried dill (optional)
2 tsp. apple cider vinegar
salt and pepper
Mix mayonnaise, horseradish, and dill relish in a bowl. Chop scallions and dill and add to mayonnaise mixture. Add vinegar and salt and pepper. Mix well.


