
By Kristina Seleshanko

Dehydration is one of the oldest and easiest methods of food preservation. Anyone can easily dry and store almost any food; there are just a few basic rules to learn about dehydrating.
What foods can be dehydrated safely?
Vegetables, fruits, herbs, jerky, and seeds can all be safely dehydrated. For safety’s sake, there are a few things you should never dehydrate.
• Fatty meats and dairy: These go rancid quickly because of their high fat content. Yes, you can dehydrate drops of yogurt and turn them into a tasty snack, but those yogurt drops are not shelf stable; store them in the fridge.
• Fish and poultry: You can dehydrate fish, but it will only remain shelf-stable a short time — perhaps a month or so. Poultry isn’t considered a good choice for dehydration because it must first be heated to kill harmful bacteria, which results in an end product that’s of dissatisfactory quality.
• Eggs: Eggs are not considered safe for home dehydrating for two reasons: the risk of salmonella poisoning and the fat content. I have dehydrated cooked (scrambled) backyard fresh eggs in the past, but it is risky … and frankly, they taste awful.
• Nuts: Nuts are too fatty to become shelf stable through dehydrating. Peanuts are an exception because they aren’t truly a nut, but a vegetable.
• Meals: I love the idea of being able to take leftovers, dehydrate them, and make them shelf stable. Unfortunately, most meals contain ingredients that aren’t safe for dehydrating. A better idea is to dehydrate individual items that can make up a meal, and combine them into their own jar or bag to make your own personal “just-add-water” food.
How long do dehydrated foods last?
There are a lot of variables here. The type of food you’re preserving is one factor, as is how dry you get it, and how well you store it. Generally, though, home dehydrated foods last at least a year.
What kind of dehydrator should I use?
Home preservers get passionate about this topic. Essentially, we are divided into two camps: Those who adore their expensive dehydrators (like Excalibur) and those who find more affordable machines completely satisfactory.
In my opinion, just because a machine is more expensive doesn’t mean it is better. I love my Nesco American Harvest dehydrator. I purchased extra trays for it, and it’s never let me down. In fact, I love it so much, last year I bought a second one!
That said, there are some lousy dehydrators on the market, so be sure that whatever you buy has the following features:
• An adjustable thermostat, from 85 to 160° F
• Double wall construction
• An enclosed heating element at the top of the unit and a fan/blower
• UL seal of approval
• The ability to add trays
• The option of using plastic tray liners designed to keep liquids and small items from falling through regular dehydrator trays
Of course, you don’t have to go with an electric dehydrator. While a good electric dehydrator does offer complete control over temperature, and therefore results in a higher quality end product, our ancestors got by pretty well just using the sun! But solar dehydrators do have limitations unless you live in an area where humidity is low and high temperatures are common for days running. To see if a solar dehydrator might work for you, go old school: Lay a clean white sheet in a sunny location and put food on it to dry. Turn the food a few times a day to speed the drying process. If this works, you might consider upgrading to either an inexpensive hanging mesh solar dehydrator rack or a more pricey wooden one.
Other options include using a standard oven or just the warming drawer in an oven. Neither of these is ideal because very low temperatures cannot be achieved, which can result in quality loss. Of the two, warming drawers are preferable.
What temperature should I use when dehydrating?
Herbs: 95° F
Seeds and nuts: 105° F
Fruits: 135° F
Fruit leather: 140° F
Vegetables: 135° F
Jerky and meat-based foods: 160° F
How to dehydrate just about any food
Herbs: For small-leaved herbs, let the leaves remain on the stem, then place stems on dehydrator trays. For large-leaved herbs, first remove the leaves from the stems then place the leaves in a single layer on dehydrator trays. Dry until crisp. Remove the leaves dried on the stem by running your fingers down the length of the stem; have a bowl or jar beneath your hand to catch the leaves as they fall.
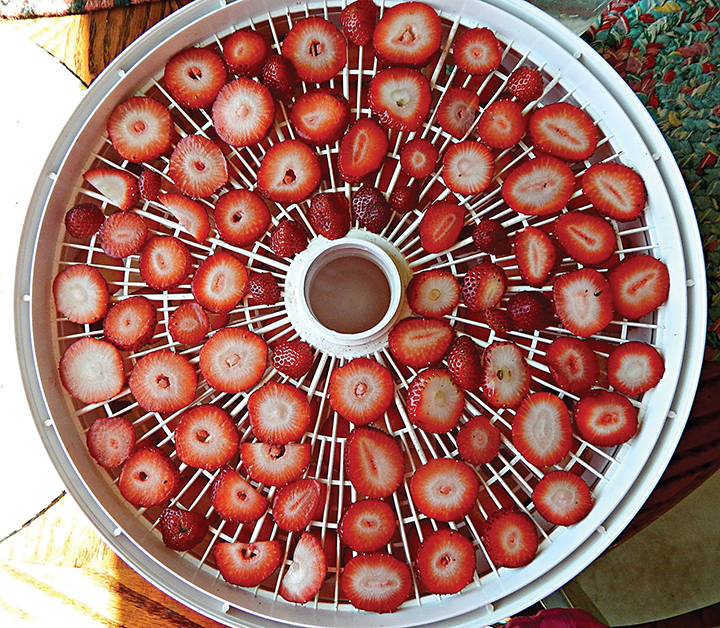
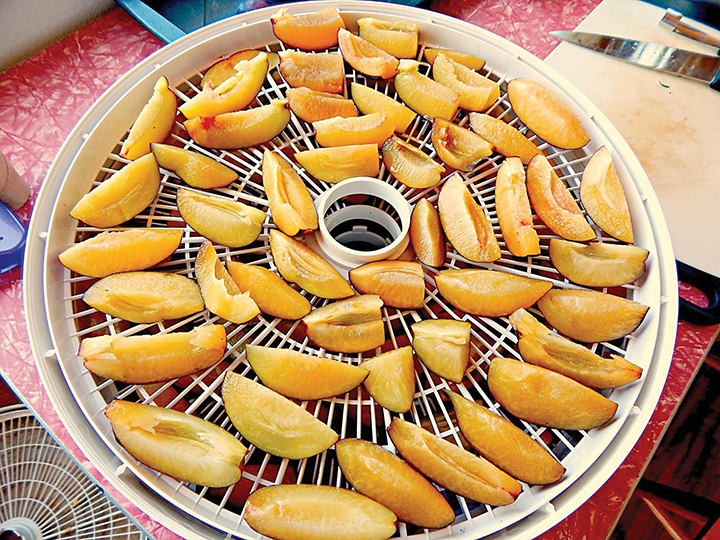
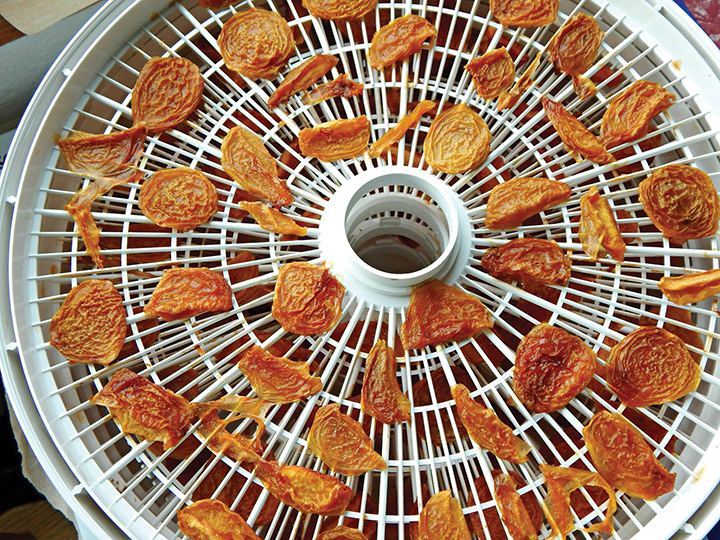
Fruits: Most fruits should be sliced before dehydrating. The thinner the slice, the less time the food takes to dry. However, paper-thin slices tend to stick to dehydrator trays. If desired, prevent discoloring by dipping fruit in lemon water as you cut it up. (Use about 1 tablespoon of lemon juice to 1 cup of water.) Place juicy fruits, like plums, peaches, and apricots, skin side down on dehydrator trays to help prevent sticking.
Dehydrate until you can tear a piece of fruit and no fluid seeps out. Fruit should still be pliable after dehydration. To prevent over-drying, test a thinner or smaller piece of fruit before you think it’s dry. Allow it to cool, then test for doneness.
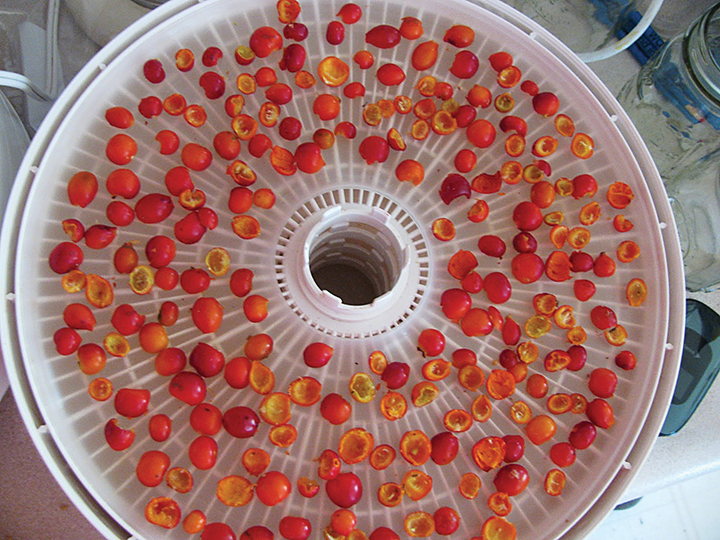
A few fruits (like blueberries, cranberries, and grapes) require the extra step of breaking their skins before deyhdration. An easy way to accomplish this is to freeze them in a single layer on a rimmed baking sheet. Once hard, transfer the fruit to the trays of a food dehydrator. Another method is to plunge the berries into boiling water for about 15 to 30 seconds until their skins crack, then plunge them into cold water to stop the cooking process. You may also prick berry skins with a needle or similar implement.
Fruits with a rind, like watermelon or cantaloupe, should have their rinds removed before dehydrating.
Fruit leathers: Fruit leathers are homemade fruit roll-ups. Puree fruit and, to prevent discoloration, add 1 teaspoon of lemon juice for every cup of purée. Pour a thin layer into a fruit leather dehydrator tray (a solid plastic tray cover — or, if this is not offered for your dehydrator, you can try turning parchment paper or Paraflexx liners and binder clips into bowls that can sit on your dehydrator’s trays.) The leather is done when you can touch the center and see no indentation left behind. Remove the leather while still warm, roll into a scroll, allow to cool, and wrap in plastic wrap. Refrigerate, if using within a few days. Otherwise, freeze.
Vegetables: Cut, if appropriate, and dehydrate until you can tear a piece and no liquid seeps out. Veggies should be brittle when dehydrated.
Most vegetables require blanching to help preserve color, flavor, and nutrients. To do this, drop into boiling water for 2-3 minutes, then dunk into ice water to stop the cooking process. But the following veggies should never be blanched before drying: cucumber, eggplant, garlic, horseradish, mushrooms, onions, peppers, and winter and summer squash (including zucchini).
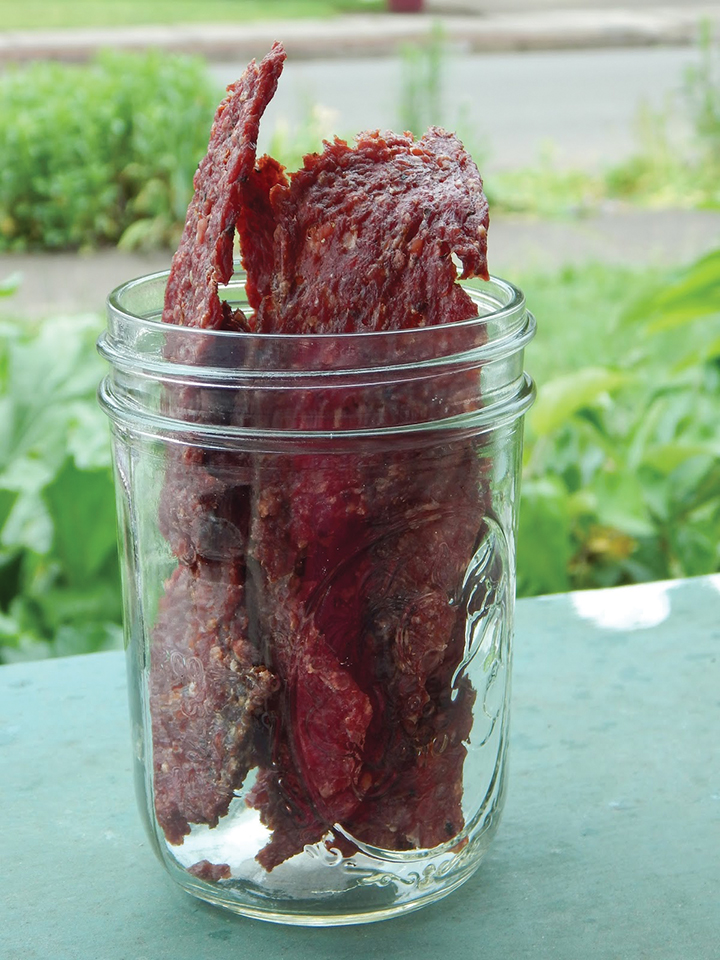
Jerky: Cut all fat off the meat, then cut into strips no more than ¼-inch thick. If you like chewy jerky, slice the meat with the grain. Season as desired. Lay in a single layer (pieces not touching) on dehydrator trays and dry until the meat cracks when you bend it. Because homemade jerky doesn’t contain preservatives, it should be stored in the refrigerator (if using within a few days) or the freezer.
You can turn ground meat into jerky simply by adding jerky seasonings, filling the mixture into a jerky gun, and “piping” the jerky directly onto the dehydrator trays.
Because all pork may contain trichinella parasites, always freeze the pork (which kills the parasites) before turning it into jerky. Cut the pork into pieces no more than 6 inches thick and freeze at 0° F for at least 30 days before dehydrating.
If not thoroughly cooked to 160° F, all meat poses the risk of serious E. coli poisoning. The dehydration process does not get meat hot enough to kill bacteria — even when the dehydrator is set to 160° F; for that reason, experts recommend heating the meat in the oven until a thermometer gives an internal temperature of 160° F. One way to do this is to heat the meat in the oven as it marinates (before placing it in the dehydrator). Another method is to first dehydrate the meat, then place the resulting jerky in the oven until it reaches the appropriate temperature. This second method is considered less desirable because bacteria can become more heat-resistant after it’s been preheated in the dehydrator. Also, do remember that preheated meat will have a shorter dehydration time than raw meat.
Important tips
• Pieces of food should not touch each other on dehydrator trays or the pieces may stick together.
• Always check the food every few hours during the dehydration process. This ensures you don’t over-dry anything. (Yes, you can over-dry dehydrated food, making it tasteless and too tough.)
• Remove finished food as soon as it is done, consolidating pieces that still need drying time.
• Rotate dehydrator trays periodically.
• When testing food for doneness, remove a piece and let it cool a couple of minutes first.
Powdering
Many people like to powder their dehydrated food because it takes up less storage space and makes adding nutrition to meals extra easy. To powder fruits or vegetables, first dehydrate them, as instructed above. Then use a coffee grinder, a food processor, or a good quality blender to powder up the dehydrated food. Store powders in an airtight glass jar, in a cool, dry location. Adding a desiccant or silica gel packet can help powders stay drier longer.
Here’s a helpful way to use this method: If you have to peel tomatoes (as for canning), be sure to save the skins. You can dehydrate them and powder them. By adding a little water, you can make tomato paste.
Dehydrating broth or stock
There are few things more nutritious than homemade stock or broth — however, it can quickly fill up your freezer or canning shelves. That’s why it’s nice to dehydrate your stock. The result is similar to bouillon, minus all the preservatives.
After making stock, strain it and place it in the refrigerator overnight. In the morning, all the fat should have risen, forming a firm layer on top. Carefully remove all the fat. (This step is vital to safe dehydrating of stock or broth, since fat quickly goes rancid.)
Place the remaining stock in a pot on the stove. Cook down the stock, simmering until there is little left and it’s thick and gravy-like. Place solid plastic fruit roll-up trays in the dehydrator and preheat until the trays reach 160° F. Pour the reduced stock onto the preheated trays, keeping the mixture as thin as possible. Dehydrate at 160° F. until dry, and the mixture easily snaps into pieces. You may store the dry stock just like this, or you may powder it. Store dehydrated stock in the freezer.


this is what I would like to learn how to do. my first few attempts were a diaster :). I have a Nesco dehydrator with about 5 or 6 trays. what I don’t have is a good vacuum sealer. I tried grapes and cherries as we have 2 cherry trees out back. I ended up with was were pantry moths… lol. all kidding aside. with the way things are right now 7-15-2020. I would like to get going on dehydrating food again.