By Patrice Lewis
One of the advantages of living a homesteading lifestyle is participants can kick aside the ever-changing concepts of what constitutes “classy” home interior design. Those model-perfect suburban abodes often hold no appeal to those who prefer earthier, hand-crafted features. This includes trendy granite kitchen countertops, which are now so common they’re no longer interesting. Yawn.
With our children grown and out of the house, my husband Don and I are selling our homestead and looking to move to a smaller place. As part of the renovation process before selling, we needed to replace our kitchen countertop with something new.
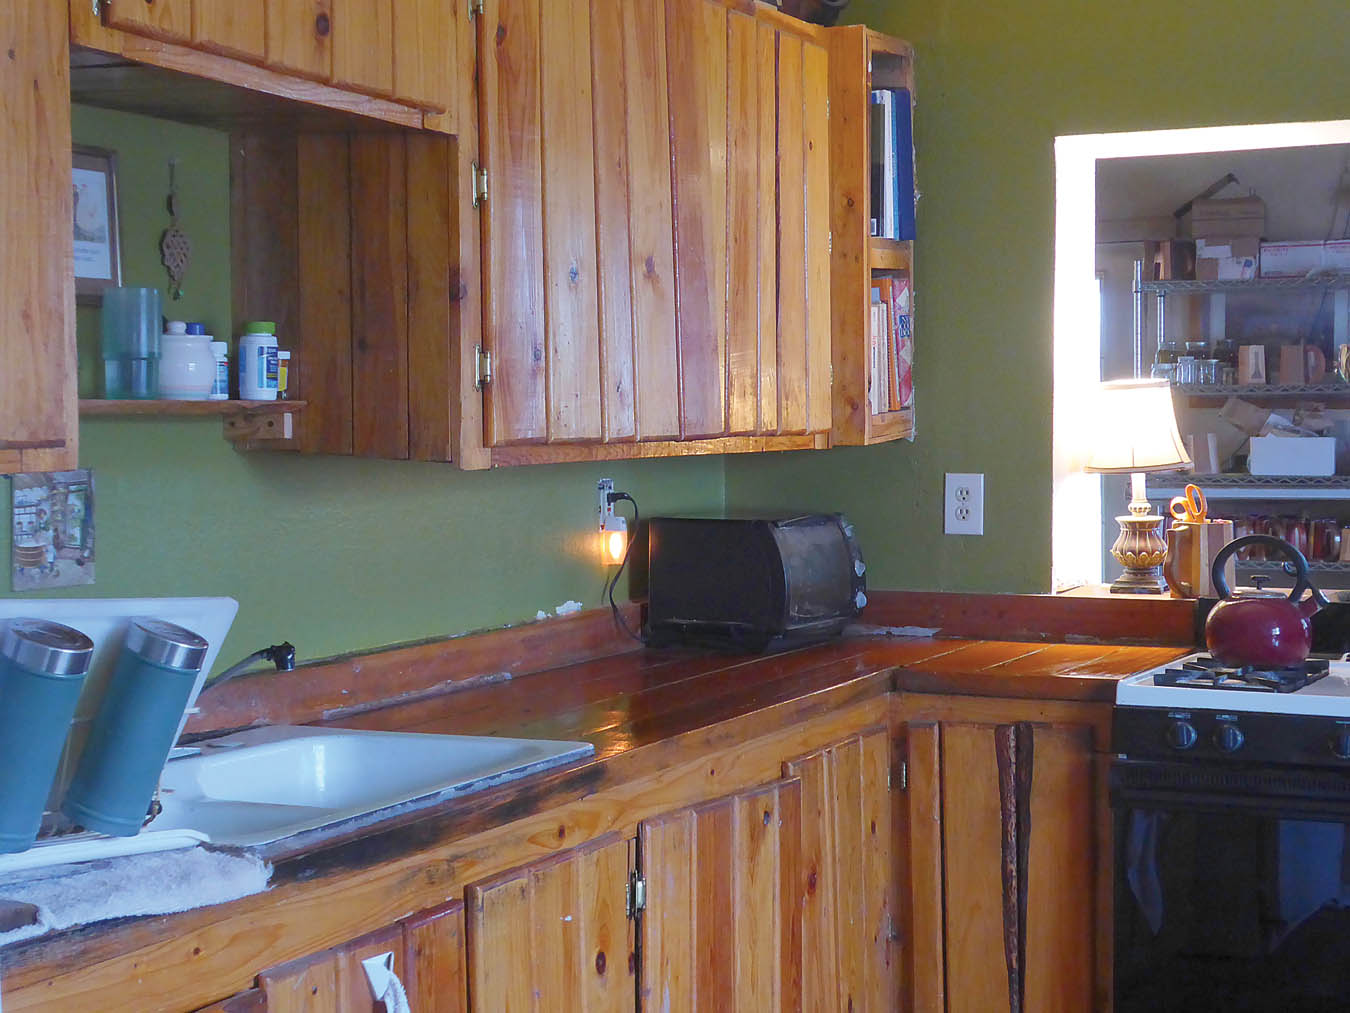
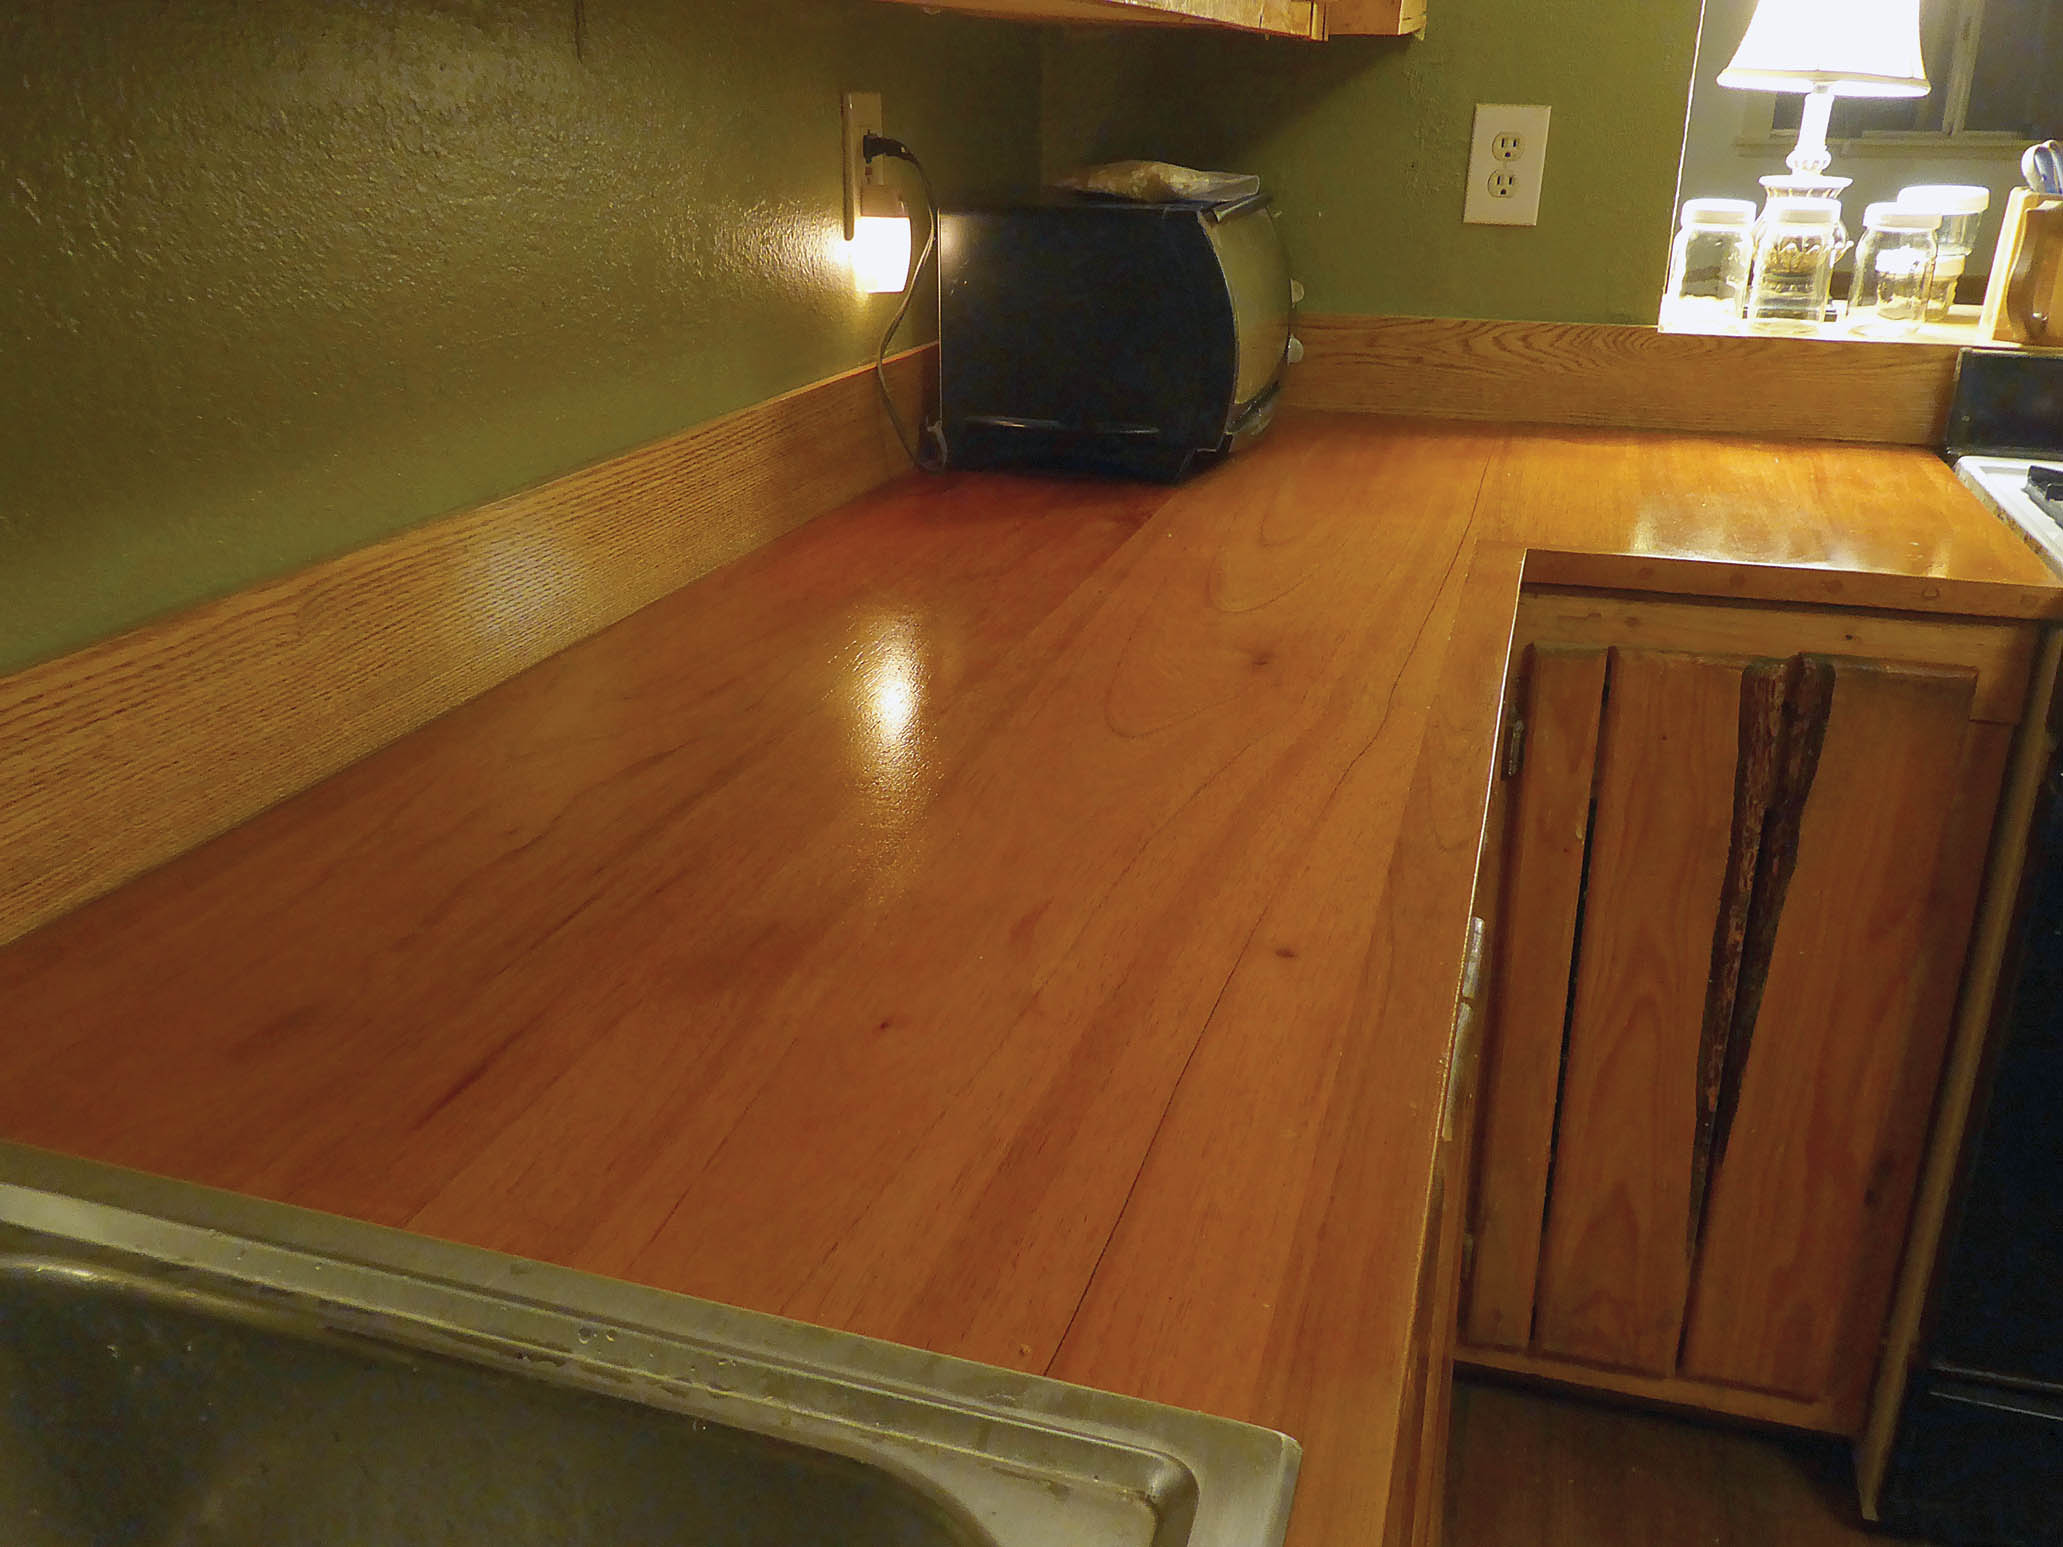
But our old countertop wasn’t your standard feature. It was a handcrafted beauty made of Spanish cedar and lent a lustrous glow to the kitchen that often drew ooohs of appreciation from visitors.
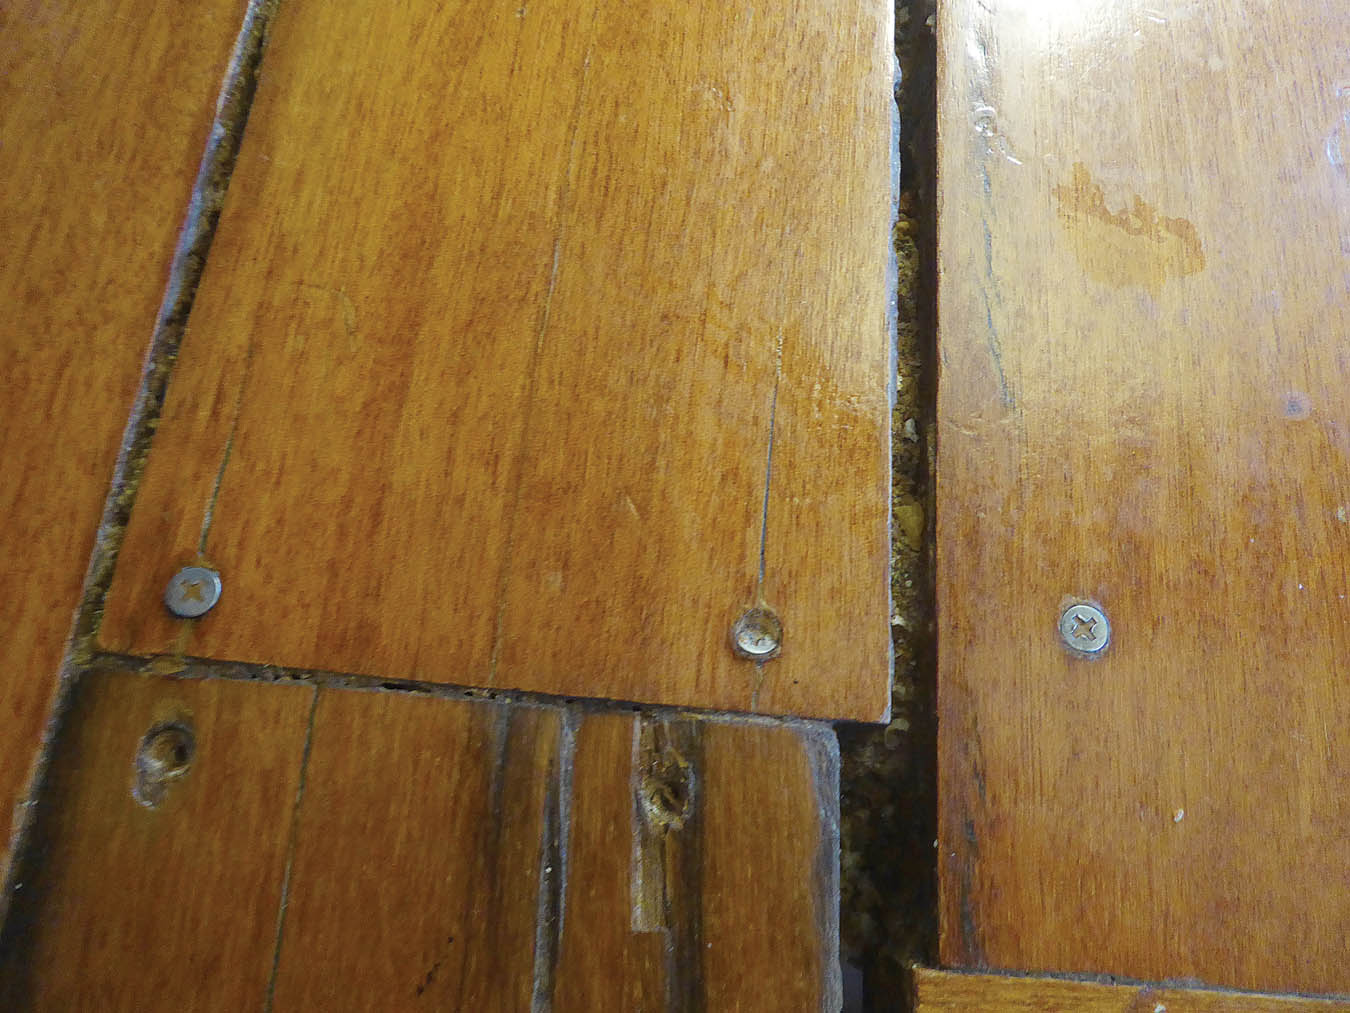
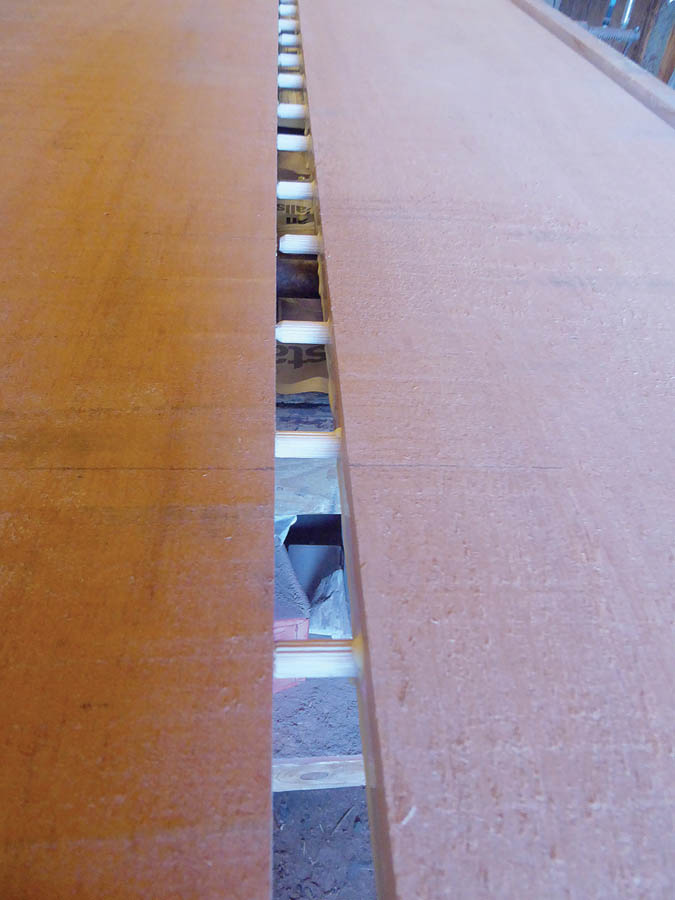
This is our original countertop in the kitchen. Notice the gap between the boards.
So why would we replace such a unique and beautiful fixture? Sadly, the man who built our house was an excellent rough carpenter but often failed to understand certain principles of finish construction, notably that wood shrinks over time. As a result, our original countertop had wide gaps between the cedar boards, in some places approaching half an inch.
For the last 16 years, we adapted to these deficits and accepted the fact that debris could (and often did) fall through into the cabinets below. (One time I defrosted some bags of garden strawberries on the countertop but neglected to put the bags in bowls. Sticky strawberry juice leaked between the gaps and dripped all over my spices, which I keep on a lazy Susan in the cabinet below. What a mess.)
My husband decided to build a replacement countertop, opting to use the same material (Spanish cedar). The result is such a beautiful feature for our kitchen that I’m encouraging other woodworkers to consider building their own version.
Here’s how he built our countertop. Keep in mind the wood my husband used to build out countertop is a soft wood (Spanish cedar), selected to match the previous countertop. Many people might prefer a harder wood, such as oak.
The board footage reflects the configuration of our particular kitchen. Don chose to make the countertop in one large unit, including the hole where the sink goes. Because the original countertop was 24 inches wide, he selected two wide boards for the main portion of the unit.
Building this countertop was a slow process, taking about two weeks total when drying time is factored in. My husband was working on multiple projects during this time, so it’s not like every spare minute was devoted to making the countertop. He had about eight hours of actual hands-on work, not counting drying times between steps.
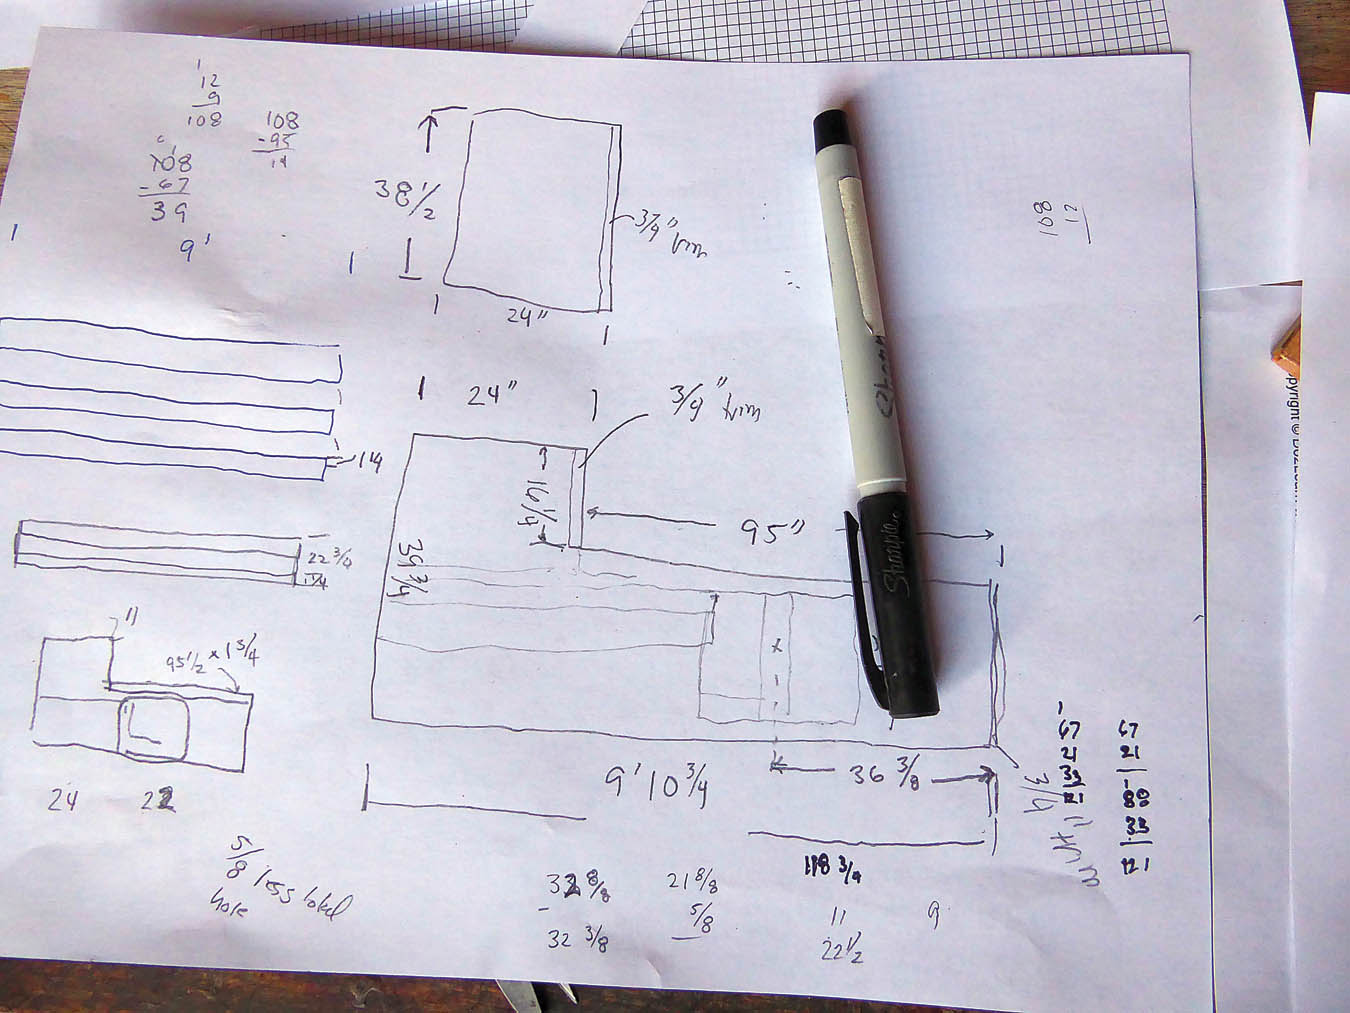
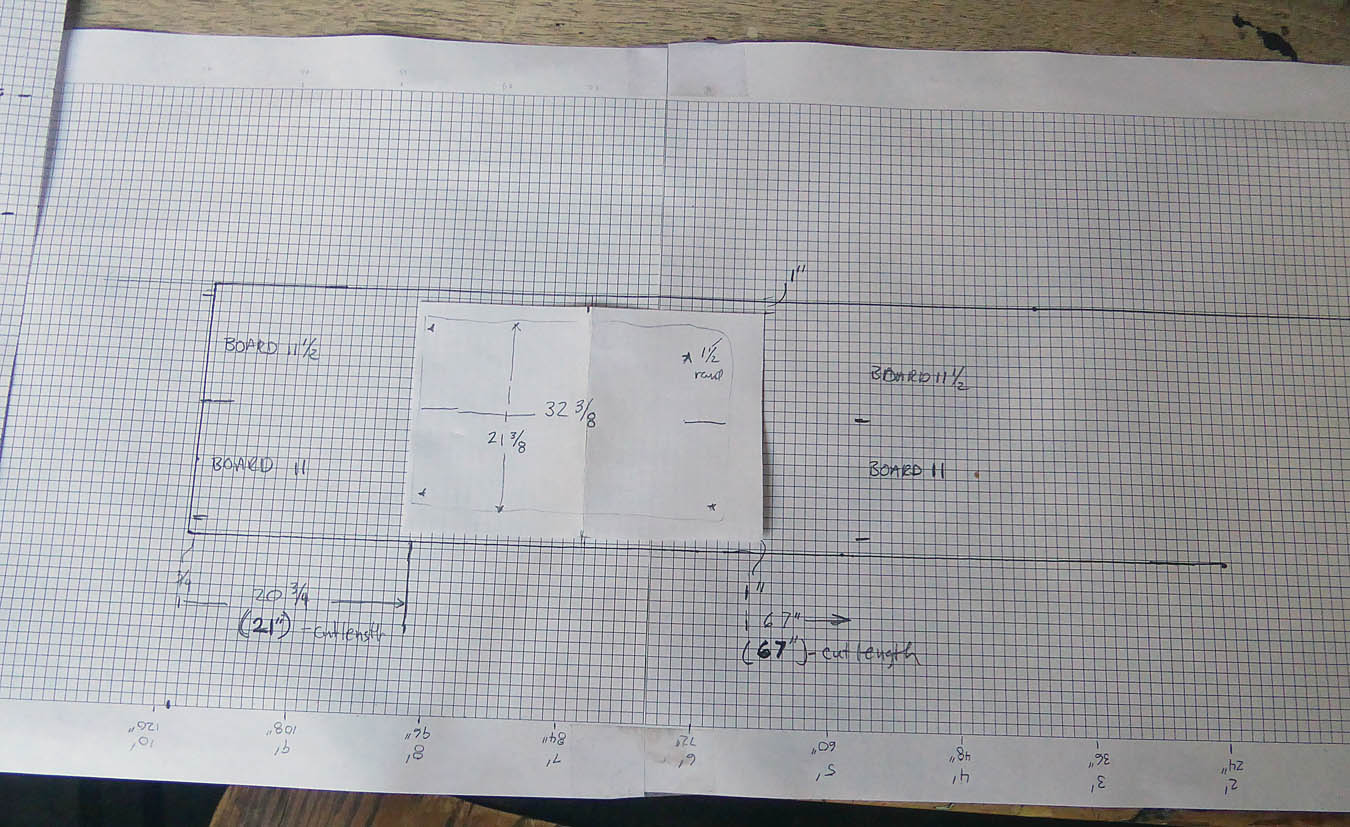
Don drew the project on paper and graph paper and measured and re-measured before cutting any wood.
Step-by-step process
Before doing anything else, Don measured and “built” the countertop on paper. He included the edge trim, the sink hole, and the countertop’s surface area to determine how much wood to buy. He factored in how much room to leave between the backsplash and the edge of the sink.
After the wood was purchased, he re-drew the countertop on graph paper, laying down precise measurements, this time factoring in the width of the boards he was using. He measured and re-measured obsessively, since there would be no room for error when it came time to fit the countertop onto the existing cabinet infrastructure.
In our case, the longest dimension of the countertop was 10 feet long and 24 inches wide. He used two wide boards (11 inches, and 11.5 inches) for the main body of the countertop (later, he added trim to both sides, which brought the countertop to the final width of 24 inches).
He trimmed the two boards to 10 feet. Standing the boards on their sides, he used a dowel jig to drill ⅜-inch holes every six inches. The purpose of a dowel jig is to precisely space and center the dowel holes, which allows long boards to be matched up and joined together using ⅜-inch wood dowels.
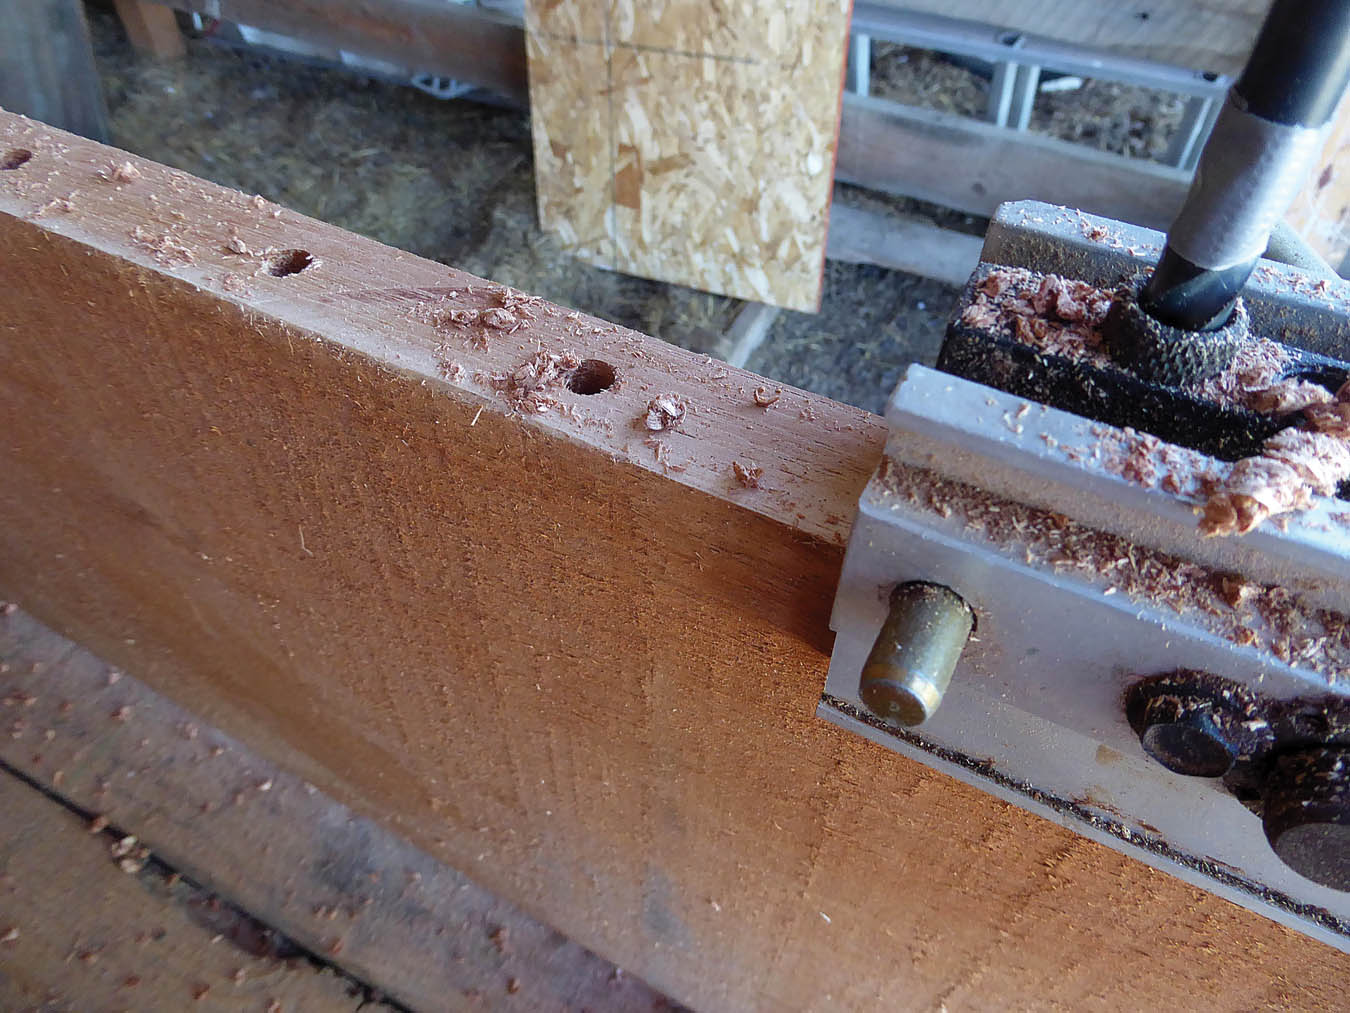
Don used a dowel jig to drill ⅜-inch holes every six inches.

He used wood glue and inserted the dowels.
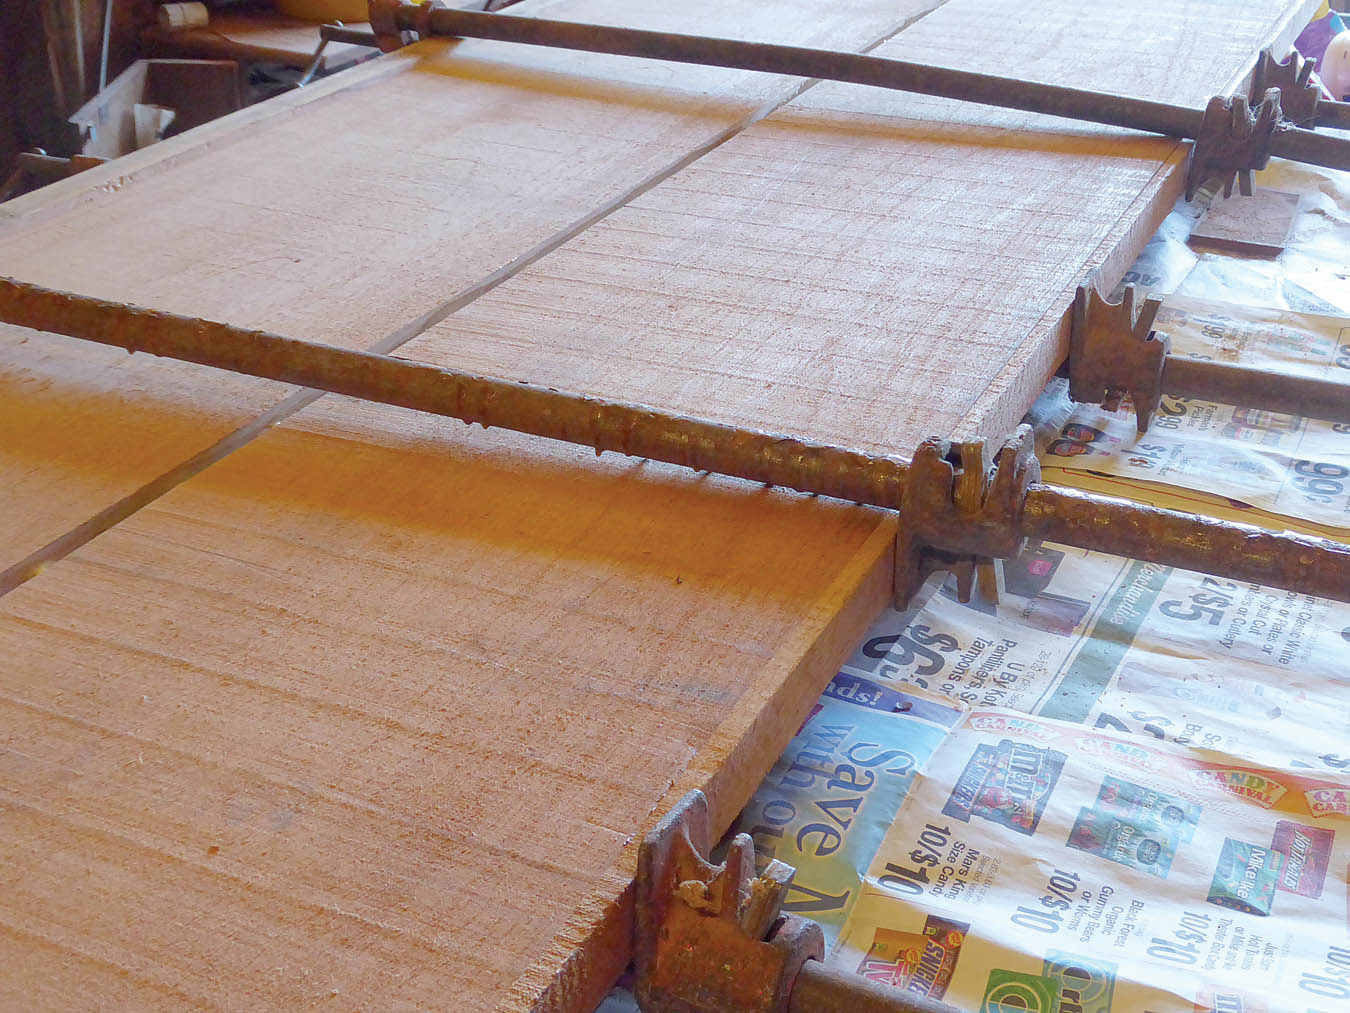
He used Titebond II wood glue in the dowel holes as well as down the length of each board. The dowels were inserted into the holes in one board and hammered down, then the two boards were joined together. Clamps kept the boards in place (overnight) until the glue dried.
He followed a similar procedure to attach a 16-inch L-shaped extension where our countertop makes a corner, again letting the boards dry overnight. Then he attached two pieces of trim to both sides of the main body of the countertop, using 2½-inch wood screws and wood plugs made to fit into the screw holes.
We bought a new sink for the occasion. A sink requires two measurements in a countertop: the actual hole where it will insert, and a lip where the edges of the sink are supported.
Don made careful measurements of both these dimensions, then made a cardboard cutout of the sink. He penciled both outlines on the countertop (the outline of the lip, and the outline of the sink hole). Using a circular saw to plunge-cut into the wood, he then used a jigsaw to finish-cut the sink hole. Before going any further, we placed the sink in the hole and lifted the countertop up to confirm it fit properly.
With the rough countertop now the correct size and shape, the finish work began.
Using a belt sander with a 60-grit belt, Don started sanding the countertop. He graduated to an 80-grit belt, then a 120-grit belt. After this, he used a palm sander with 220-grit sandpaper to make the countertop as smooth as possible.
When the sanding (which took place over two or three days) was finished, he used a shop vacuum to clean the surface of any sawdust residue. He then used a soft towel to further remove additional sanding dust. Finally, he hand-rubbed the surface to remove any remaining extremely fine wood residue.
The two halves were joined together, clamped, and left overnight to dry.
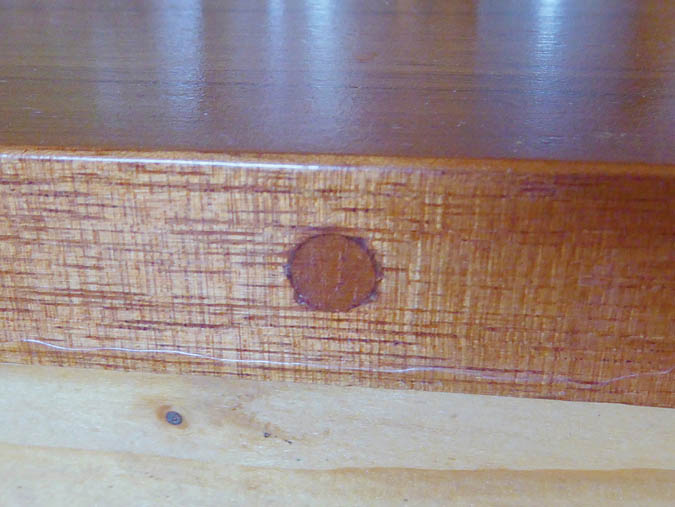
Trim was attached using screws, and the holes were covered by wood plugs.
Then it was time to start coating. He began with three coats of wood hardener. This is a liquid plastic that’s easily absorbed into the wood, then hardens. This step could be skipped with hard woods such as oak; but because he was using a relatively soft wood (Spanish cedar), it was necessary to toughen up the countertop.
Using a brush, he applied three coats of wood hardener, letting it dry about eight hours between coats. After the last coat was applied, he let the wood hardener cure for 48 hours.
As helpful and necessary as wood hardener is for toughening up soft woods, it has some drawbacks. Wood does not have a uniform density, so some parts of the wood absorbed the hardener better than other parts. As a result, the hardener left spots of clumpy and stringy residue on the wood’s surface. Very thick spots had to be scraped with a metal scraper, and the whole countertop needed to be sanded again. The residue frequently gummed up and clogged the sandpaper. (Don went through a lot of sandpaper for the palm sander during this process.)
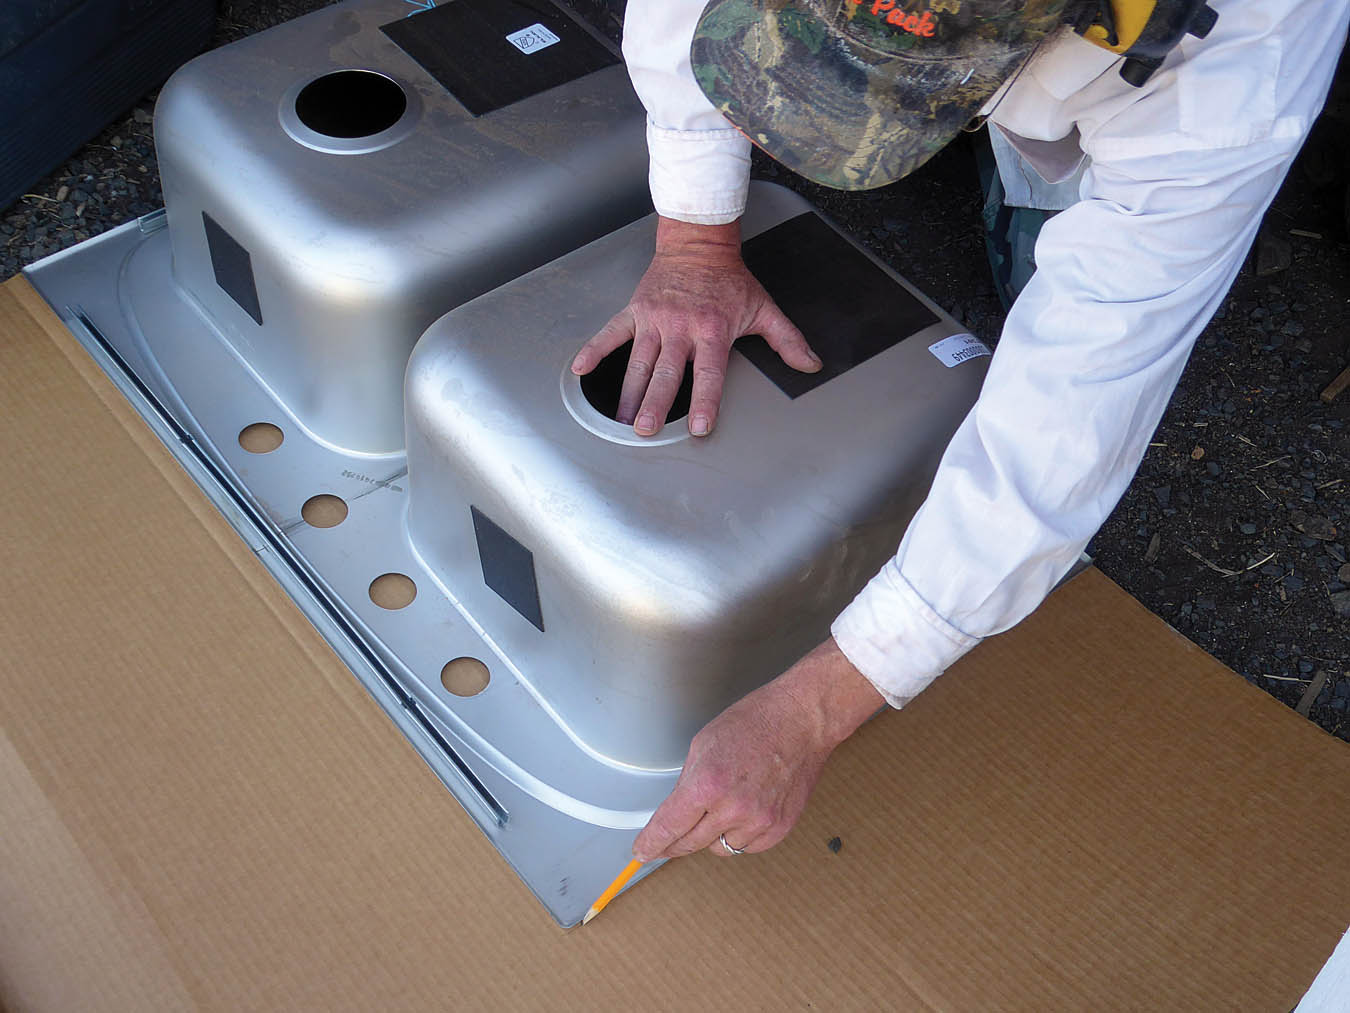
Don made a cardboard cutout of the sink.
Once the countertop was dried, scraped, and sanded, it was time to coat it with varnish. He used Minwax Helmsman indoor/outdoor spar urethane (clear gloss) applied with a spray gun, powered by a compressor. He put on nine coats of varnish, letting the countertop dry between coats. After each coat dried, we rubbed the countertop down with xxx-grade steel wool (the slight scratching this causes helps the next coat of varnish stick better and removes wood fibers that raise from the surface as a result of the varnish).
He also gave two coats of varnish to the underside of the countertop, just to seal things in. Since this didn’t have to be as smooth, he used a brush instead of a spray gun. A brush finish puts on more material for each treatment so it seals faster, but is usually not as smooth as spray coating.
After the countertop was complete, we brought it into the house and leaned it against the kitchen wall for a day or two, to let the wood adapt to the ambient house temperature.
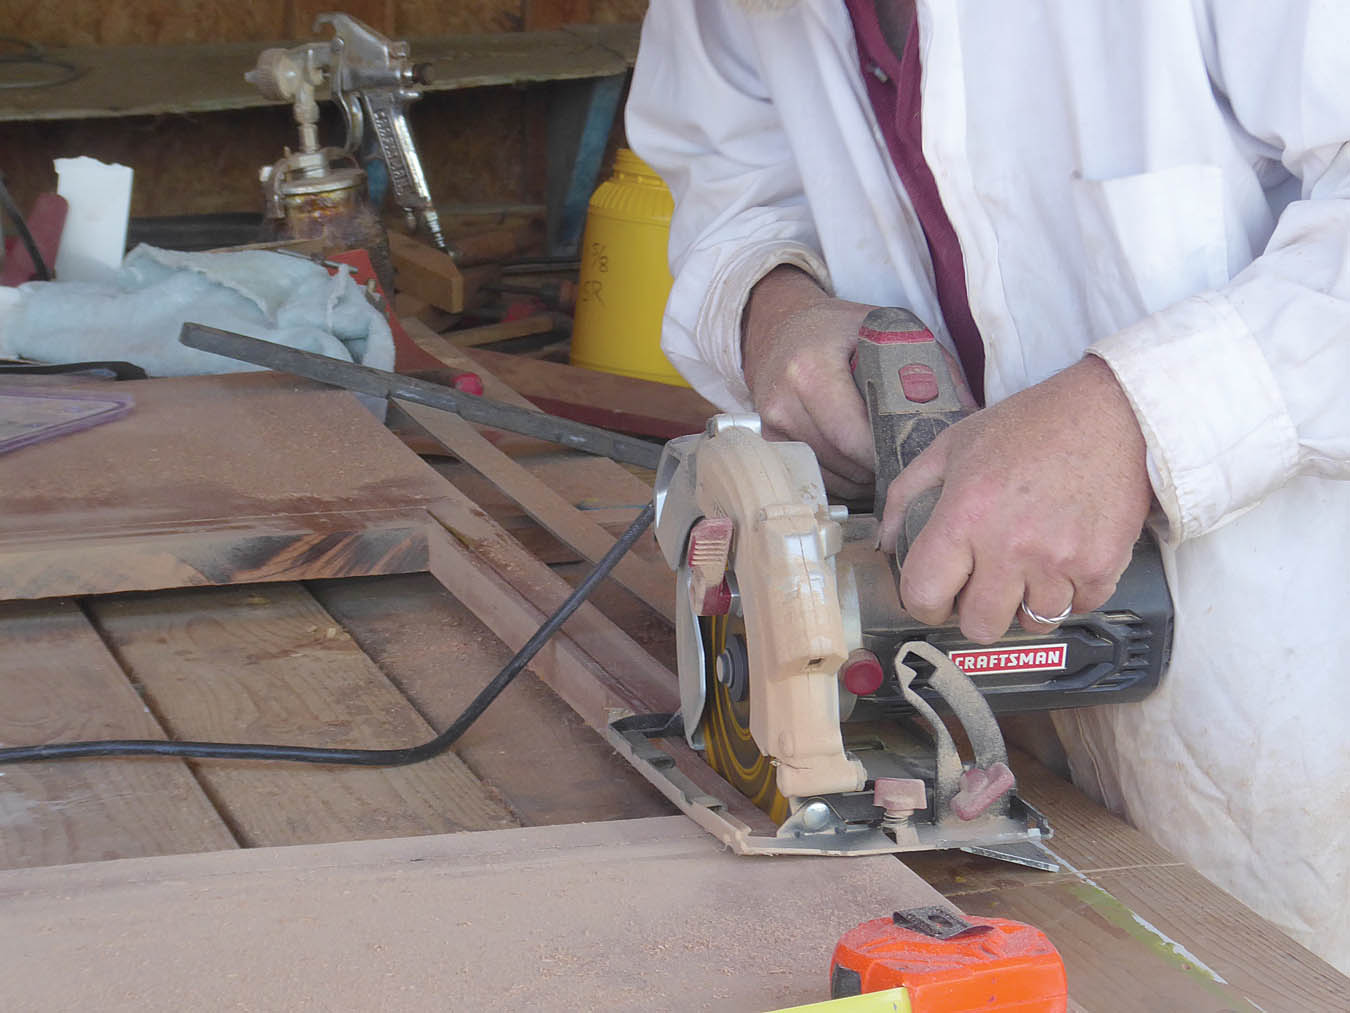
Cutting out the sink hole
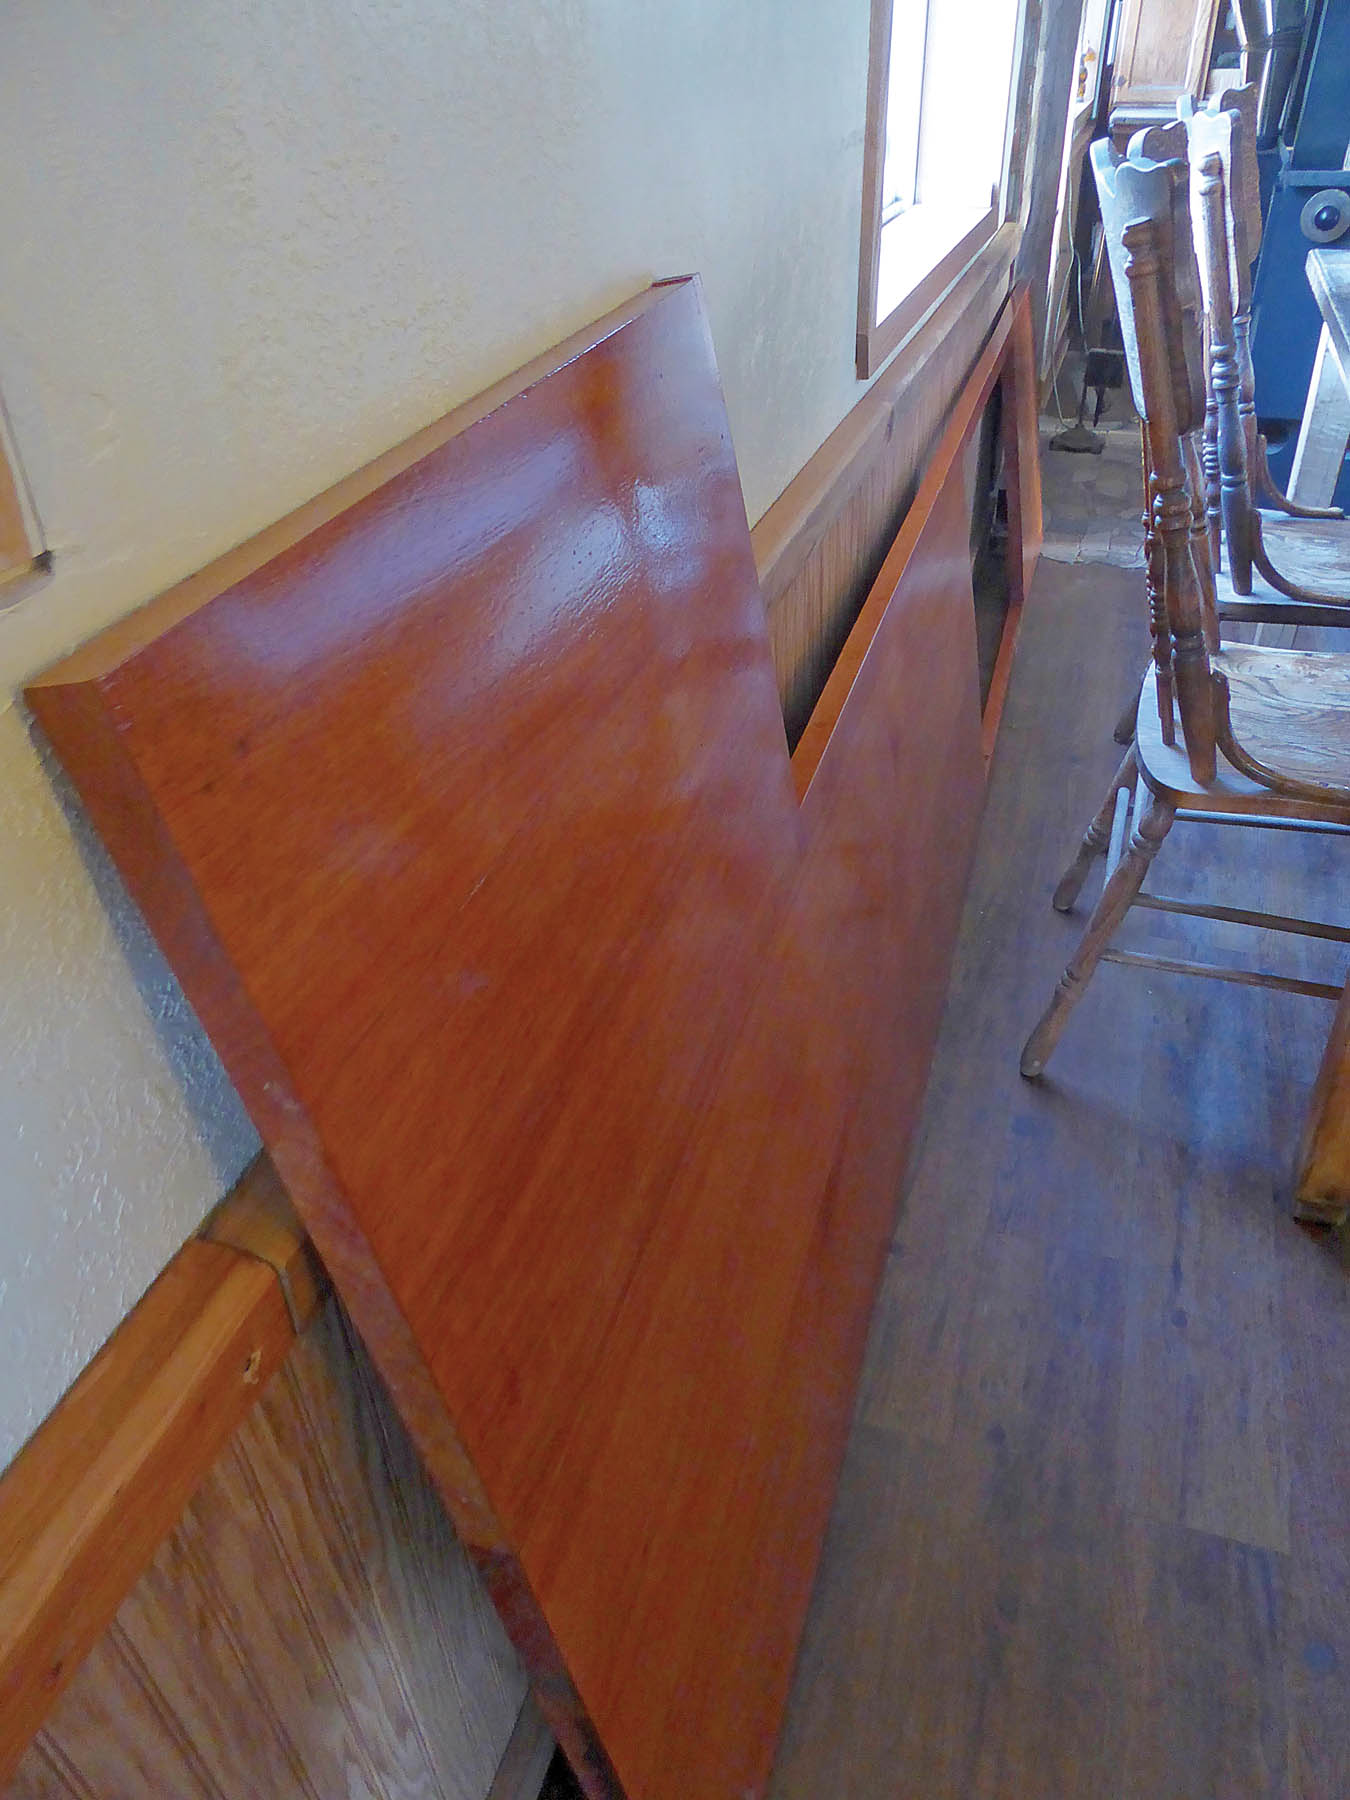
After the wood hardener and varnish were applied and dried, the countertop was placed against the kitchen wall to acclimate to our house.
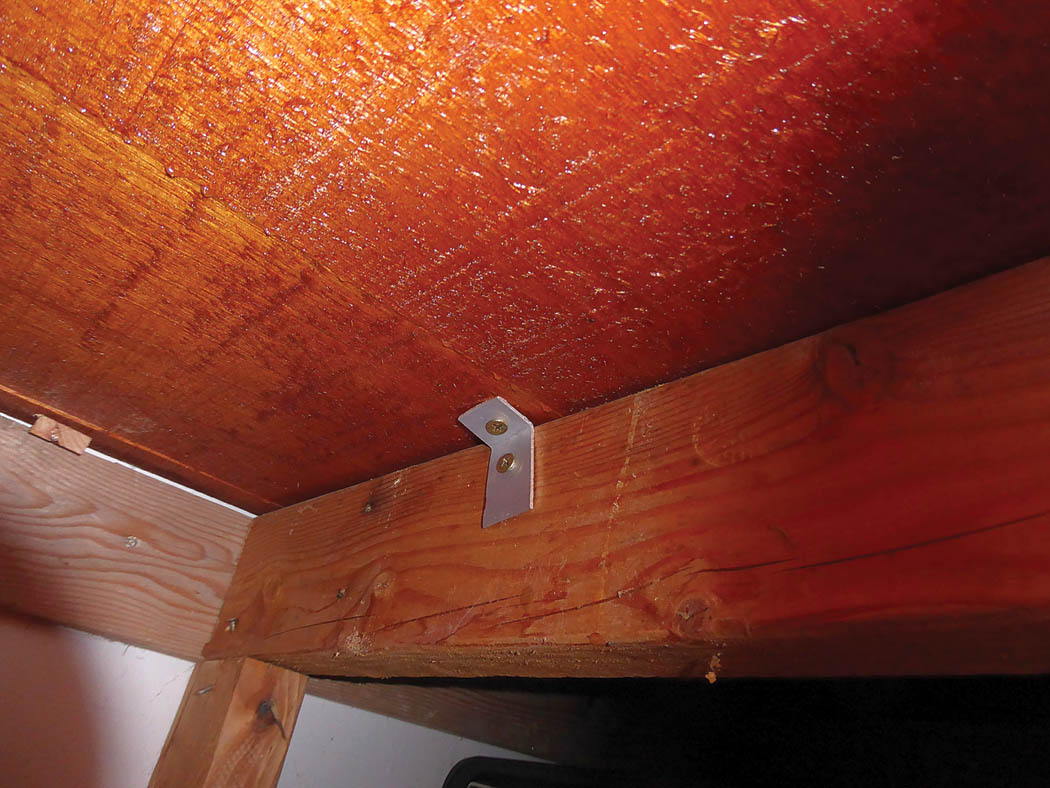
Next Don pried off the old kitchen countertop and cleaned the infrastructure (scraping where necessary, removing old unneeded screws, glue residue, old caulking etc.). Removing the old countertop exposed the ribs to which the new countertop would be fastened. Then together we lifted the new countertop unit in place, hoping it fit. Thanks to his careful and obsessive measurements, it fit perfectly.
To fasten the countertop in place, Don used L-shaped aluminum clips which screwed to the existing cabinet ribs as well as the underside of the countertop, using one-inch wood screws. Then he inserted the new sink, plumbed it in, caulked under the lip, and fastened it down to complete the project.
As beautiful as the new countertop was at this point, it was incomplete without a backsplash. Don opted to make the backsplash from half-inch oak, 4½ inches wide, to match the trim already in place throughout the rest of the kitchen.
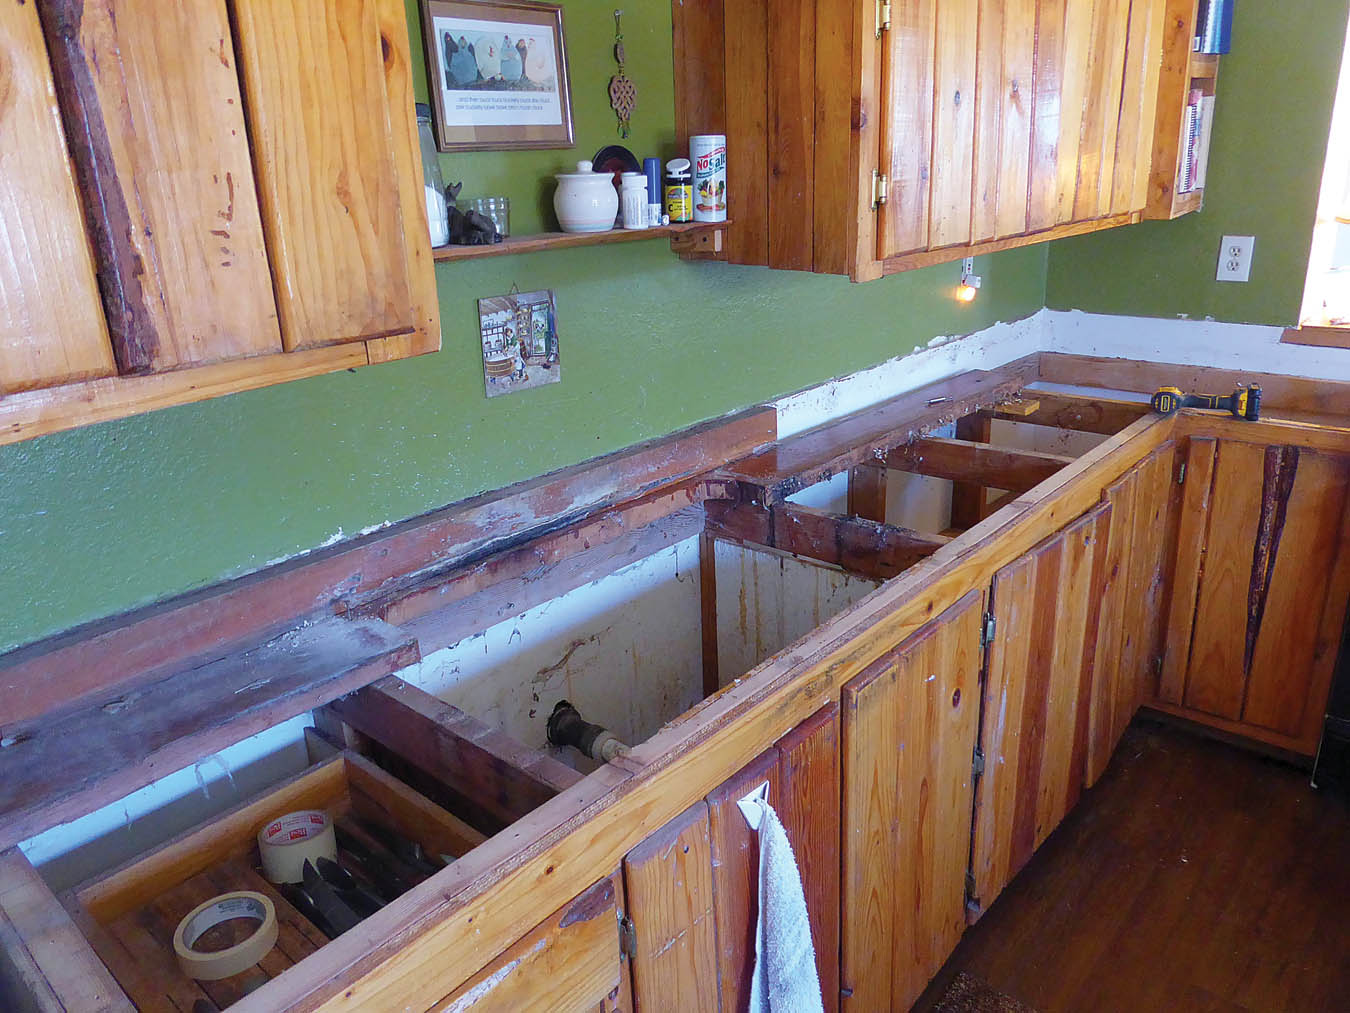
The old countertop was removed and the tops of the cabinet frames were cleaned of old glue, caulk, and debris before installing the new counter with aluminum L-shaped clips and wood screws. Finally, Don installed an oak backsplash.
Once cut to size, he applied five coats of varnish (no need to use a hardener) to the oak backsplash on the side facing out. When the backsplash was ready to install, he applied adhesive caulk on the side facing the wall and used a nail gun powered by the air compressor to fasten the backsplash in place.
To seal and waterproof the joint between the countertop and the backsplash, he used a line of dark brown latex caulk. He removed the excess latex caulk by dipping his finger in rubbing alcohol and wiping away the extra. He also used a cloth dipped in rubbing alcohol to remove any smears left on the wood.
After the entire countertop and backsplash were in place, I touched up some wall paint chipped by the removal of the old back splashes and the kitchen was complete. The result is a stunning new countertop.
It’s important to remember this countertop is made of wood. Wood is much softer than granite or Formica. No matter how many coats of hardener and varnish you add, it will get some scratches and nicks from daily wear and tear. Over the years, the counter will become scarred and scratched by heavy abuse. If imperfections like this drive you crazy, then do not build a wood countertop.
But for us, the occasional nick and scar is fine. We love the warmth of wood, and prefer the dignified patina of antiques over the slick perfection of granite or Formica. Our wooden countertop is sturdy, practical, and — in this day and age of cookie-cutter sameness — uniquely beautiful.
Materials list:
- 27 board feet of wood (three boards, 11 ft. long, 1 foot wide, Spanish cedar in our case)
- ⅜-inch dowels
- Clamps
- Aluminum angle clips (for fastening the completed countertop to the cabinet)
- Dowel jig
- Titebond 2 wood glue
- 1-inch wood screws
- 2½ -inch wood screws
- 2 pints Minwax wood hardener
- 1 quart Minwax indoor/outdoor high-gloss spar urethane varnish
- Drill-press mounted wood plug cutter
- Bandsaw
- Shop vacuum
- Spray gun
- Nail gun
- Air compressor
- Circular saw w/fine-tooth panel blade
- Belt sander (with 60, 80, and 120-grit sanding belts)
- Palm sander (with 220 grit sandpaper)
- Assorted paint brushes


look into WaterLox..good product that absorbs into wood,food grade. Doesnt separate like polyurethane..can reapply straight on top. It has been good to may wood counters 10+yr